The early release of Papers 3 got a bad rap, and rightly so. My negative experience began as I imported my Papers 2 library into Papers 3. I had about 2500 papers, but only a fraction of these PDFs were imported properly. I am still recovering from these import problems--having to add each missing PDF by hand. Although importing was a issue early on, The makers of Papers, MekentosJ, now part of Springer Science+Business Media, worked hard to fix problems. I assume, with all the work on Papers, that importing has been fixed. My advice? Back-up your data before trying to import to Papers 3!
Although I had early problems, I can tell you that Papers 3 is pretty robust now. I recently used it to write and submit a full grant. I’ll say the app should be strongly considered if you’re looking for a reference manager / bibliography builder. If you’re interested in some of the changes in Papers 3, check out this entry.
With the release of Papers 3, all files and PDFs are bundled into a single container. Bundling makes syncing across computers more reliable, but indexing of individual files much more difficult. Unfortunatly, my Papers 2 workflow was dependent on indexing of single files. And thus, with the release of Papers 3, I had to revamp my writing workflow. That’s what I’m going to cover in this entry.
My current workflow has three parts: 1.organizing, 2. creating, and 3. writing/formatting
The software I use includes:
Papers3
DropBox
Hazel
Skim
Keyboard Maestro
Ulysses
Devonthink
Tinderbox
OmniOutliner
Scrivener
Pages or Word
Part 1: Organizing
Papers 3
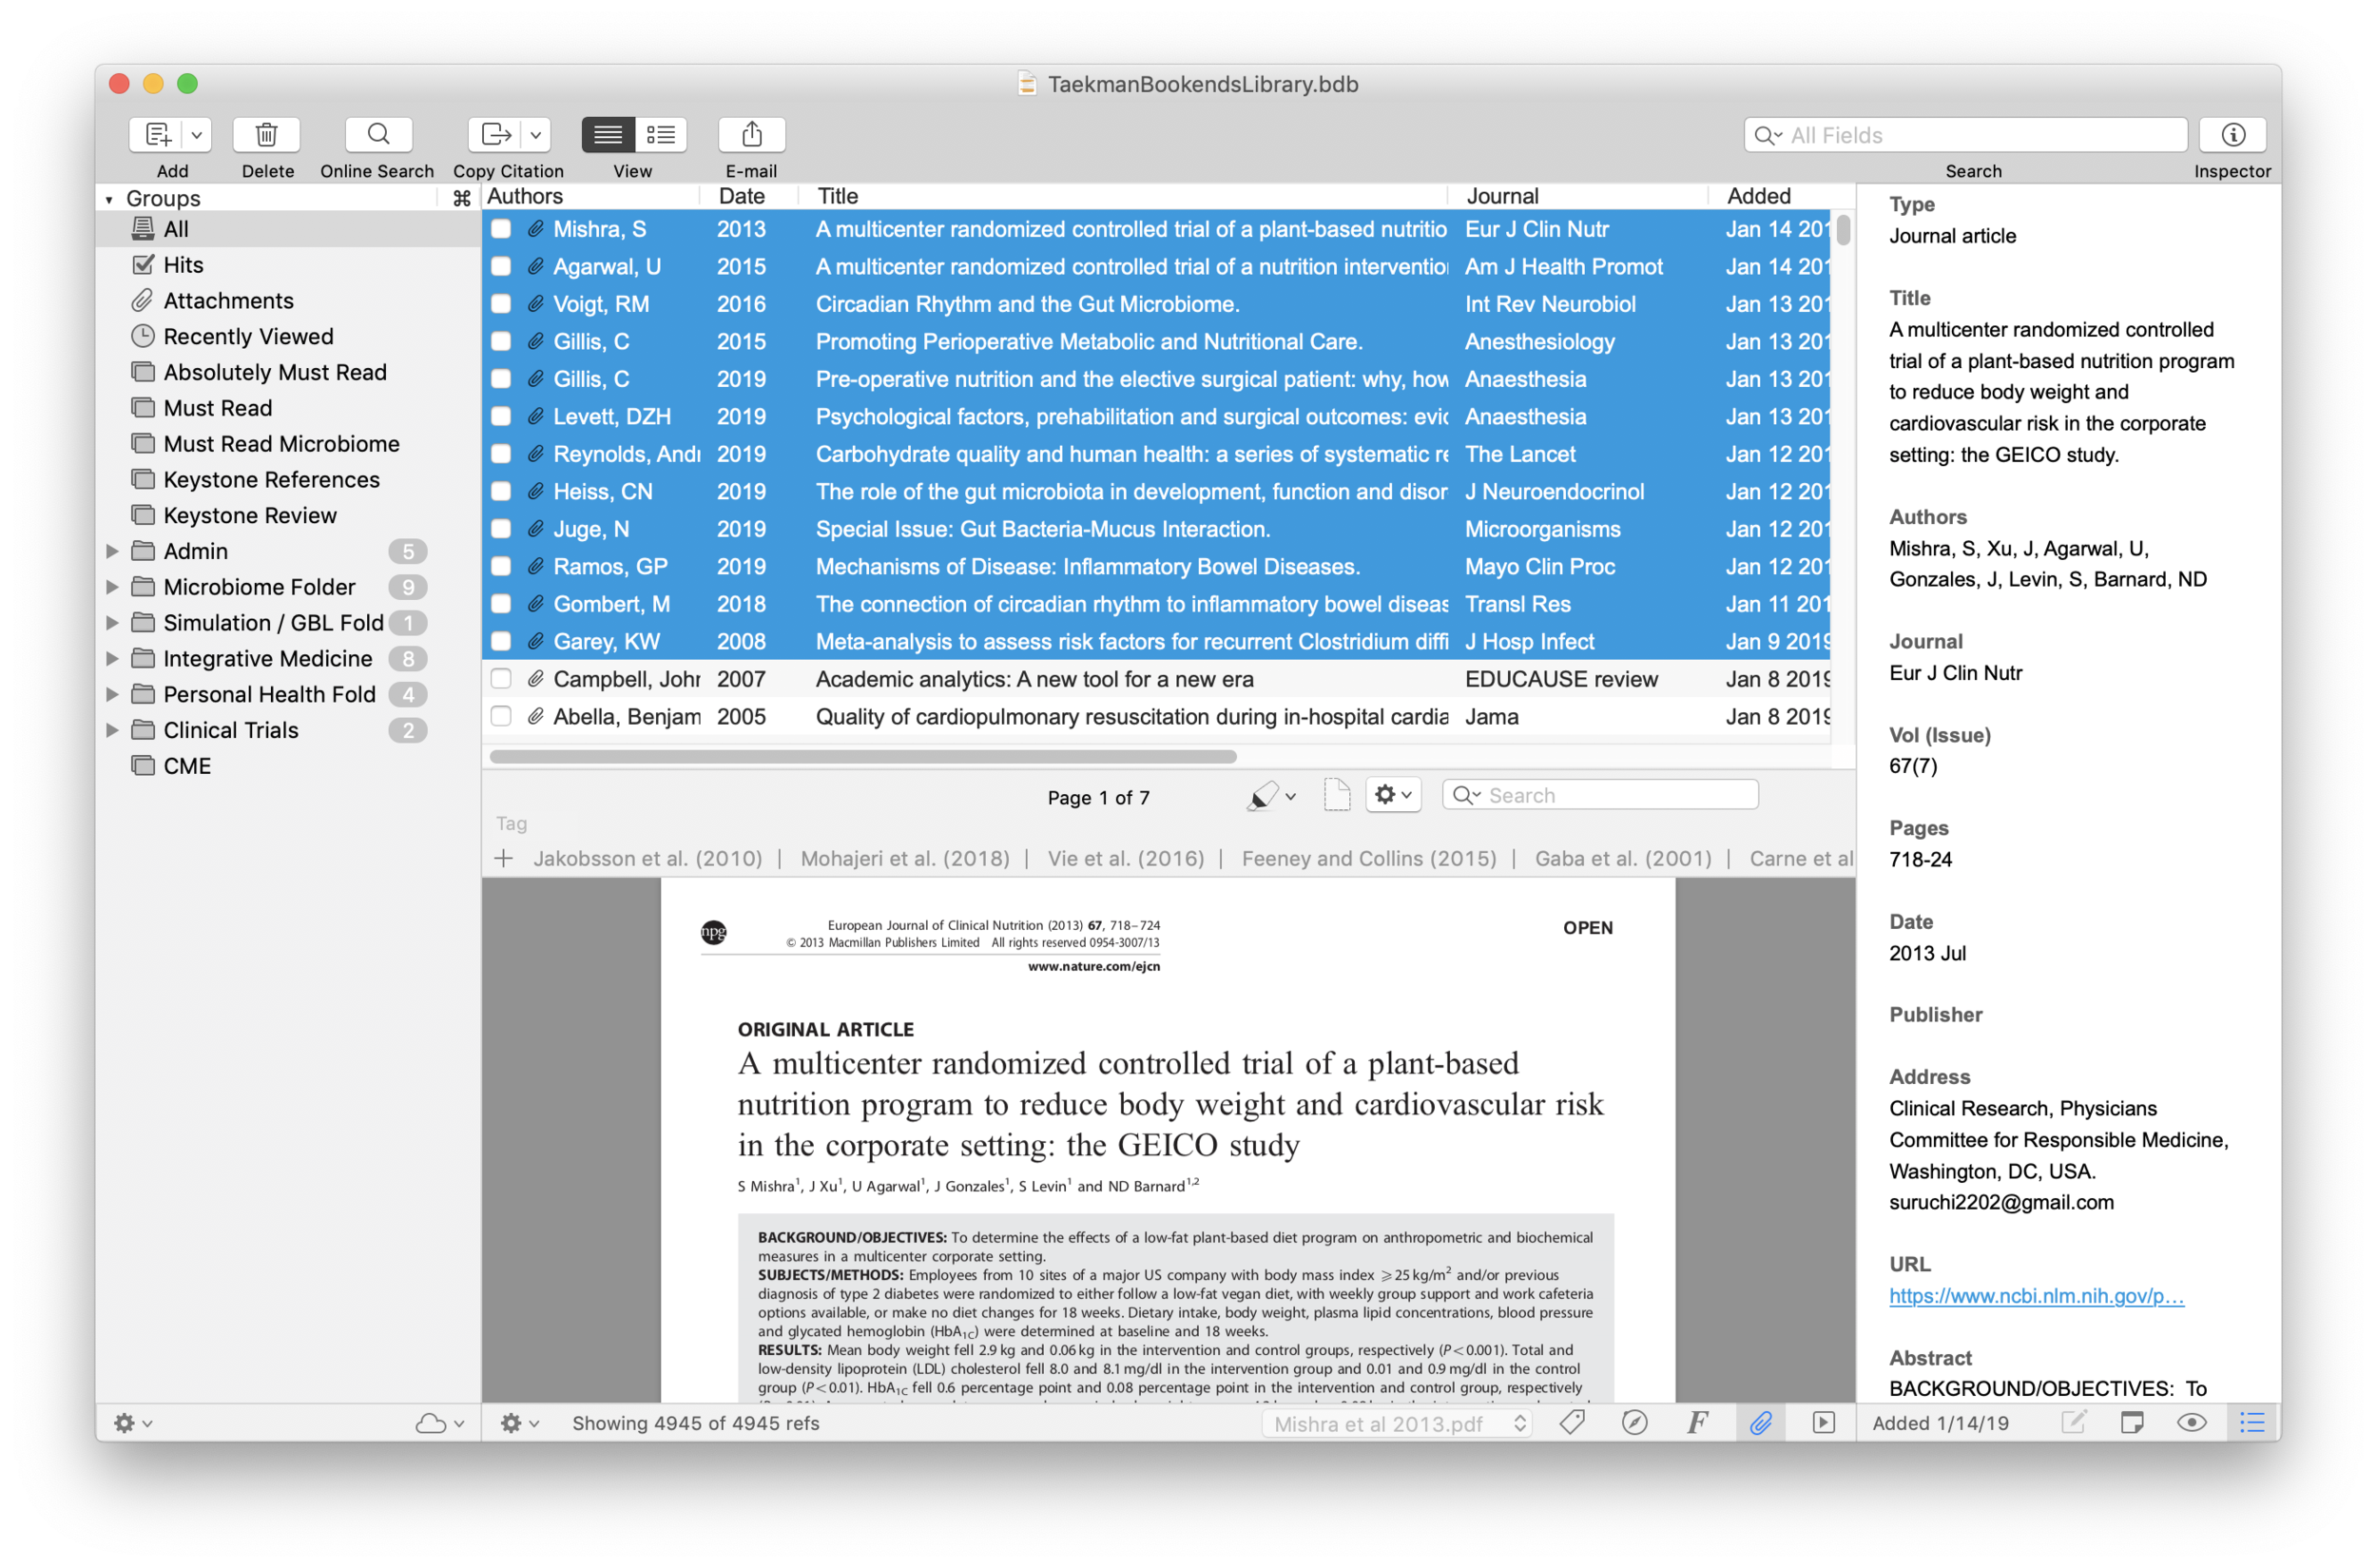
Papers is used as my storehouse for all academic literature. I use Keywords and Smart Folders (akin to Smart Playlists in iTunes) to keep my literature sorted. In addition to the topic of each manuscript or book chapter, I use keywords such as "MustRead" that fuel my prioritized reading list. I tend to keep my library sorted by the date in the main window, but can easily search or sort my library in numerous other ways. My library is synchronized using Dropbox.
KeyBoard Maestro
Most people, while reading academic literature, find additional manuscripts they’d like to download. I’ve developed a series of KeyBoard Maestro scripts that simplify the download of these additional articles from Duke’s Library, Pubmed, and Google Scholar. As I’m reading a manuscript, I highlight the article I want to download and invoke my KM script. The macro copies the text string I’ve highlighted, goes to the appropriate web page (e.g. Duke’s Library), pastes the search string into the appropriate box, and hits submit. Thus with two keystrokes, I can find and download new PDFs I’d like to read. The new PDFs are sent to my “Downloads” folder. Then Hazel takes over.
Hazel
Hazel is a program that watches folders on my computer. When a file matches defined criteria, Hazel performs a script. I have a Hazel script watch for PDFs that contain the word “Reference.” When Hazel sees a file that matches, it launches Papers and imports the file into my library.
Skim
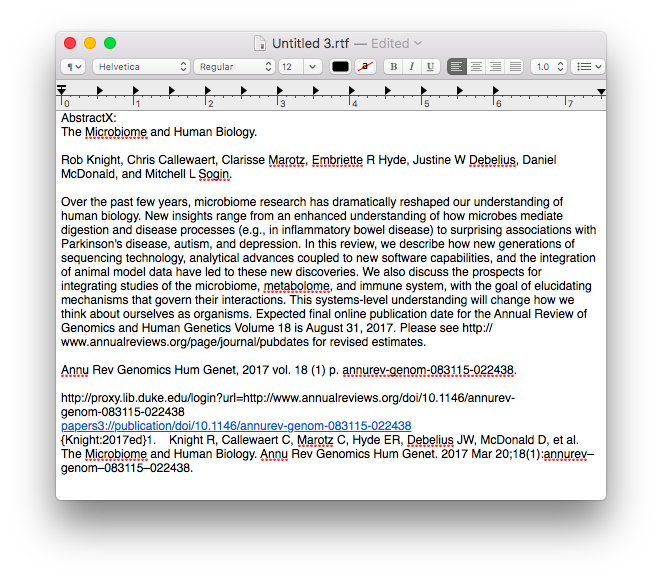
Despite the pleasing new main interface, Papers 3 highlighting leaves much to be desired. For reading and annotating scientific literature I use Skim (Skim can designated as the primary PDF reader in the Papers Prefernce menu). Skim has a robust feature set and is customized for academic literature. Oh, and it’s free! When I’m done reading and annotating, I export the Skim annotations to a PlainText file. I then use a KM script to name the the Skim Notes file to my convention.
Using another KM script, I parse the single notes file into separate text files (one for each highlight or annotation). Each file is named to convention and contains the text I highlighted in the manuscript, my own comments, and the full reference. All the individual notes are aggragated into a folder. I move this folder from my Desktop to the cloud so I can access it from anywhere. I call this my Literature Comments Folder. Now I move to Ulysses.
Ulysses
Ulysses is able to read files anywhere on my computer. I’ve configured Ulysses to point to my Literature Comments Folder so all my comments are available in an organized fashion. At this point I can add additional comments to my individual highlight files. The next step is to index the files in Devonthink.
Devonthink
Finally, I open Devonthink. This workflow has matured from what I discussed in this entry. I have a database that is solely used to index my scholarly reading. From the File Menu, I update the index (NOT import) of my Literature Comments Folder. Indexing this folder allows me to take advantage of the “Artificial Intelligence” of Devonthink, finding relevant information throughout my reading.
Part 2: Creating
Tinderbox
At this point I’m ready to start developing my scholarly work. I use Tinderbox (in Outline View) to generate a high-level preliminary outline. Tinderbox is a power-user’s application. I’ve only scratched the surface of its capabilities, but find it extremely useful early on to organize thoughts and find connections between what I’ve read and what I hope to write.
From within Devonthink, I review each of my comments. If I find something I want to include, I drag and drop the file (comment, reference, and highlighted text) into Tinderbox. Then, using Devonthink’s “See Also & Classify” command, I see related notes in my Literature Comments Folder . I drag and drop the additional comments into Tinderbox too. As I think of new ideas, it’s not uncommon for me to conduct a freeform search from within Devonthink to see which comments bubble to the top.
Once I have several dozen comments in Tinderbox, I find myself entertaining new thoughts, and often adjusting (or add to) my outline.
Another way I approach the creative process is to surf through interesting comments and move them one by one into Tinderbox without organizing them (usually in the Map View). Once I have a few dozen of these interesting quotes and highlights, I start to see connections between them, letting me further refine and organize my thoughts (and begin to develop and outline).
Once I’m satisfied with my outline, I’ll sometimes export to OmniOutliner for additional organization. But most times, I’ll export my outline directly from Tinderbox to Scrivener.
Part 3: Writing and Formatting
Scrivener
Scrivener is the place where the early versions of my manuscript are built. Scrivener imports OPML files from Tinderbox or OmniOutliner—each bullet of the outline gets its own content field. I do the majority of my early writing in Scrivener, attacking whatever section I feel like writing at the time. I use the Magic Citations of Papers 3 to insert my references as I write. Once I get words down on the screen, I often find myself tweaking the outline in Scrivener. This early phase, when I’m writing on the go, is when I yearn for the iPad version of Scrivener. Until that’s available, I’ll continue to use Scrivener’s synchronization with SimpleNote when I plan to write on my iPad.
When I’ve completed all the sections in my Scrivener outline, I’ll export everything I’ve written to Ulysses. I use Ulysses to edit and rewrite (in Markdown) until I think the work is ready for submission. As I’m importing and editing my paper in Ulysses, I make sure to have the document type set to Markdown (not MarkdownXL). MarkdownXL uses the curly brackets as an internal mark for annotations. If I use MarkdownXL in Ulysses, all of my Papers citations are formatted as footnotes—very annoying.
Word or Pages
I write and edit for several rounds in Ulysses. Ulysses for iPad makes this process more seamless and enjoyable. Unfortunately, when I’m done writing, I cannot format my bibliography in Ulysses. I have to export my file to Word or Pages. That’s okay though, I still have to format my paper. I use an old version of Pages (the new version of Pages still doesn’t allow bibliography formatting). Microsoft Word also works. To do this, I highlight all my text and from the Ulysses Edit Menu I select Copy as RTF (Word), then paste it in the word processing application. After my bibliography is formatted, I format the rest of the paper.
Finally, as the final check of my writing, I use a KM script to read back the text to me. I often find errors, even in this late phase of writing. Finally, I double check everything conforms to required format of the journal (or funding agency) and hit submit.
And there you have it: my writing workflow. As with most of my workflows it is continuously subject to improvement. For the time being this workflow has streamlined my writing. I hope it works for you too.


 Once the information is assembled in Textedit, the whole note is copied to Tinderbox.
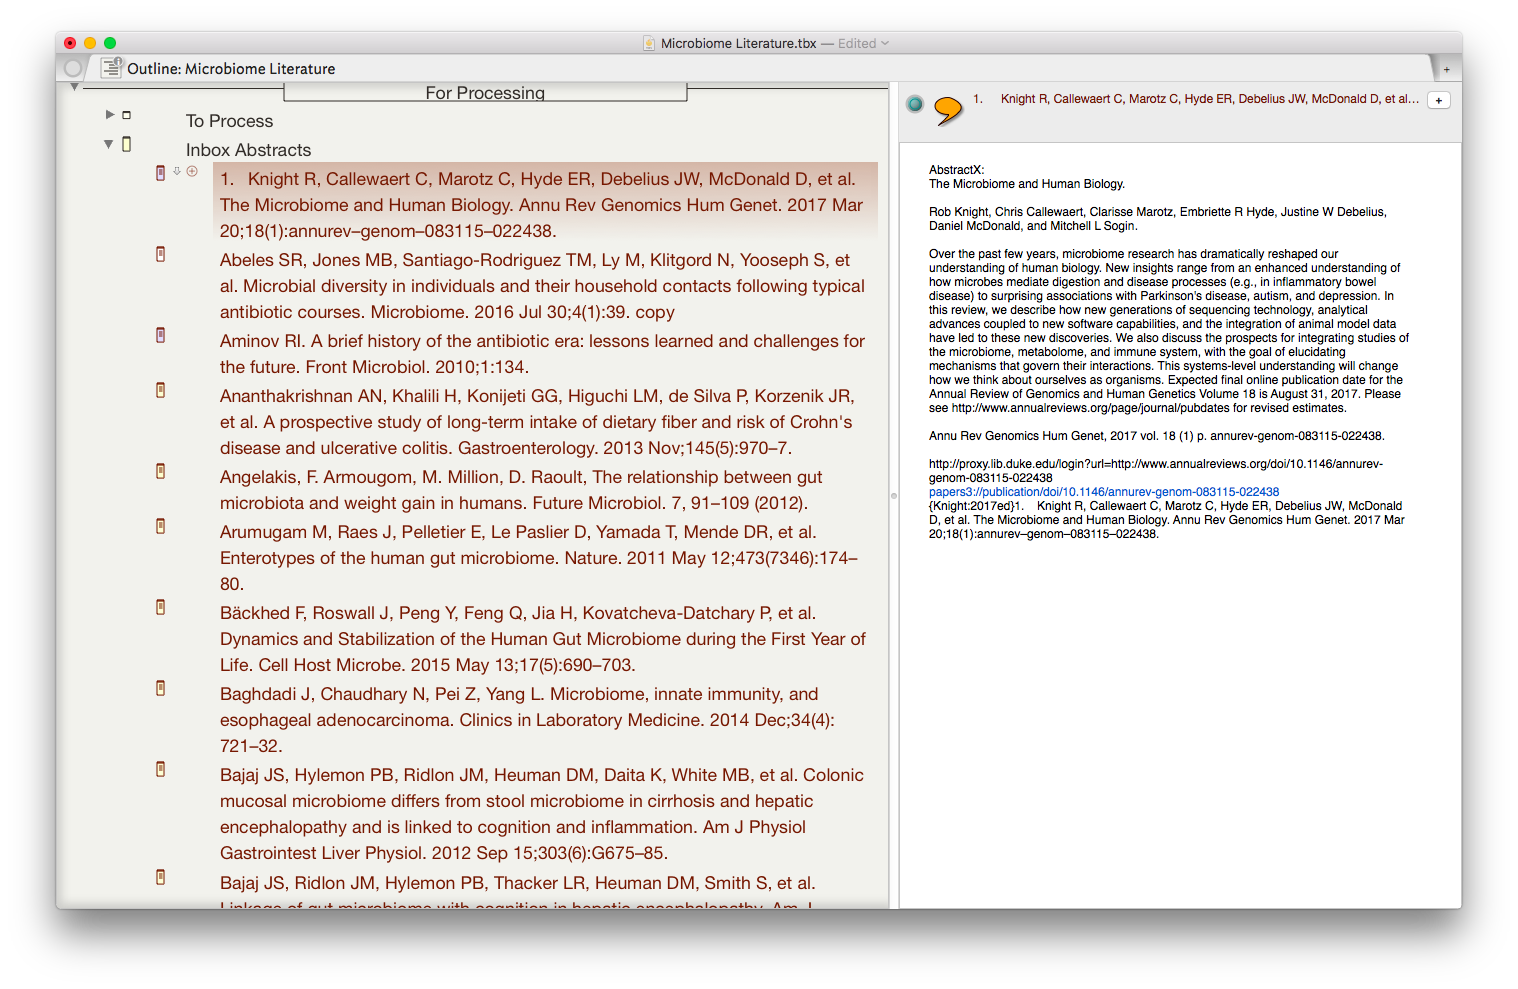 I then put together an assortment of agents that search across the entirety of the imported information and aggregate information similar information under a single heading.
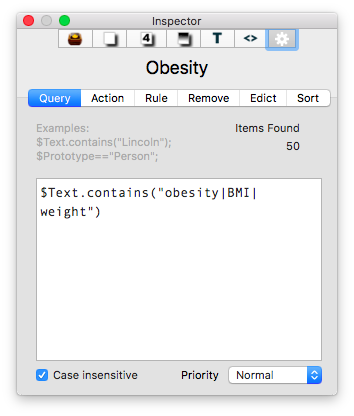
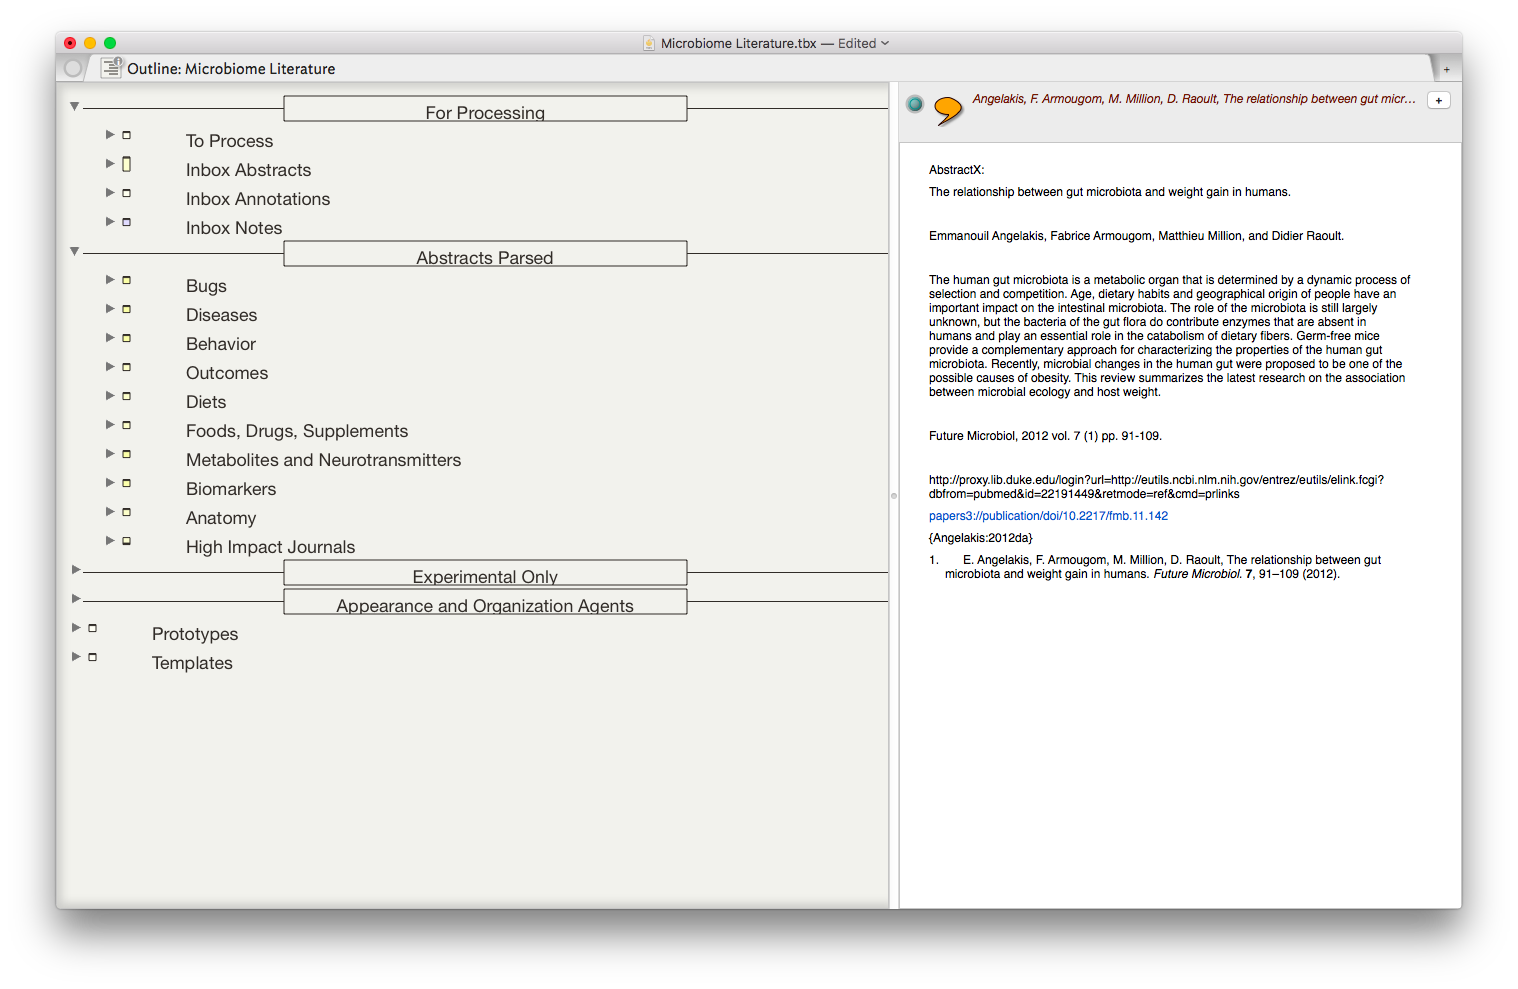 The result is the ability to rapidly find related Information, in an organized fashion, on virtually any topic I’ve read. As I digest new information, I add the abstract and metadata to my Tinderbox Inbox and the agents do the rest—duplicating the abstract into the relevent topics throughout my outline.
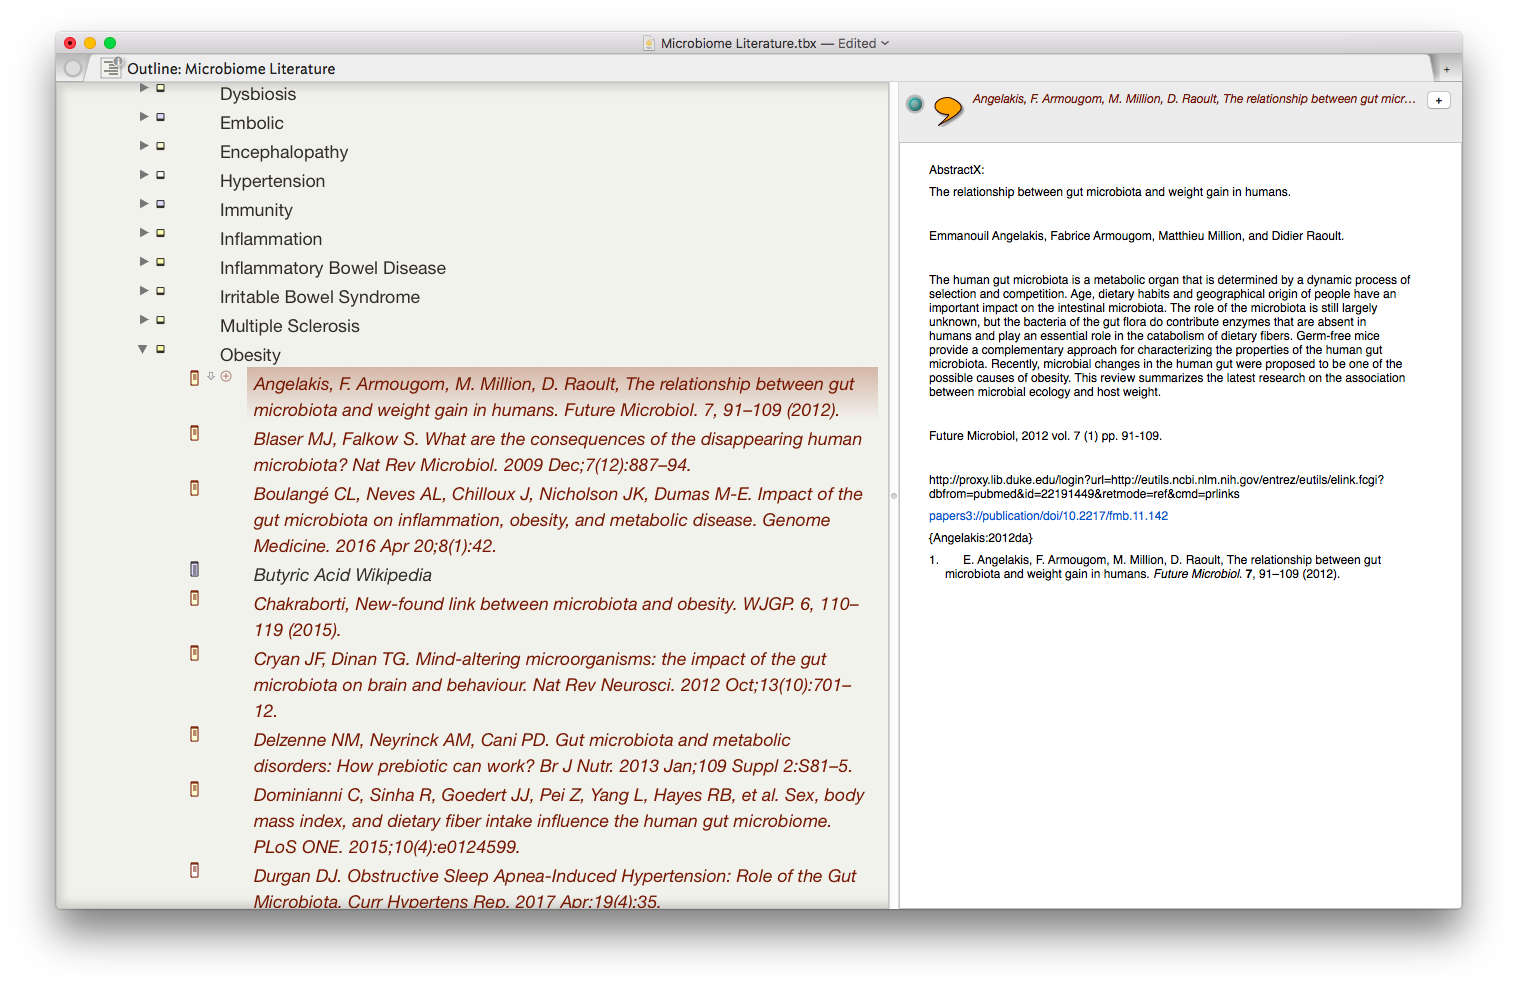 I have been using the collection of abstracts as the starting place for writing manuscripts and grants. Tinderbox can export Individual items, or the entire document outline as OPML—making it easy to import into
 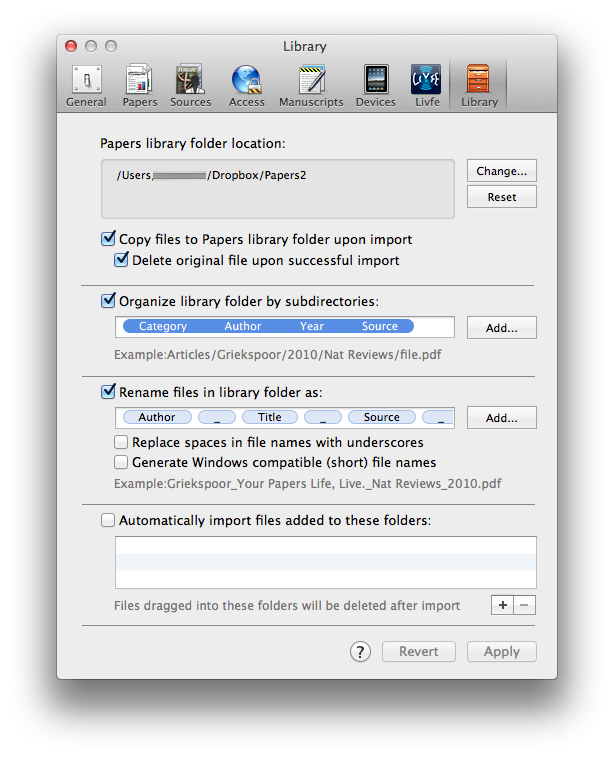 Within the Papers preferences, I’ve configured Papers to launch a PDF in a new tab (using Papers itself, NOT an external PDF reader).
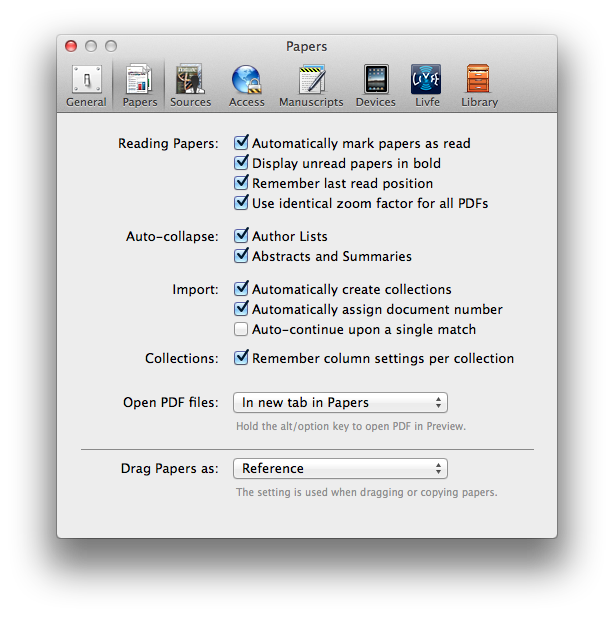
 If I find a paper I’d like to read that’s not in my library I copy and paste the title and author to my
  A limitation of Papers is that it can’t export each note or highlight separately–it dumps all my annotations into a single file. I open the file and cut and paste each individual note (that represents a single highlight) into its own file. I then comment on the highlighted passage. Finally, I use the “Magic Manuscript” feature of Papers (invoked by hitting my Option Key twice) to append the citation reference to each statement.
 Finally, I drag each RTF into to the “Supplemental Files” tab of the Papers. This saves each comment in a supplemental folder residing side-by-side with the manuscript in the Papers Dropbox hierarchy.
 The next step of the workflow uses the “Indexing” feature of
  This all sounds complicated, but trust me, it’s worth it. What this allows me to do is open Devonthink and find any statement, concept, or related item quickly. I can then cherry pick comments related to my search and paste them into a draft document with little modification.When I’m writing, I take all related concepts and paste all of them into a single card in