LiquidText PDF Reader

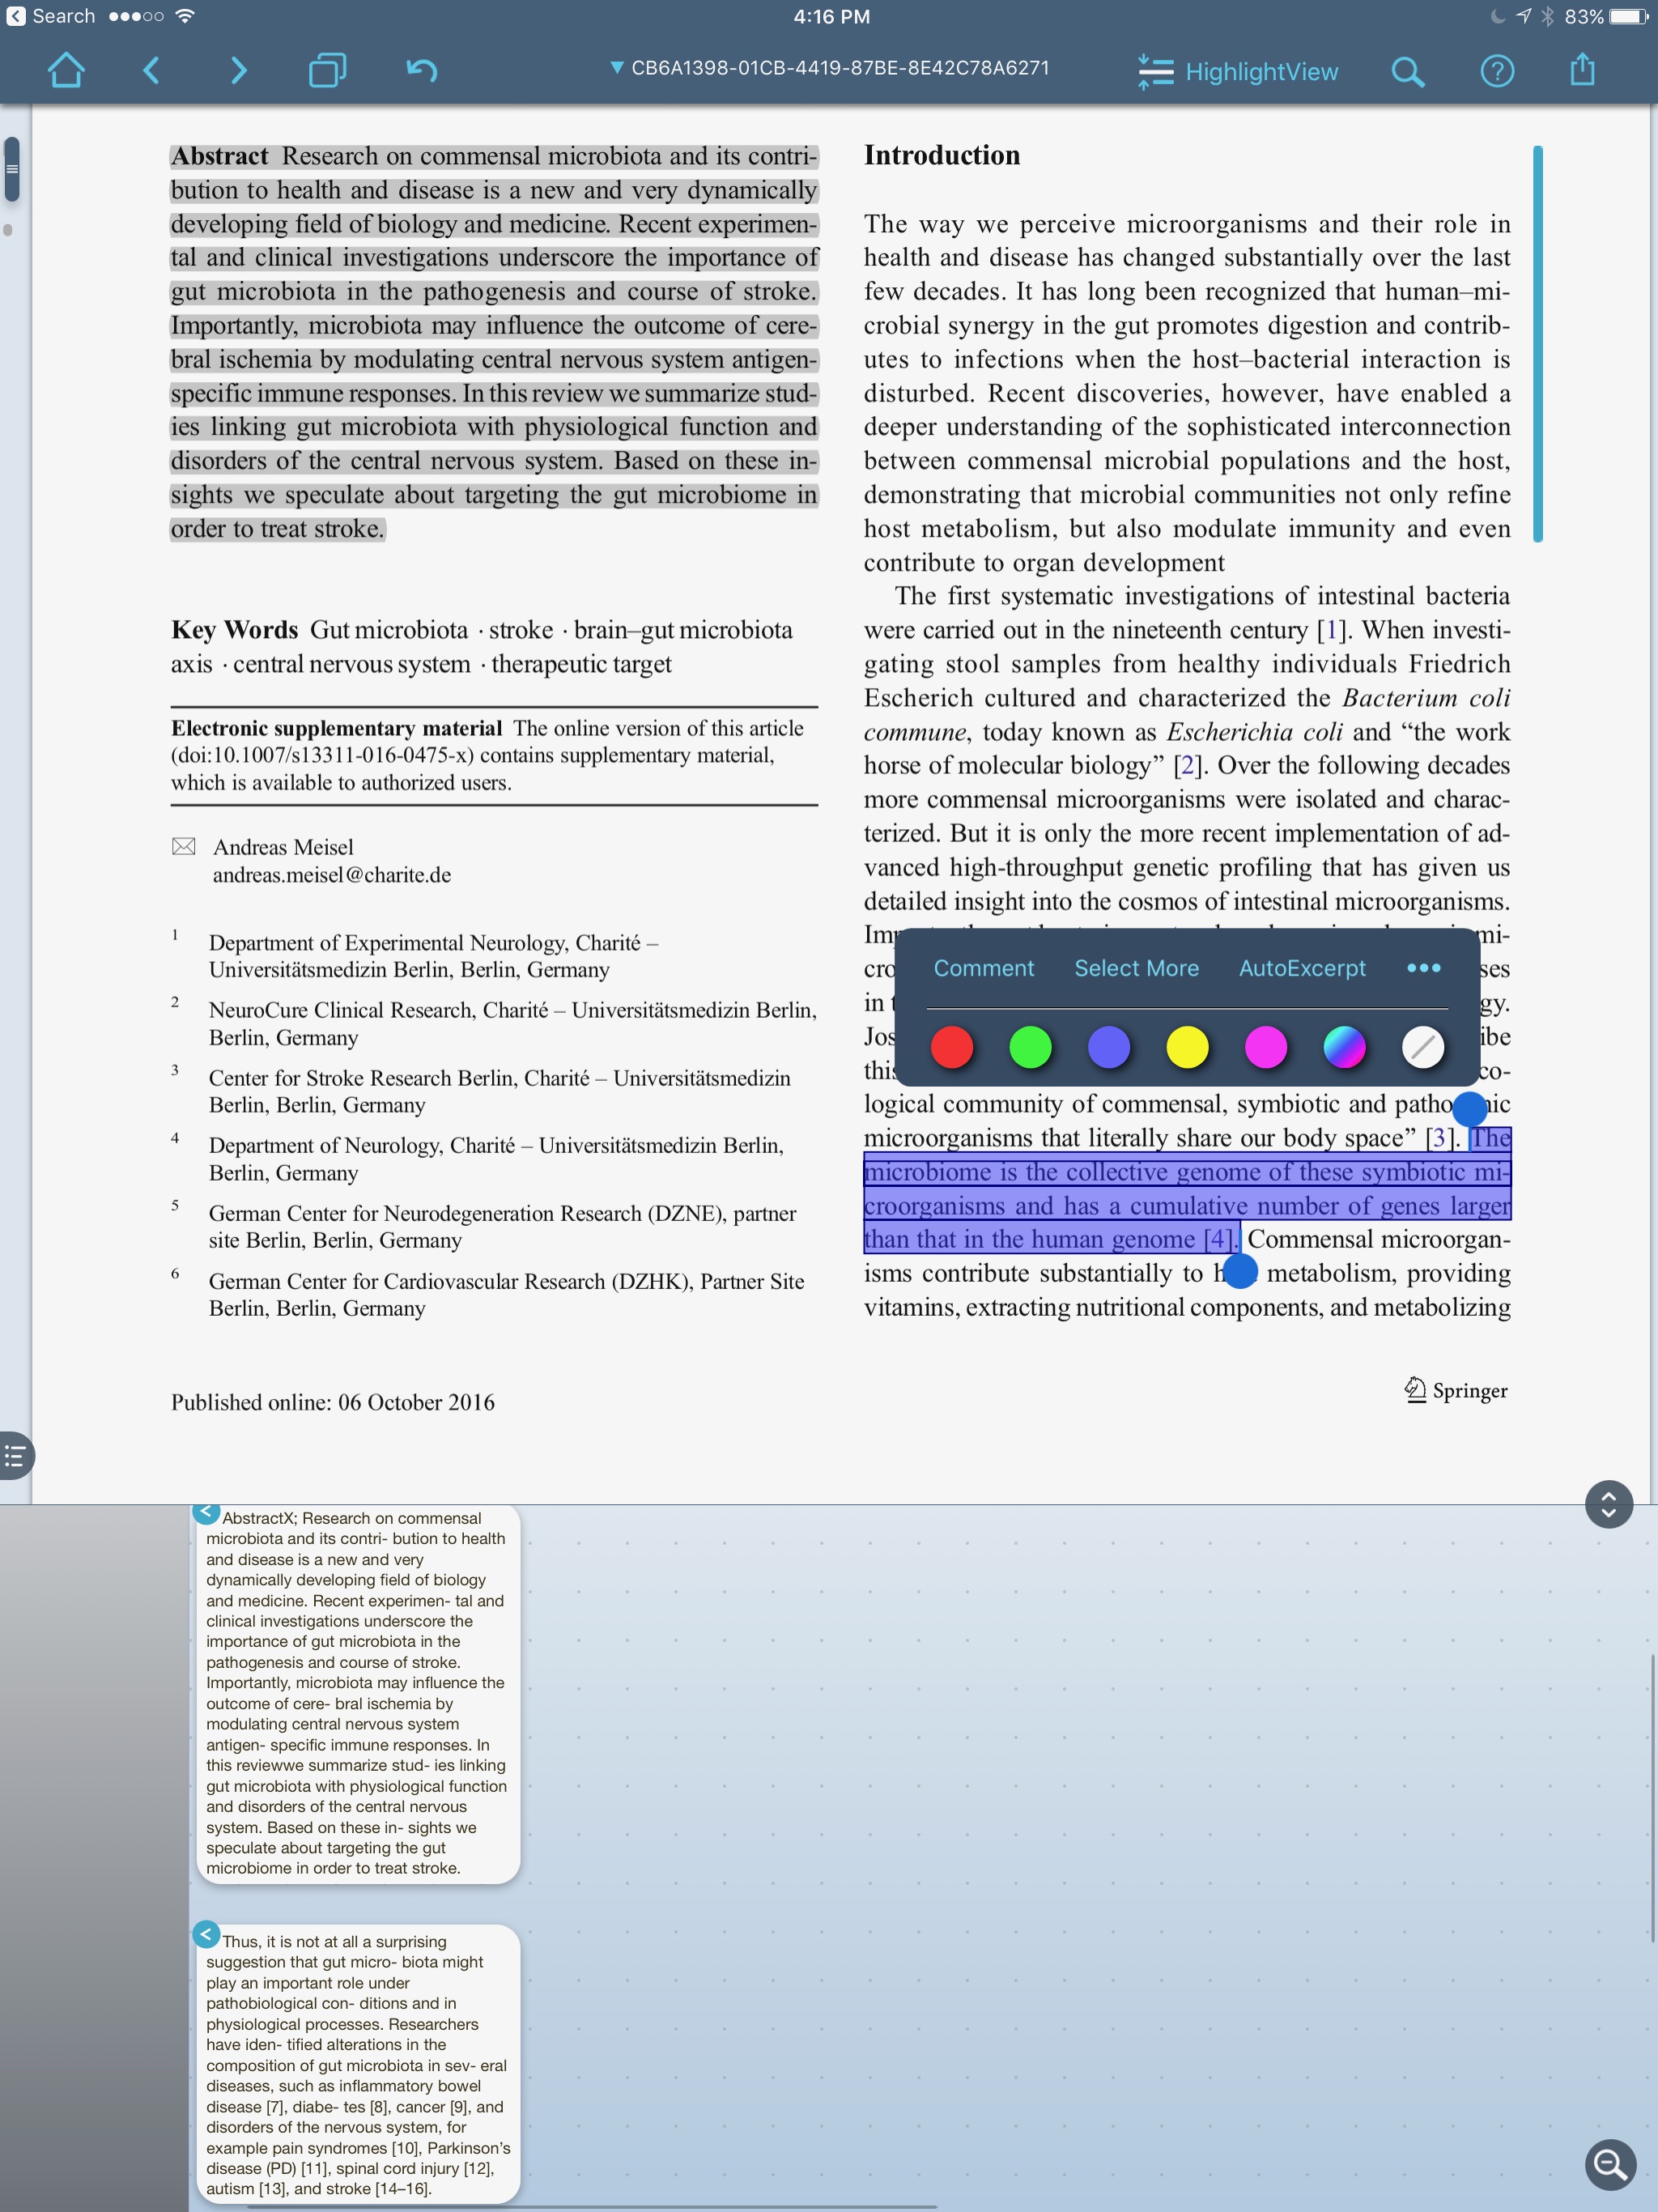
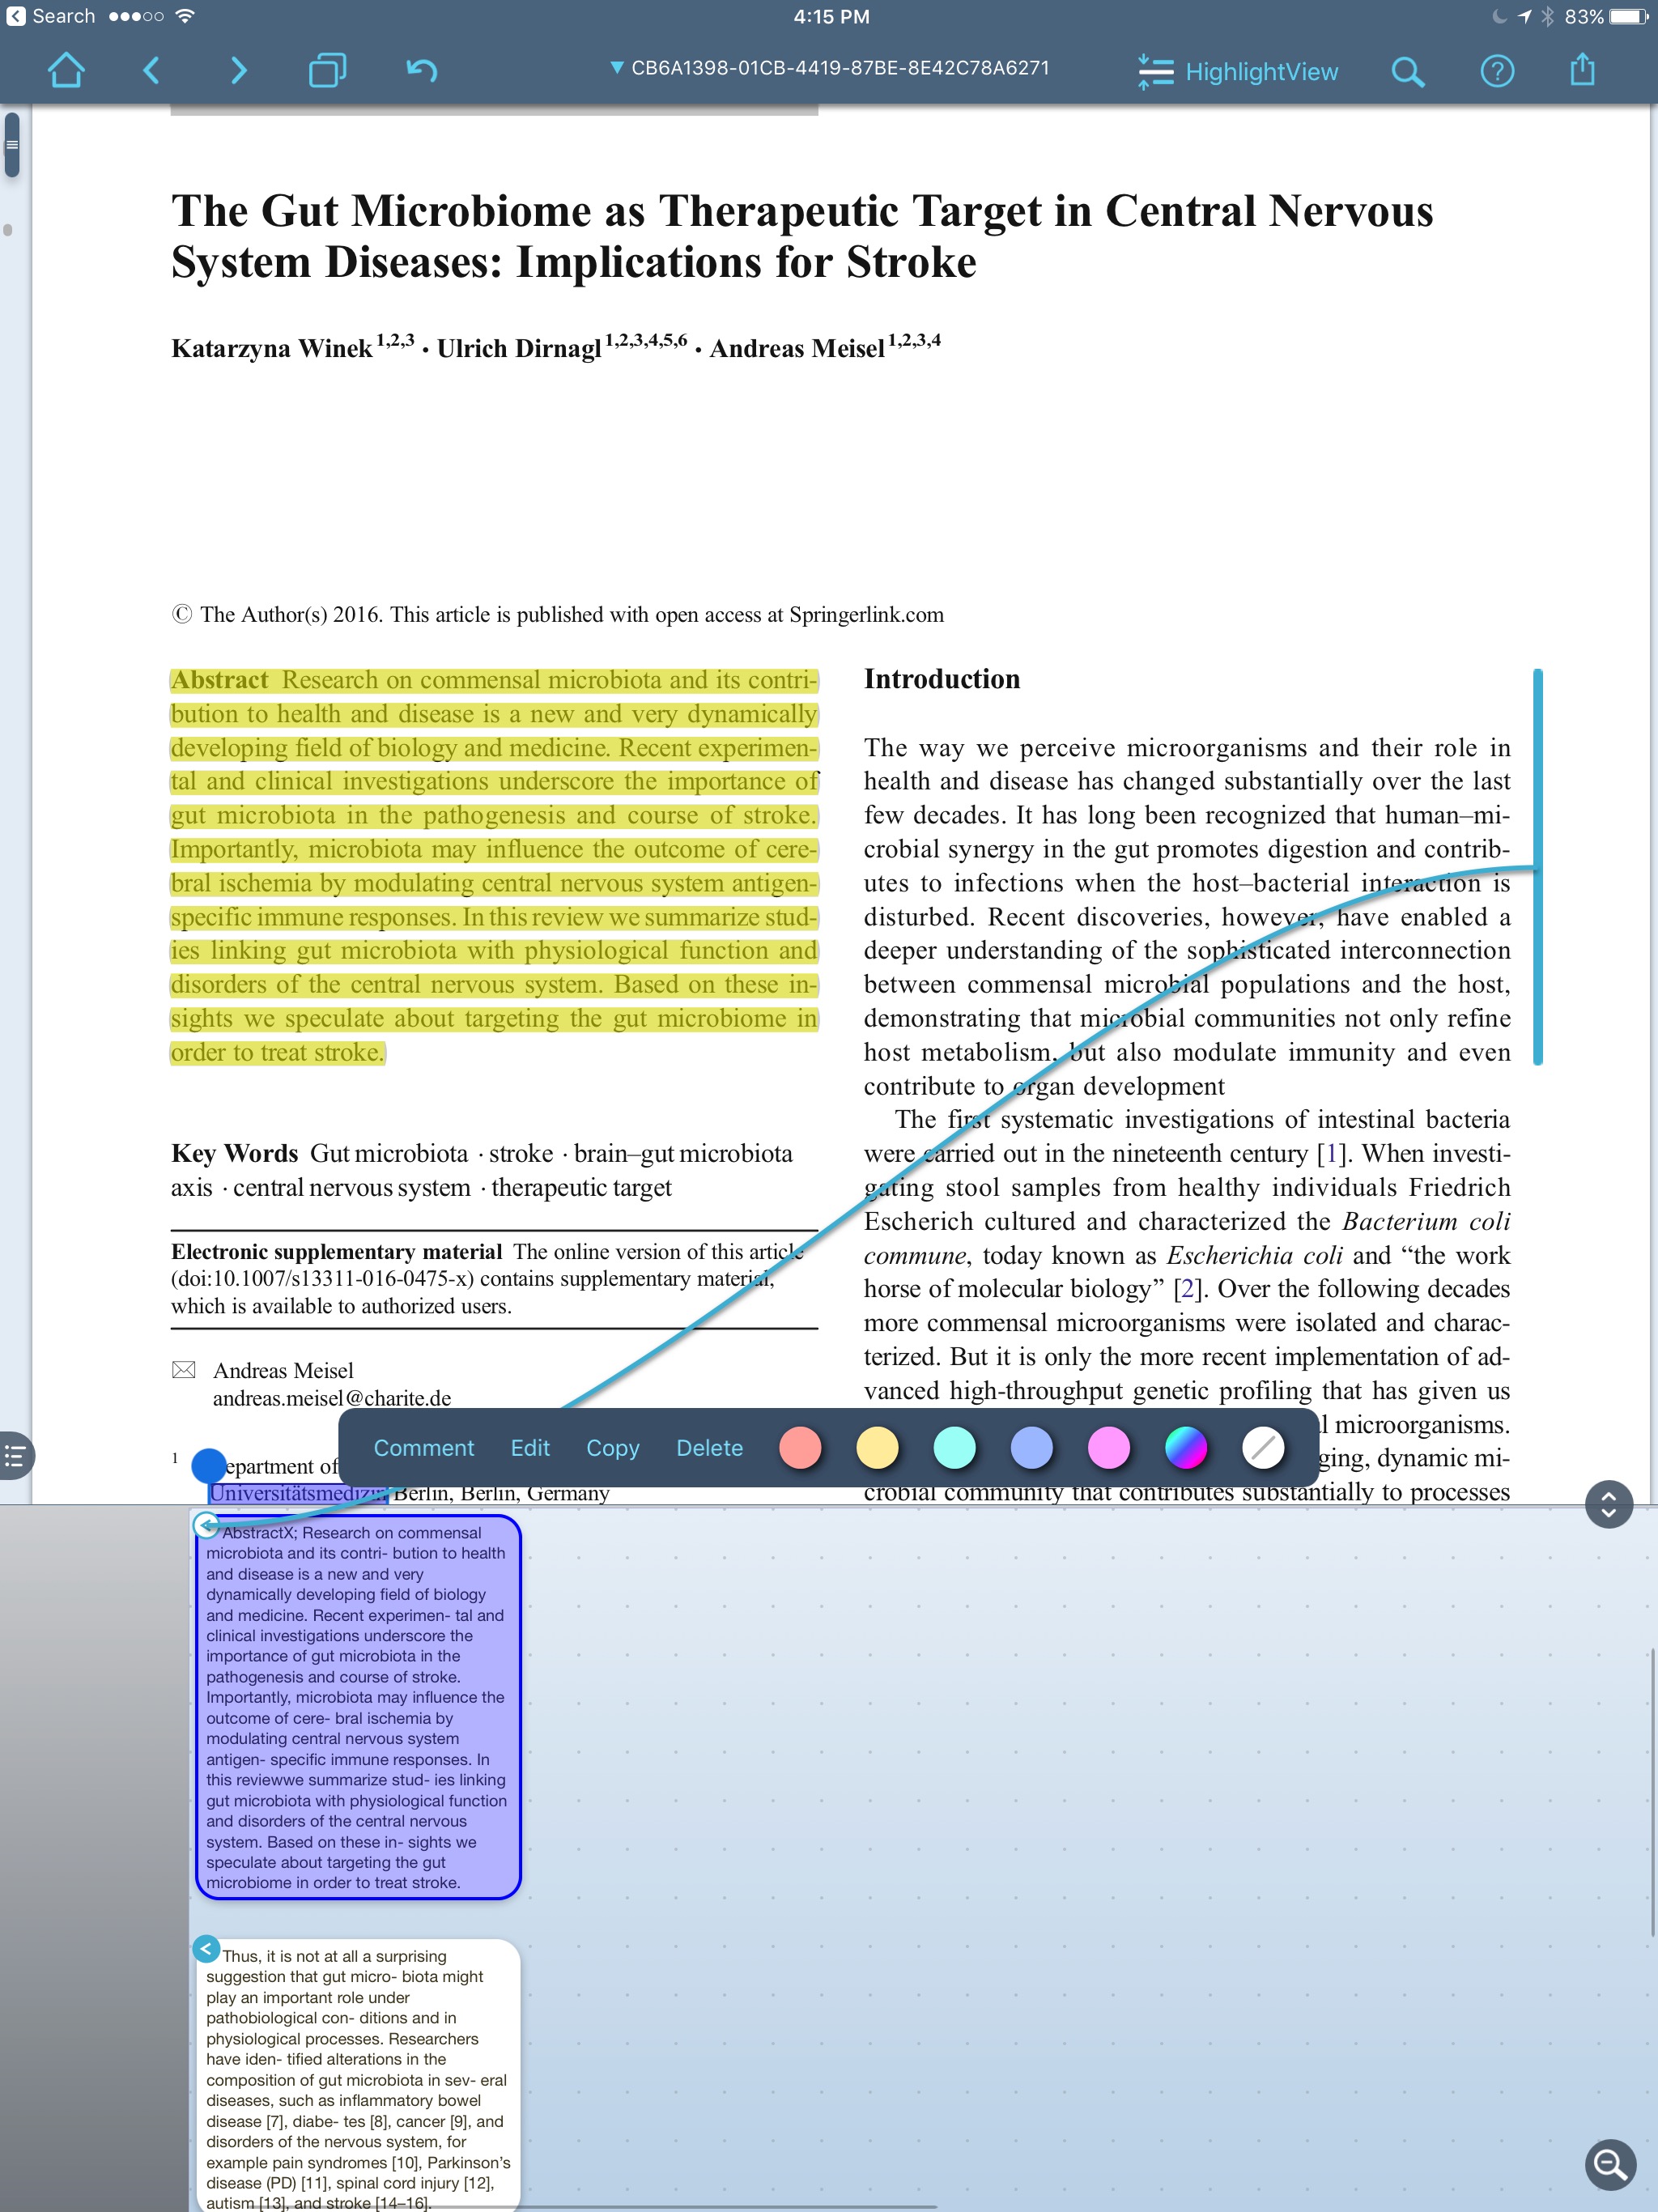
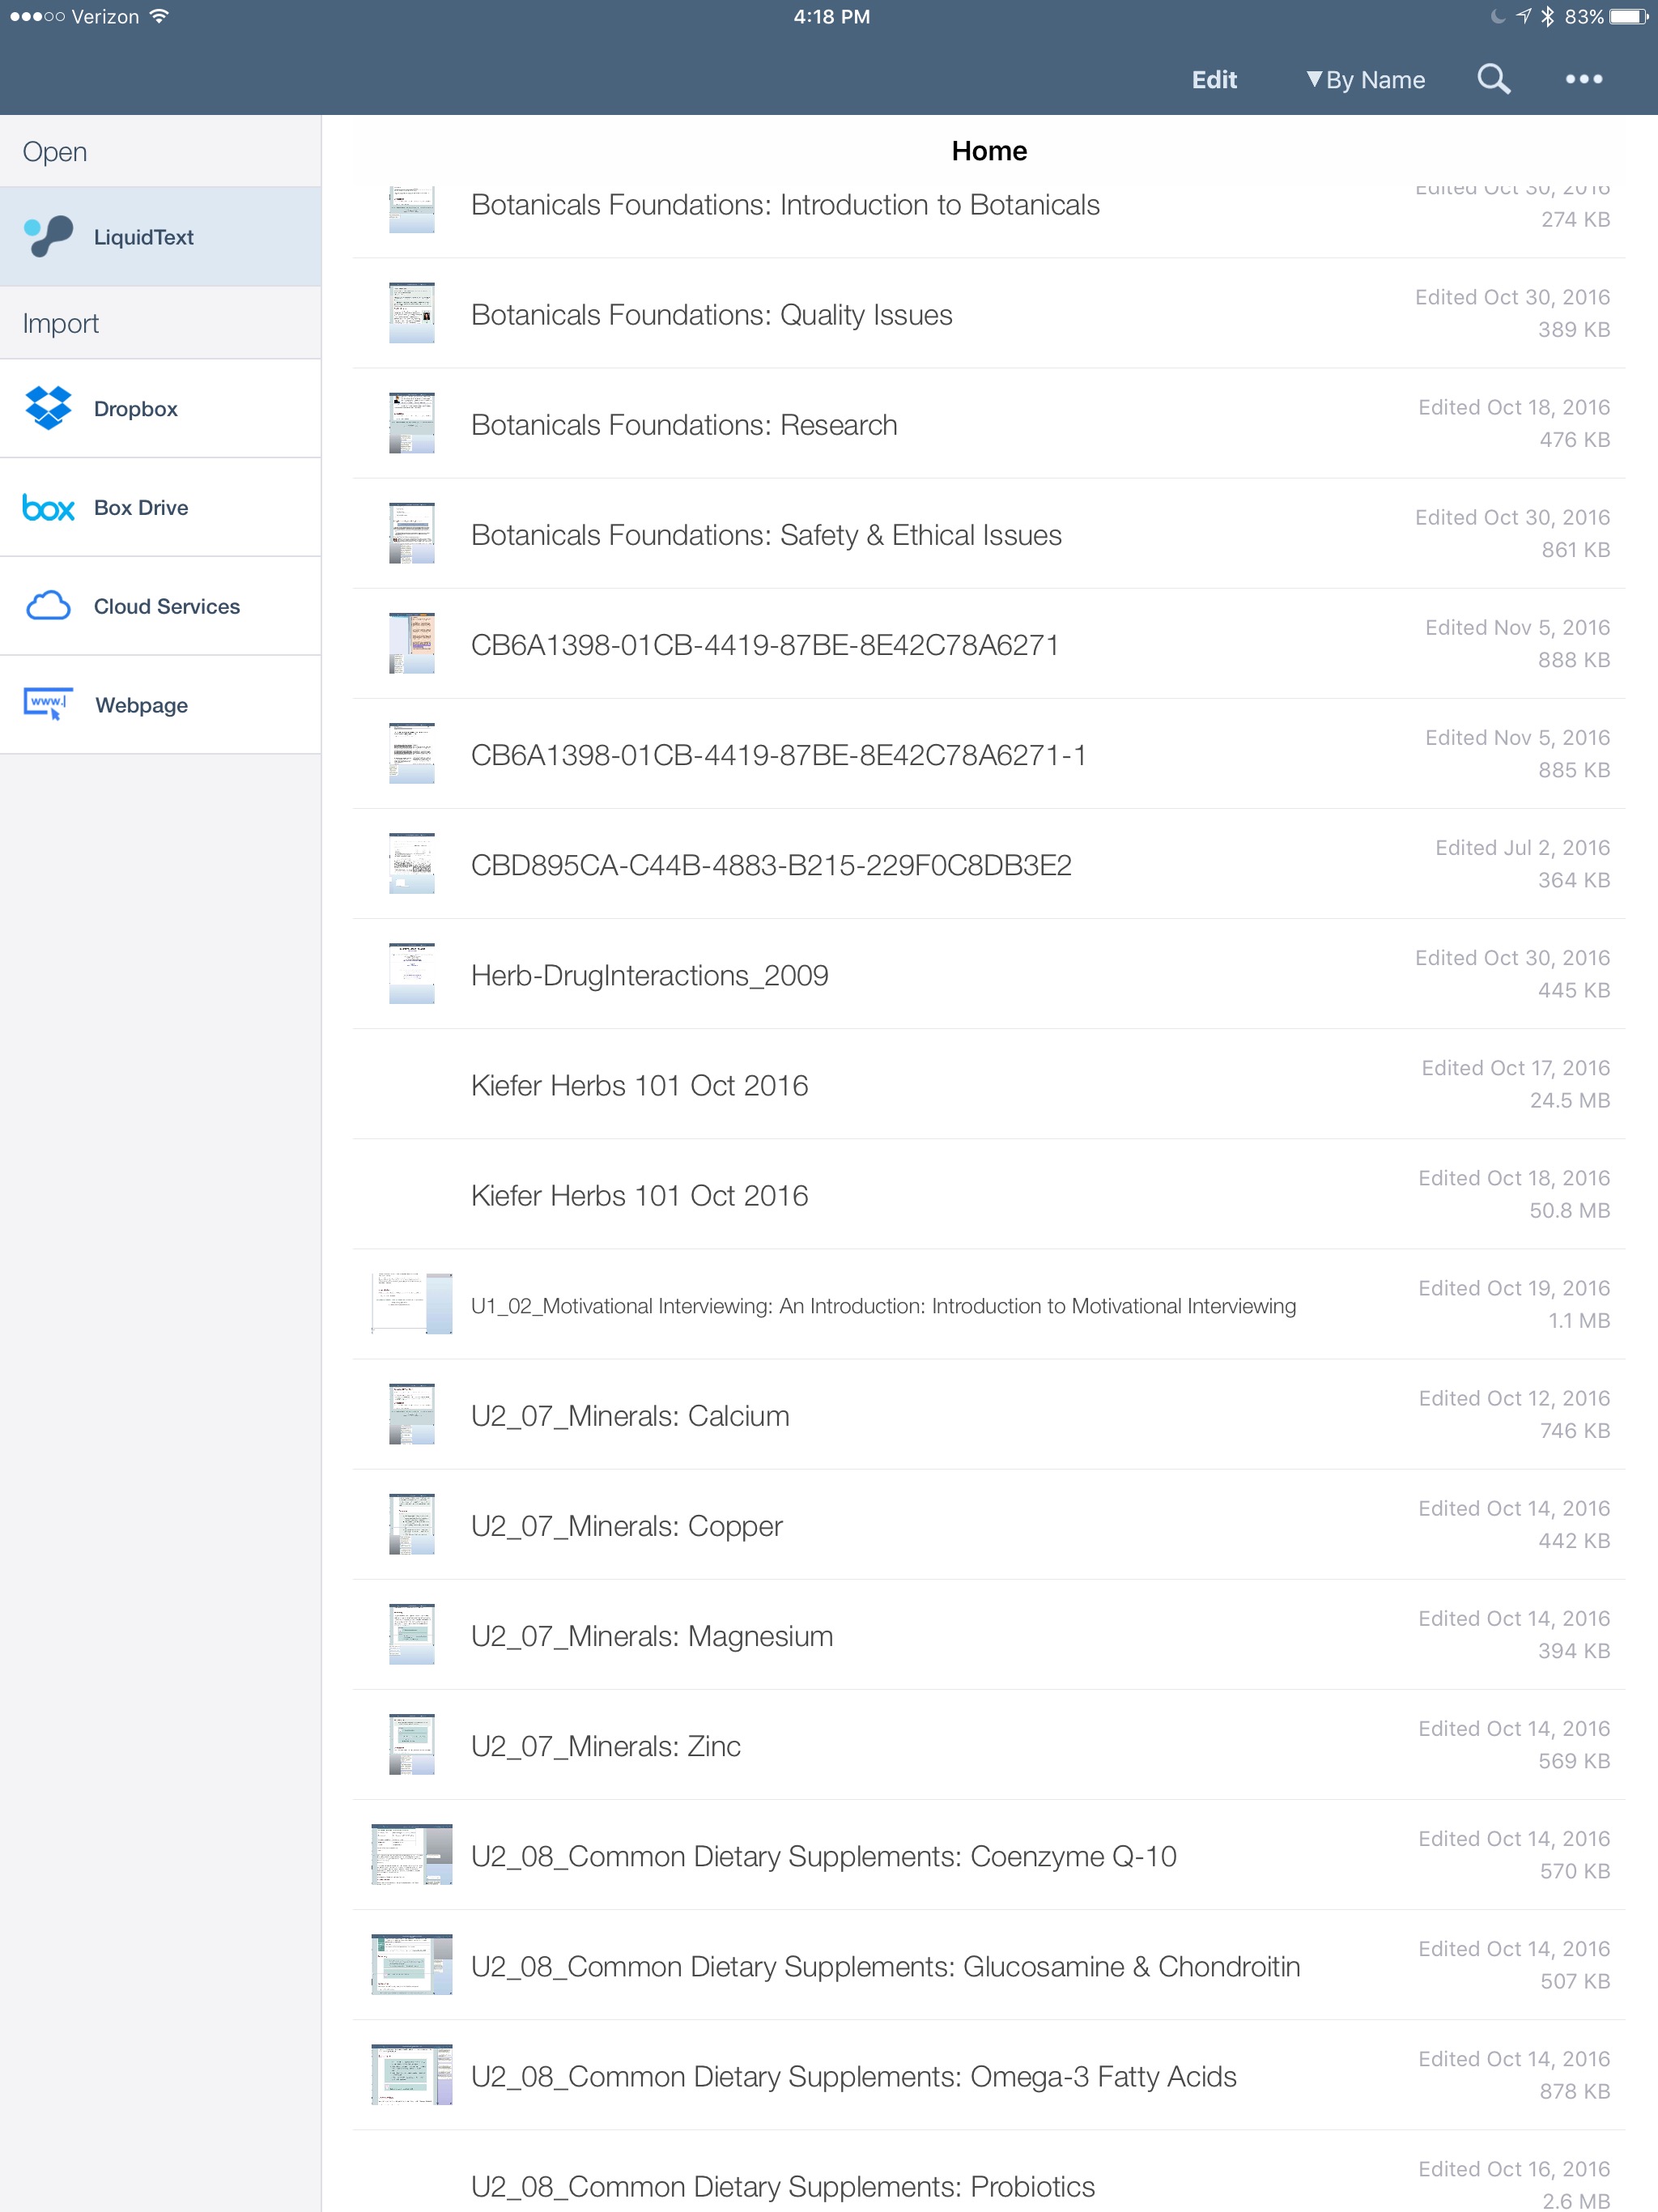
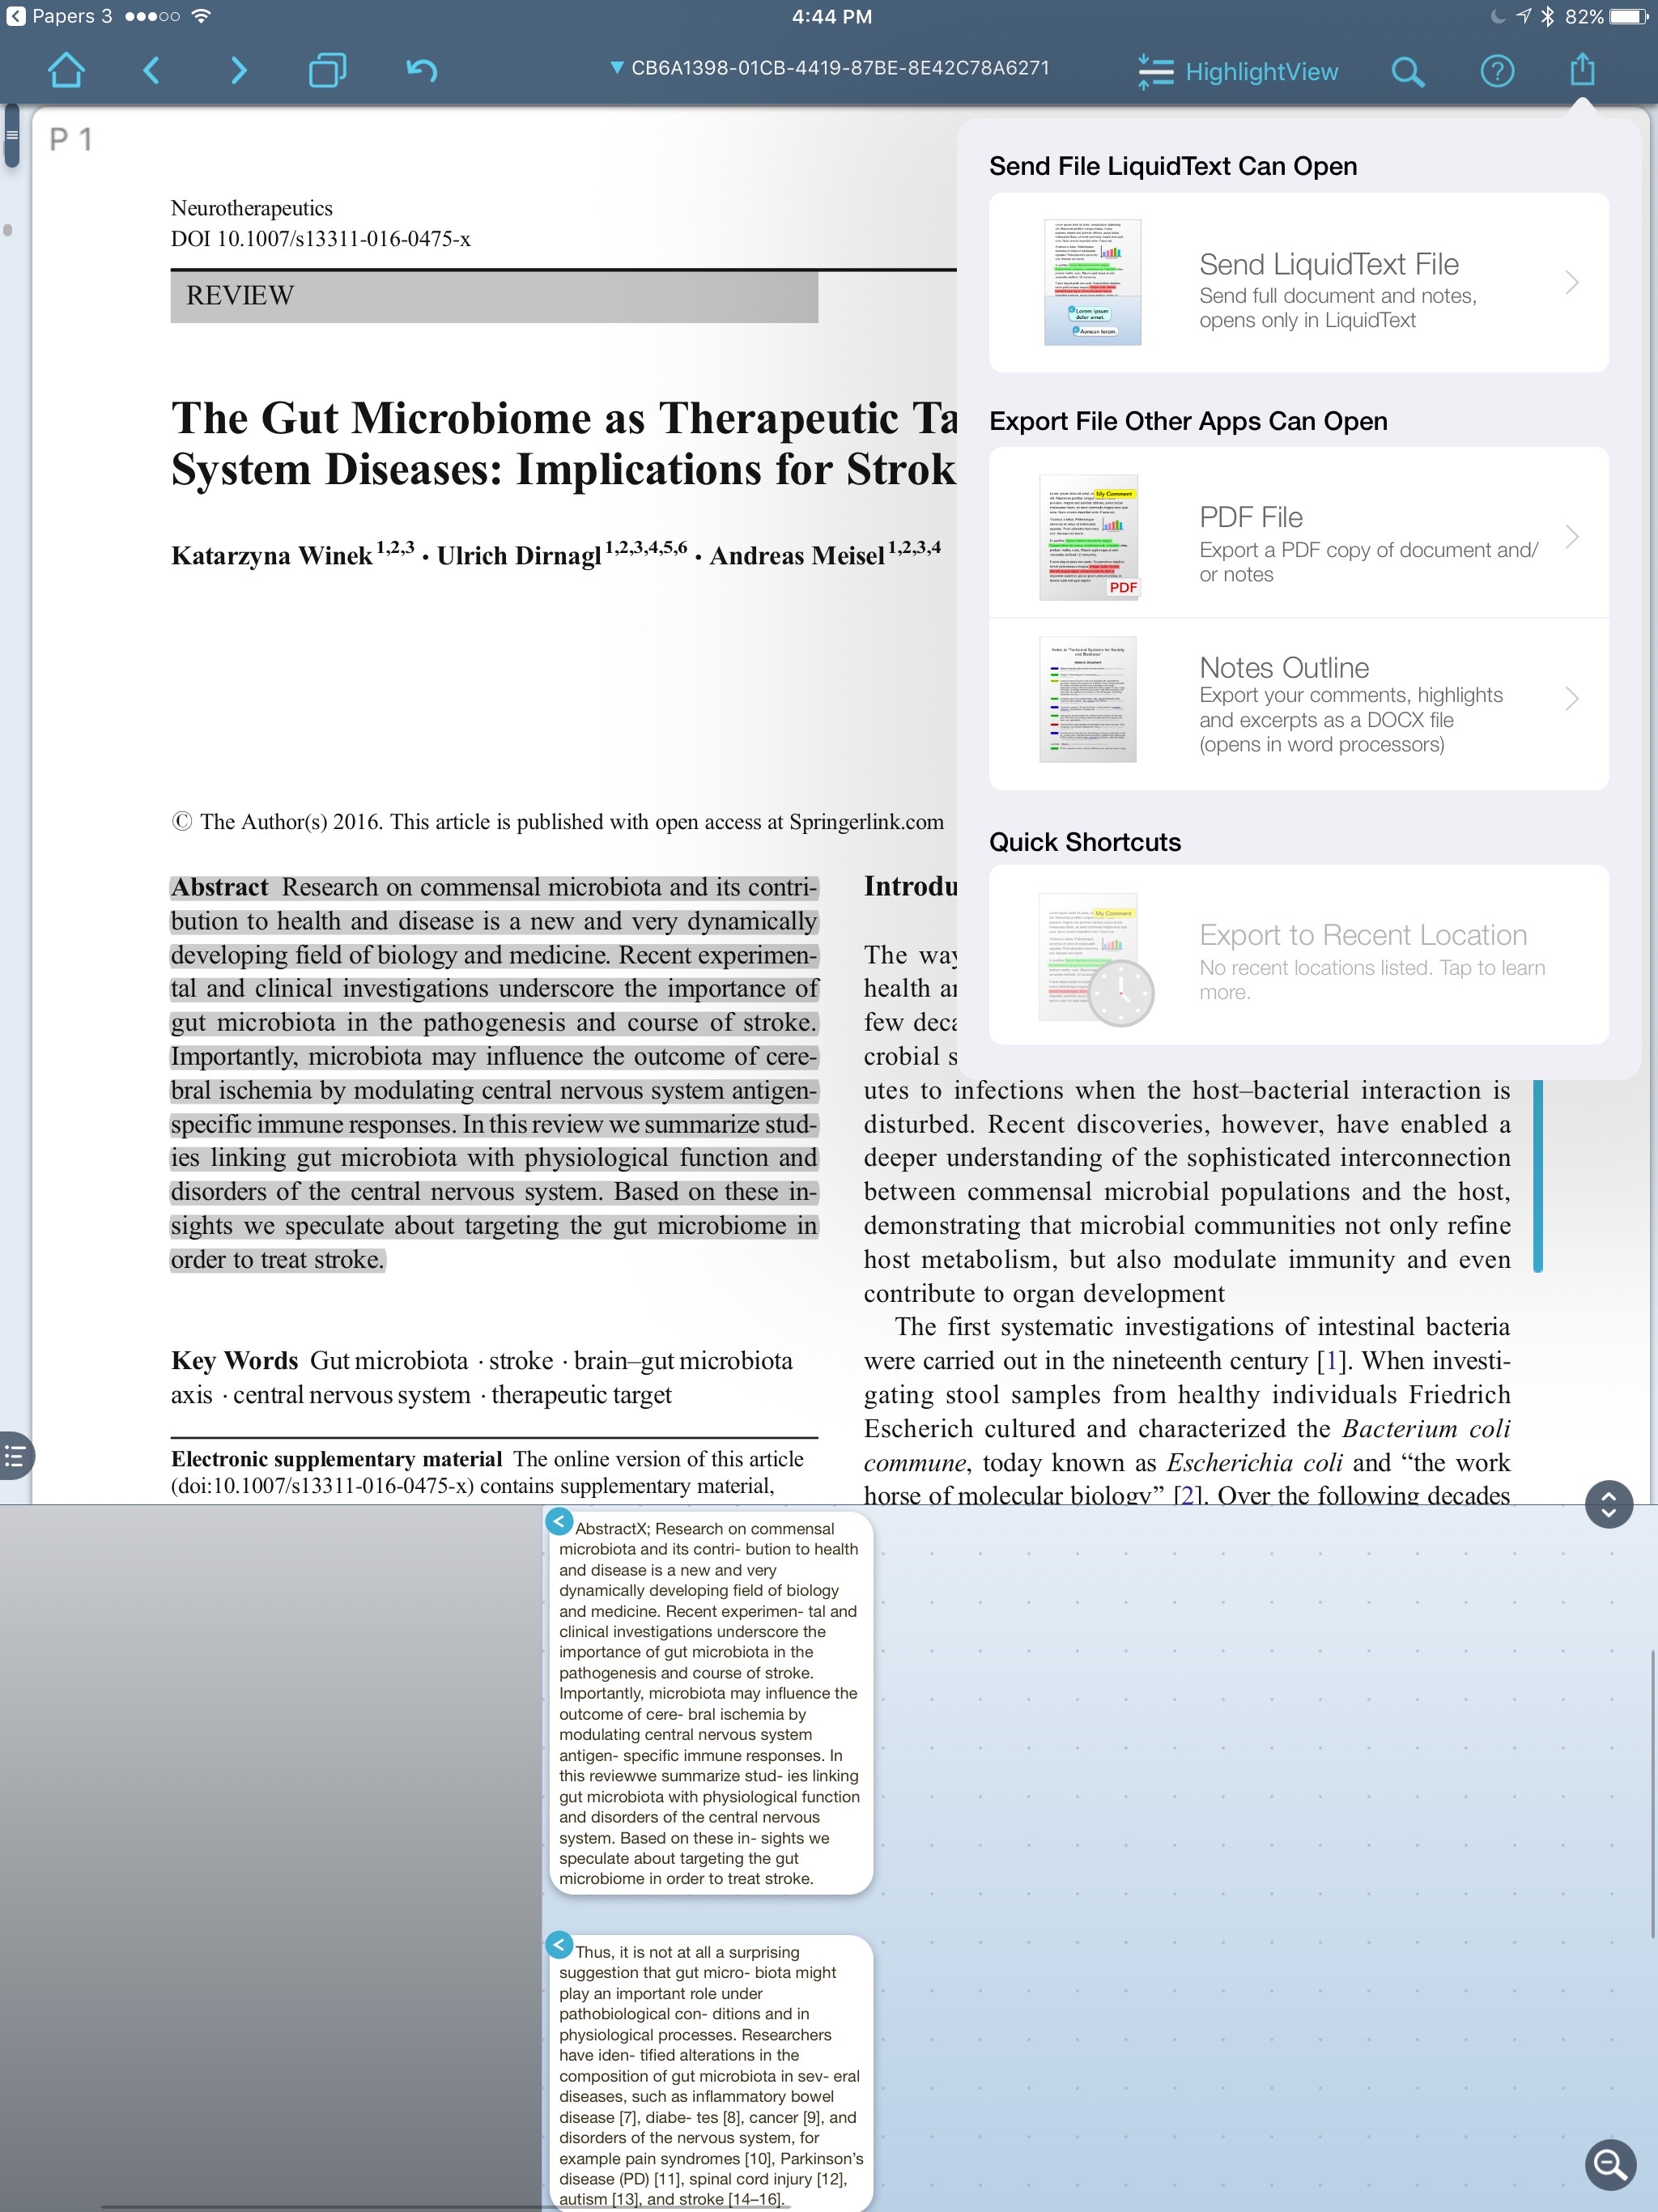
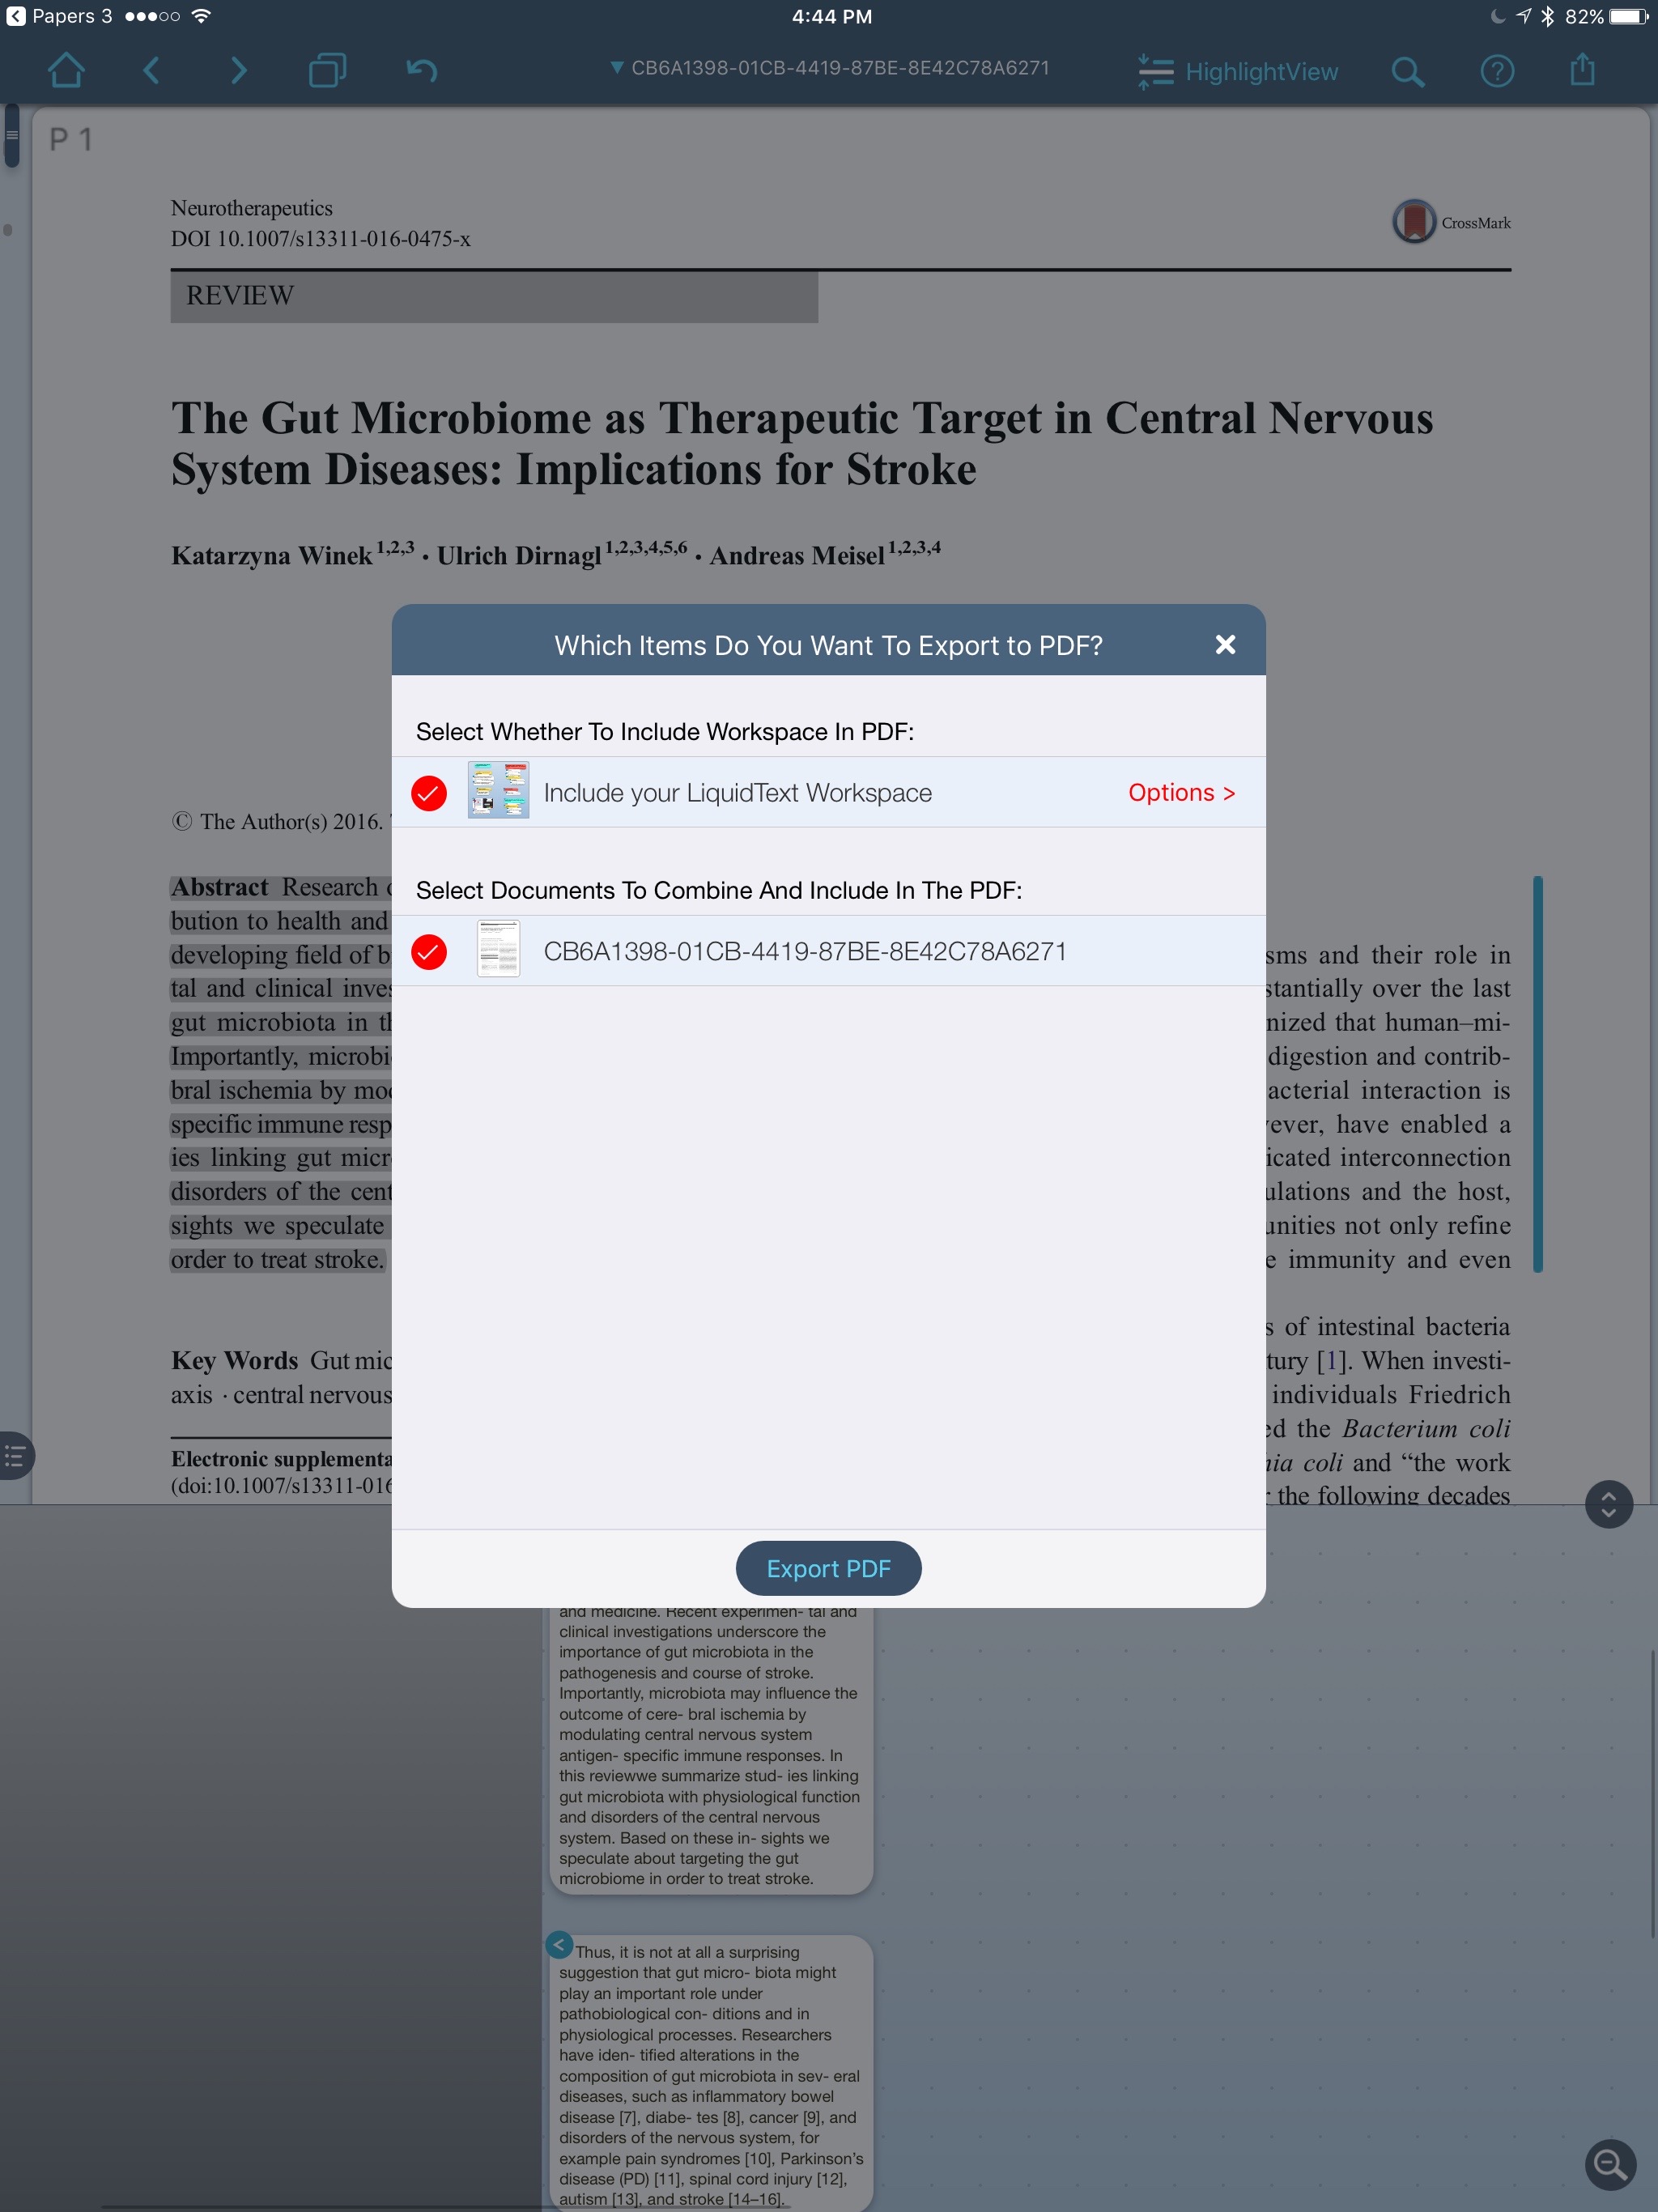
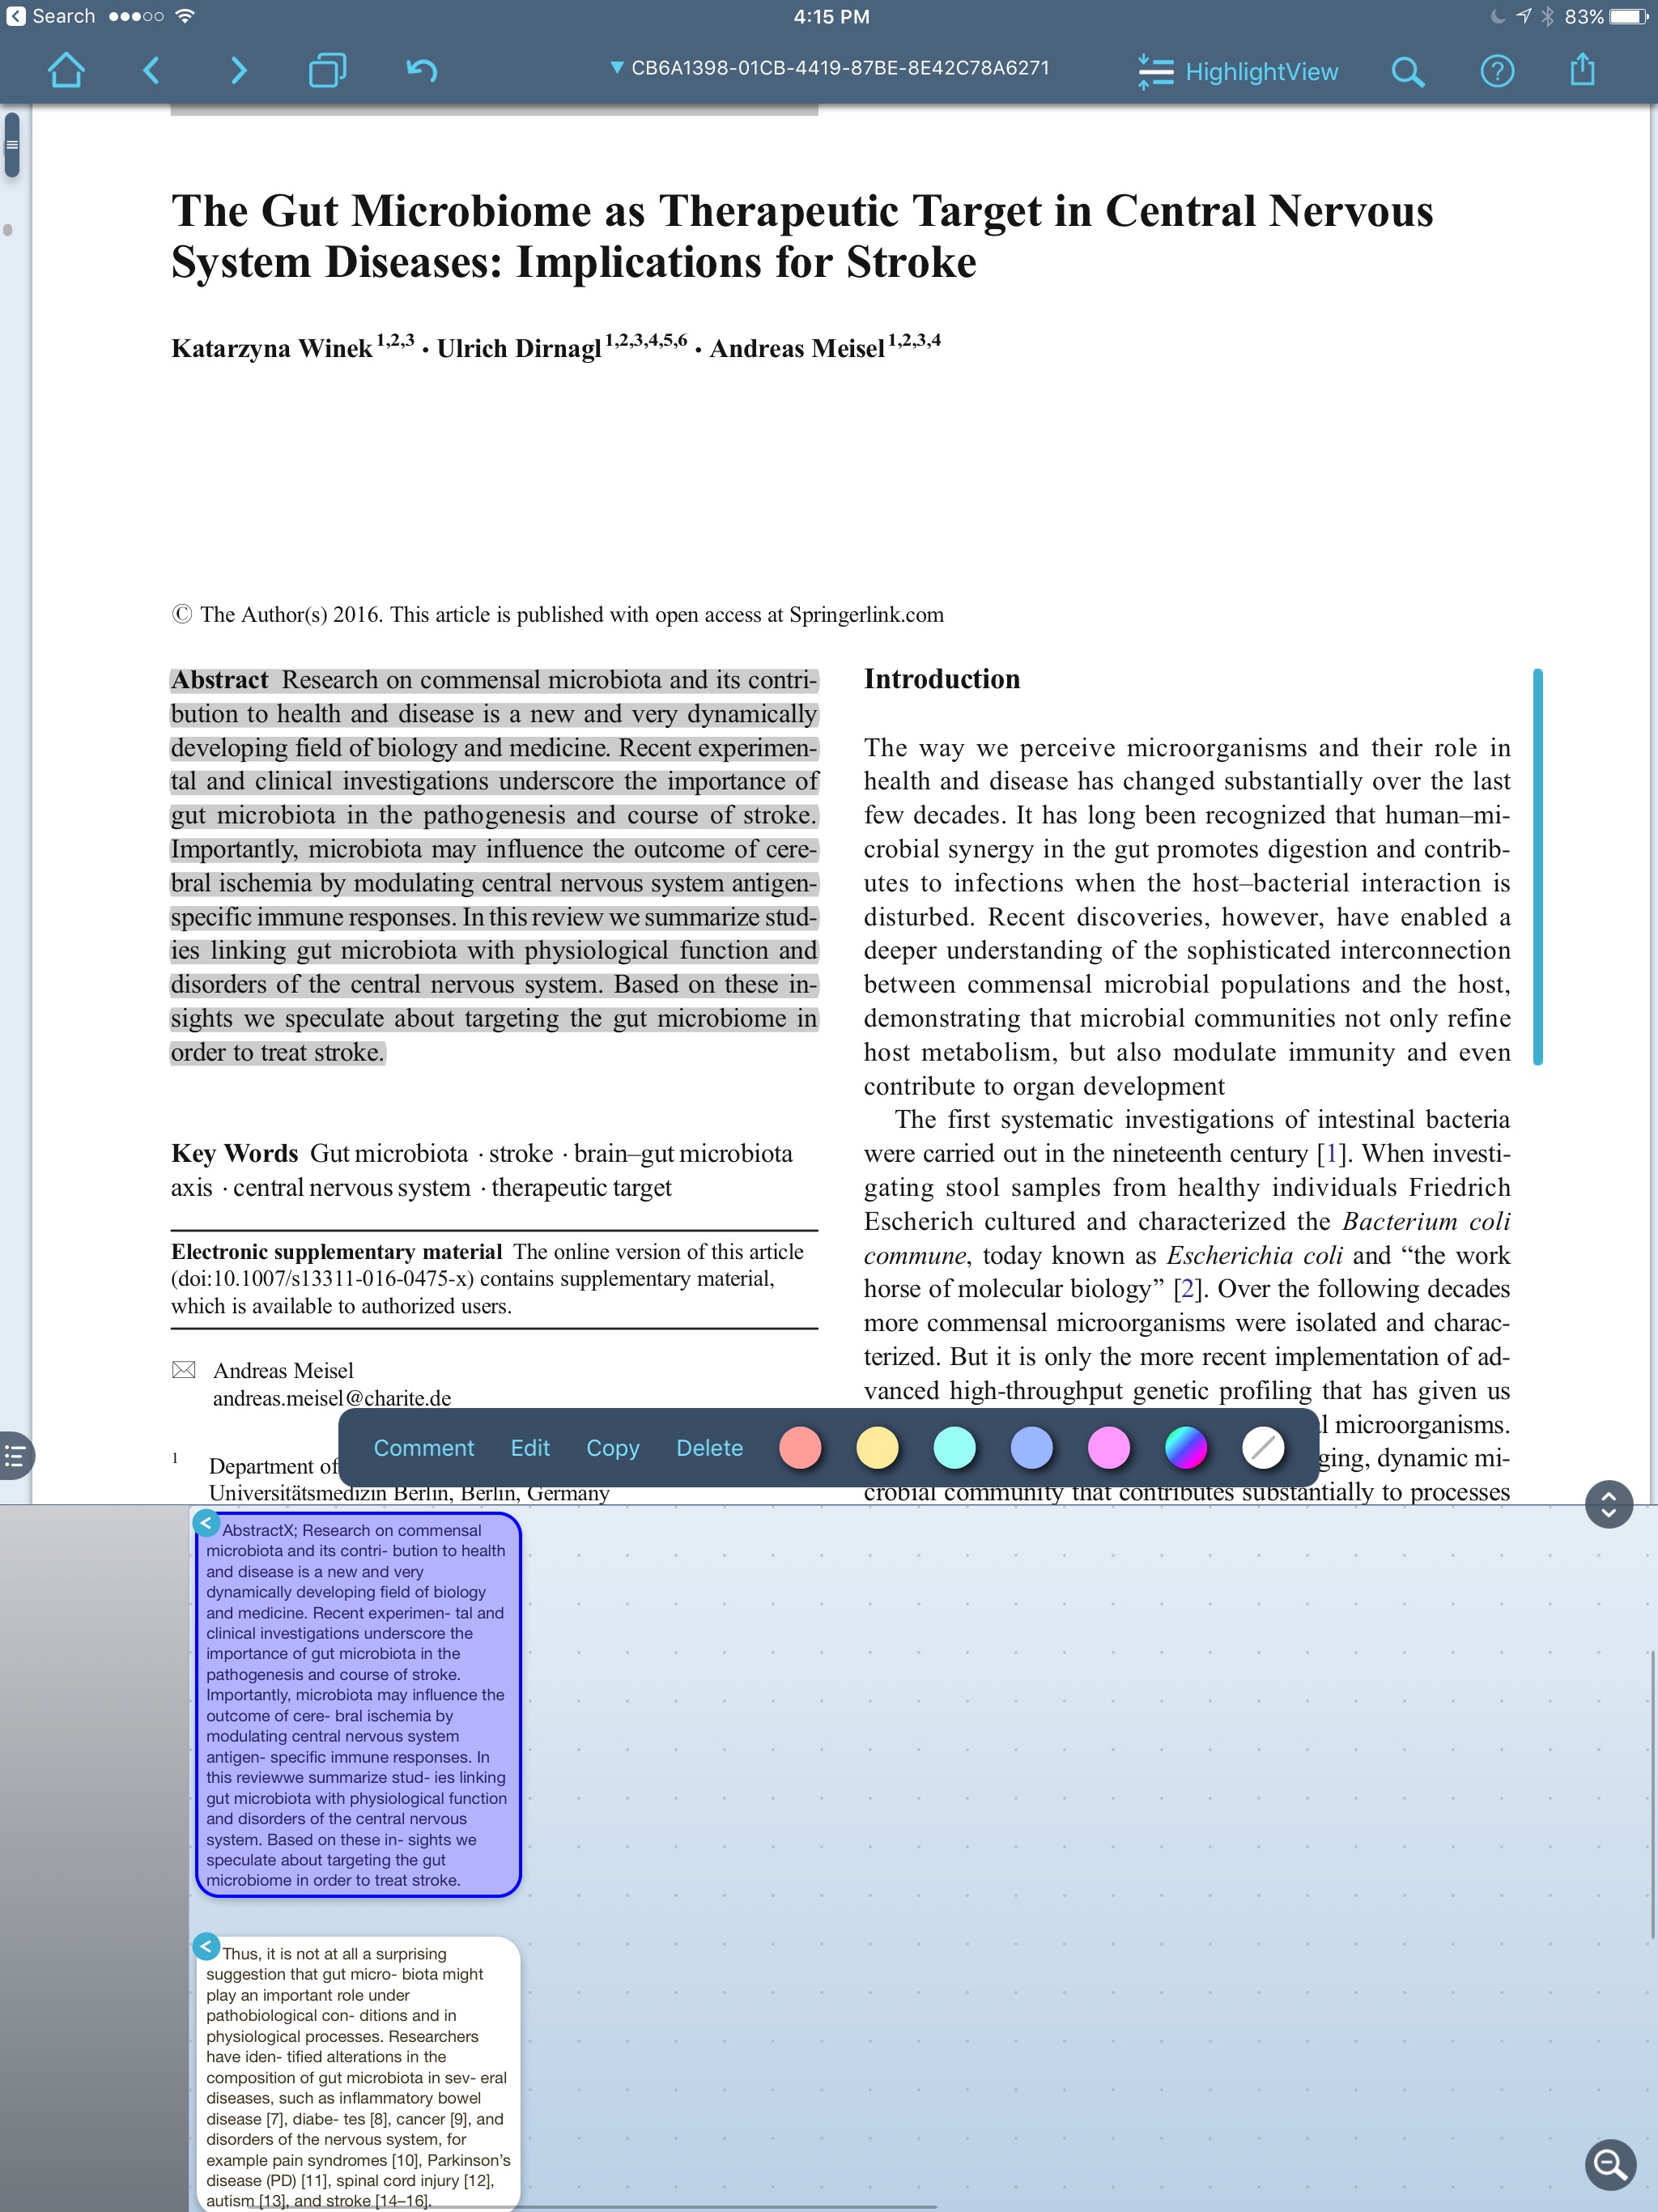
I have experimented with different PDF readers on my iPad. Over the past several months I’ve exclusively used a program called LiquidText.LiquidText has a unique, award-winning, interface that allows me to drag, drop, and manipulate text using my finger. LiquidText was named “Most Innovative iPad App of the Year” by Apple in 2015. LiquidText feels much more natural than any other PDF reader I’ve used on iOS--and I've used many. After highlighting with my finger, the exerpts / highlights / comments are extracted into their own area. The excerpts may be dragged around, linked, and repositioned at will.When reading and highlighting, I either drag text from the PDF into the notes area, or simply hit “AutoExcerpt” and the text is extracted for me. I can comment on the excerpted information.I can also view the place in the paper the highlight came from by merely touching the excerpt in the notes area.LiquidText reads and writes to a whole range of cloud services, but has limited range of export document choices.An Enterprise version is available for $9.99 that adds features like multi-document search and the ability to comment on multiple documents simultaneously. I've been using the app so much, I upgraded primarily to support the developer.There are a few features that are not (yet) available—the most critical for me is the inability to export highlights into a text file—LiquidText only exports highlights to Microsoft Word. This, unfortunately, is not compatible with my workflow for extracting highlights, but I like Liquidtext so much, I figured out a workaround using Skim—here is my entire workflow:

  • I set up a Dropbox LiquidText Folder to serve as a bridge with my desktop.
  • I open the entry in Papers on iOS.
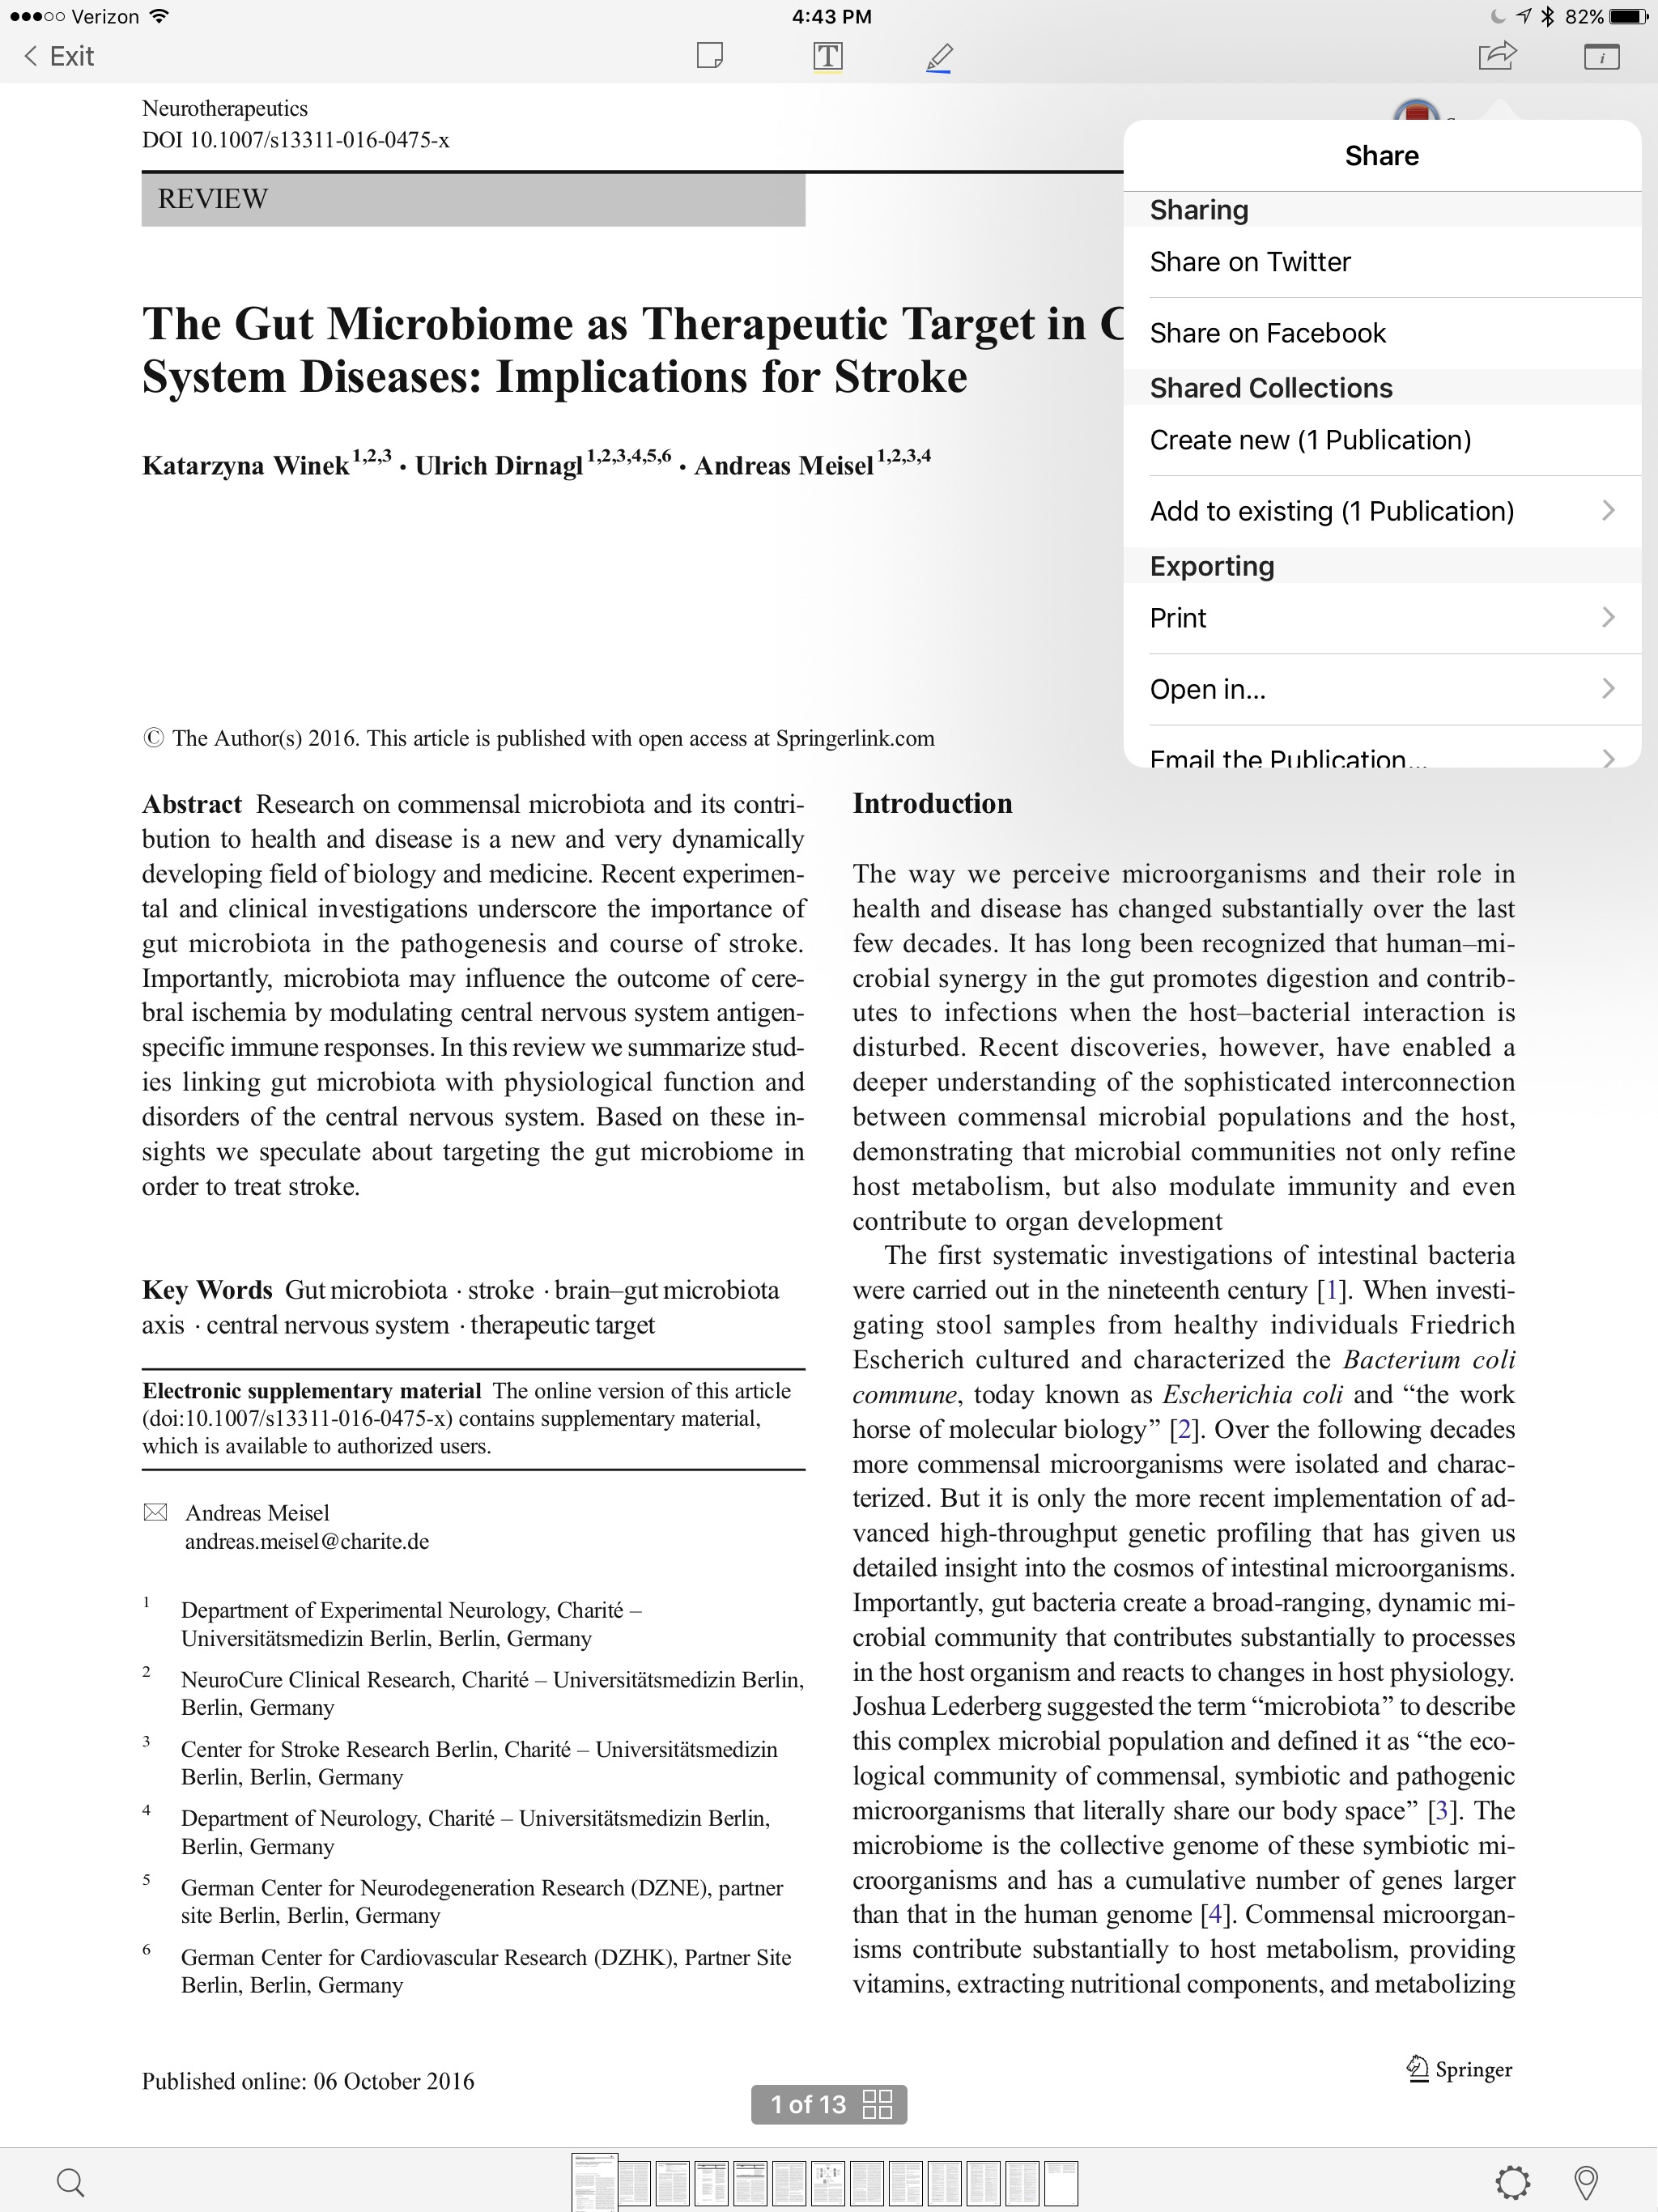
  • From within Papers I select "open in". -this brings up action menu.
  • I open, read, and annotate in Liquidtext. This includes linking the full-text of references to each excerpt (as suggested by reader GH).
  • I export the PDF and Notes from Liquidtext to my Dropbox Folder.
  • When I get to my Mac, I open the PDF in Skim.
  • Under the File Menu in Skim, I choose “Convert Notes” making my highlights into Skim Notes.
  • I then process the annotations as discussed in this blog entry.
  • (If you want to take the time on your desktop you can also replace the Papers PDF with the LiquidText highlighted version).

Give Liquidtext a try and please let me know what you think.

Skim Split Screen Workaround

When reading PDFs on my Mac, I use Skim. Although I love the program, Skim has one annoying quirk. I cannot select (or highlight) text in a split screen. This makes it difficult to highlight or download references in real-time.I found a workaround that is fast and efficient. After opening a PDF in Skim, I’ll select “Print” from the File Menu and then, from the bottom left drop down menu, I’ll select “Open PDF in Preview.” This opens a second editable version of the manuscript side-by-side with the original.Let me know how this works for you.

Retrieval, Annotation, and Capture of Highlights (2016)

I have a unique way of processing scholarly information, I am convinced it gives me an advantage when writing grants and manuscripts--allowing me to find specific notes and related information very quickly and efficiently without having to rely purely on memory. I’ve written a bit about this before, but the process has evolved, so I am dedicating an entry to my updated workflow. The software and utlities integral to this workflow are:

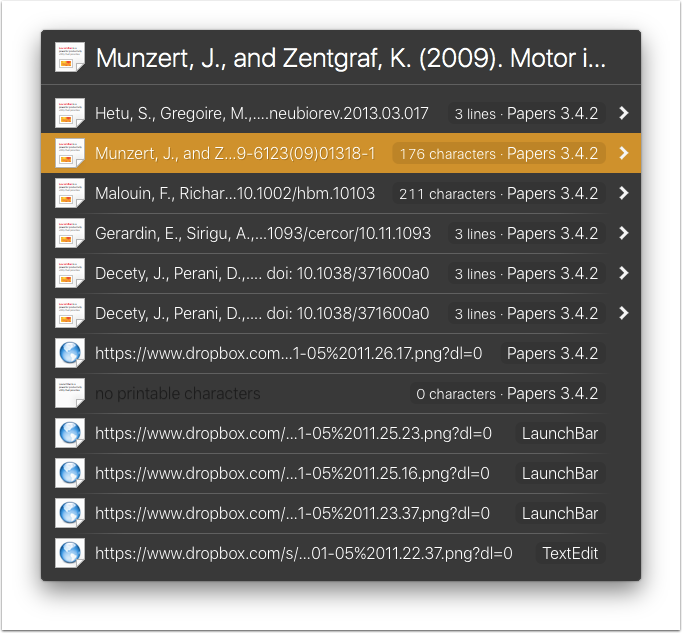
Highlighting in Papers 3Despite lacking the outstanding features of Skim, I am back to reading/highlighting in Papers. I switched back to Papers primarily for synchronization. I do a fair amount of reading on my iPad. Any highlights I make on my Mac become immediately available on iOS. Anyhing I highlight on my iPad shows up on my Mac. Although I prefer Skim, the simplification afforded by doing everything in Papers was irresistable. Here is the manuscript we’ll be working with, highlighted in Papers.highlighting-in-papers-3Export NotesOnce I’m finished highlighting, it's time to process. Within Papers I go to File->Export->Notes and am provided with the following menu box. (1) I usually choose to save the file to my Desktop, as it needs to be easily accessible for processing. (2) I choose "Selected Papers Only" or you I export notes from my whole collection. (3) I choose Plain Text.export-notesFirst Stage of Processing the Untitled Notes File on DesktopHere is the untitled notes file saved to my desktop.first-stage-of-processing-the-untitled-notes-file-on-desktopContents of the unprocessed notes Filecontents-of-the-unprocessed-notes-fileKeyboard Maestro Script to Add Citation + Link and Save FileI have written two Keyboard Maestro scripts to help process my exported notes. The first script adds metadata to the text of the notes file we just exported, then renames the file using the unique Papers Citation. In order to use my script, in Papers, I make sure the correct paper is highlighted. Next, in the Finder, I select the exported note file. I invoke the script and it prepends the unique Papers Citation followed by a Papers Link to the top of the file.keyboard-maestro-script-to-add-citation---link-and-save-fileKeyboard Maestro Script to Add Citation + Link and Save File ContinuedThe script continues on to a save dialogue box where it replaces "Untitled" with the unique Papers Citation. I have to manually remove the curly brackets (as they are disallowed in file naming). I save the file to the Desktop.Download the script here…. You'll have to remove the .txt from the end of the file to use.keyboard-maestro-script-to-add-citation---link-and-save-file-continuedUniquely named Notes File Saved to Desktop.This note I just saved contains ALL of the exported highlights from the manuscript in a single file. As I've talked about in previous entries, I find it more efficient to access a single concept rather than having to dig through an entire papers worth of notes. I developed (along with a few others) a second KM script that copies the Metadata at the top of the note file, parses the single note file into a collection of notes files--one highlight per file, and appends the metadata to each file.Processing highlights in this way has revolutionized my grant and manuscript writing efficiency.Keyboard Maestro Script to Parse Highlights and Append metadata to each notekeyboard-maestro-script-to-parse-highlights-and-append-metadata-to-each-noteDownload the script here…. You'll have to remove the .txt from the end of the file to use.Moving the FolderI highlight the folder on my Desktop, then double click my Shift Key--this invokes a Launchbar action.Screenshot 2015-12-19 16.54.54Launchbar Moves FolderUsing Launchbar I move the text notes to the folder where I keep all the extracted highlights from all the manuscripts I'v read.Screenshot 2016-01-05 11.25.23Ulysses to finish the processAs I've mentioned previously, i use Ulysses extensively in my personal and professional life. I use Ulysses to finish the processing of my highlights, but any text editor will do. (1) Ulysses is pointed to read all the files in my Notes folder--here you see all the individual files extracted from this manuscript. (2) is the text of a single highlight, (3) is the metada added to each file by the KM script. With some notes I will add my own comments, other times, not. (4) are the references that support the statement....these are added manually by reading through the statement and copying each of the corresponding references from the original PDF. I don't go back and forth between the text file and the PDF...instead, I take advantage of Launchbar's Clipboard History.ulysses-to-finish-the-processLaunchbar Clipboard HistoryI merely highlight each reference mentioned, then in bulk I paste each of the references into the note.launchbar-clipboard-historyAppearance of NoteI showed you what this file looked like in Ulysses. Here is its appearance as a free standing text file. Depending on my mood (and time) I may or may not append refernces to each note file.appearance-of-noteCopy PDF to Indexed FolderAfter I've processed everything, the last step is to export a copy of my PDF to a location Devonthink can access.copy-pdf-to-indexed-folderUsing Devonthink to Find Concepts and Related InformationYou may aak yourself why I go to such lengths processing the information I read. The answer is Devonthink. I use the "Artificial Intelligence" of Devonthink quite extensively in my writing. As I mentioned, all the processed highlights, copies of PDFs go into a set of folders on Dropbox. I then Index (not import) the information in these folders (1) so they are "seen" by Devonthink. Why is that important? When I conduct a search (2), I can find the idea I'm looking for (3). By clicking on the "See also" function (4) in Devonthink I can see every piece of related information in my scholarly library (5), including things I have previously written. This ability has revolutionized the way I write.using-devonthink-to-find-concepts-and-related-informationConclusionIn this entry, I have shown you how I read and process scholarly my annotations from manuscripts. Although the process requires an extra ten minutes or so per manuscript, the payoff is immense.Please comment below.

Taekman Writing Workflow 2015

The early release of Papers 3 got a bad rap, and rightly so. My negative experience began as I imported my Papers 2 library into Papers 3. I had about 2500 papers, but only a fraction of these PDFs were imported properly. I am still recovering from these import problems--having to add each missing PDF by hand. Although importing was a issue early on, The makers of Papers, MekentosJ, now part of Springer Science+Business Media, worked hard to fix problems. I assume, with all the work on Papers, that importing has been fixed. My advice? Back-up your data before trying to import to Papers 3!

Although I had early problems, I can tell you that Papers 3 is pretty robust now. I recently used it to write and submit a full grant. I’ll say the app should be strongly considered if you’re looking for a reference manager / bibliography builder. If you’re interested in some of the changes in Papers 3, check out this entry.

With the release of Papers 3, all files and PDFs are bundled into a single container. Bundling makes syncing across computers more reliable, but indexing of individual files much more difficult. Unfortunatly, my Papers 2 workflow was dependent on indexing of single files. And thus, with the release of Papers 3, I had to revamp my writing workflow. That’s what I’m going to cover in this entry.

My current workflow has three parts: 1.organizing, 2. creating, and 3. writing/formatting

The software I use includes:
Papers3
DropBox
Hazel
Skim
Keyboard Maestro
Ulysses
Devonthink
Tinderbox
OmniOutliner
Scrivener
Pages or Word

Part 1: Organizing

Papers 3

Papers is used as my storehouse for all academic literature. I use Keywords and Smart Folders (akin to Smart Playlists in iTunes) to keep my literature sorted. In addition to the topic of each manuscript or book chapter, I use keywords such as "MustRead" that fuel my prioritized reading list. I tend to keep my library sorted by the date in the main window, but can easily search or sort my library in numerous other ways. My library is synchronized using Dropbox.

KeyBoard Maestro

Most people, while reading academic literature, find additional manuscripts they’d like to download. I’ve developed a series of KeyBoard Maestro scripts that simplify the download of these additional articles from Duke’s Library, Pubmed, and Google Scholar. As I’m reading a manuscript, I highlight the article I want to download and invoke my KM script. The macro copies the text string I’ve highlighted, goes to the appropriate web page (e.g. Duke’s Library), pastes the search string into the appropriate box, and hits submit. Thus with two keystrokes, I can find and download new PDFs I’d like to read. The new PDFs are sent to my “Downloads” folder. Then Hazel takes over.

Hazel

Hazel is a program that watches folders on my computer. When a file matches defined criteria, Hazel performs a script. I have a Hazel script watch for PDFs that contain the word “Reference.” When Hazel sees a file that matches, it launches Papers and imports the file into my library.

Skim

Despite the pleasing new main interface, Papers 3 highlighting leaves much to be desired. For reading and annotating scientific literature I use Skim (Skim can designated as the primary PDF reader in the Papers Prefernce menu). Skim has a robust feature set and is customized for academic literature. Oh, and it’s free! When I’m done reading and annotating, I export the Skim annotations to a PlainText file. I then use a KM script to name the the Skim Notes file to my convention.

Using another KM script, I parse the single notes file into separate text files (one for each highlight or annotation). Each file is named to convention and contains the text I highlighted in the manuscript, my own comments, and the full reference. All the individual notes are aggragated into a folder. I move this folder from my Desktop to the cloud so I can access it from anywhere. I call this my Literature Comments Folder. Now I move to Ulysses.

Ulysses

Ulysses is able to read files anywhere on my computer. I’ve configured Ulysses to point to my Literature Comments Folder so all my comments are available in an organized fashion. At this point I can add additional comments to my individual highlight files. The next step is to index the files in Devonthink.

Devonthink

Finally, I open Devonthink. This workflow has matured from what I discussed in this entry. I have a database that is solely used to index my scholarly reading. From the File Menu, I update the index (NOT import) of my Literature Comments Folder. Indexing this folder allows me to take advantage of the “Artificial Intelligence” of Devonthink, finding relevant information throughout my reading.

Part 2: Creating

Tinderbox

At this point I’m ready to start developing my scholarly work. I use Tinderbox (in Outline View) to generate a high-level preliminary outline. Tinderbox is a power-user’s application. I’ve only scratched the surface of its capabilities, but find it extremely useful early on to organize thoughts and find connections between what I’ve read and what I hope to write.

From within Devonthink, I review each of my comments. If I find something I want to include, I drag and drop the file (comment, reference, and highlighted text) into Tinderbox. Then, using Devonthink’s “See Also & Classify” command, I see related notes in my Literature Comments Folder . I drag and drop the additional comments into Tinderbox too. As I think of new ideas, it’s not uncommon for me to conduct a freeform search from within Devonthink to see which comments bubble to the top.

Once I have several dozen comments in Tinderbox, I find myself entertaining new thoughts, and often adjusting (or add to) my outline.

Another way I approach the creative process is to surf through interesting comments and move them one by one into Tinderbox without organizing them (usually in the Map View). Once I have a few dozen of these interesting quotes and highlights, I start to see connections between them, letting me further refine and organize my thoughts (and begin to develop and outline).

Once I’m satisfied with my outline, I’ll sometimes export to OmniOutliner for additional organization. But most times, I’ll export my outline directly from Tinderbox to Scrivener.

Part 3: Writing and Formatting

Scrivener

Scrivener is the place where the early versions of my manuscript are built. Scrivener imports OPML files from Tinderbox or OmniOutliner—each bullet of the outline gets its own content field. I do the majority of my early writing in Scrivener, attacking whatever section I feel like writing at the time. I use the Magic Citations of Papers 3 to insert my references as I write. Once I get words down on the screen, I often find myself tweaking the outline in Scrivener. This early phase, when I’m writing on the go, is when I yearn for the iPad version of Scrivener. Until that’s available, I’ll continue to use Scrivener’s synchronization with SimpleNote when I plan to write on my iPad.

When I’ve completed all the sections in my Scrivener outline, I’ll export everything I’ve written to Ulysses. I use Ulysses to edit and rewrite (in Markdown) until I think the work is ready for submission. As I’m importing and editing my paper in Ulysses, I make sure to have the document type set to Markdown (not MarkdownXL). MarkdownXL uses the curly brackets as an internal mark for annotations. If I use MarkdownXL in Ulysses, all of my Papers citations are formatted as footnotes—very annoying.

Word or Pages

I write and edit for several rounds in Ulysses. Ulysses for iPad makes this process more seamless and enjoyable. Unfortunately, when I’m done writing, I cannot format my bibliography in Ulysses. I have to export my file to Word or Pages. That’s okay though, I still have to format my paper. I use an old version of Pages (the new version of Pages still doesn’t allow bibliography formatting). Microsoft Word also works. To do this, I highlight all my text and from the Ulysses Edit Menu I select Copy as RTF (Word), then paste it in the word processing application. After my bibliography is formatted, I format the rest of the paper.

Finally, as the final check of my writing, I use a KM script to read back the text to me. I often find errors, even in this late phase of writing. Finally, I double check everything conforms to required format of the journal (or funding agency) and hit submit.

And there you have it: my writing workflow. As with most of my workflows it is continuously subject to improvement. For the time being this workflow has streamlined my writing. I hope it works for you too.
Writing and Reading Workflow: Batching and Automating Full-Text Retrieval

In my work at Duke University on simulation, games-based learning, and learning technology, I frequently read and write scientific information. I’ve developed a series of workflows to help me efficiently deal with information when writing papers and grants. In a previous entry I talked about how I try to batch operations, doing similar things at the same time. This entry will be about my workflow for reading scientific manuscripts.

I use Skim for scientific reading, typically using the bottom pane of the “Split PDF” feature to look at the title of references as I come across them in the body of the manuscript. On average, I’m interested in downloading about 10% of these references to my personal library.

Although I love Skim, one feature I have not been able to figure out is how to highlight items in the bottom split screen. Thus, I’ve created a workaround. Before I start reading an article in Skim, I create a note called “Get Manuscripts” As I’m reading, I merely record the references number of articles I want to fetch in my “Get References” note. Because I create this note first it’s always located at the top of my Skim Notes. When I’m done reading the current article and processing my annotations, I retrieve the supporting articles I identified while reading. 

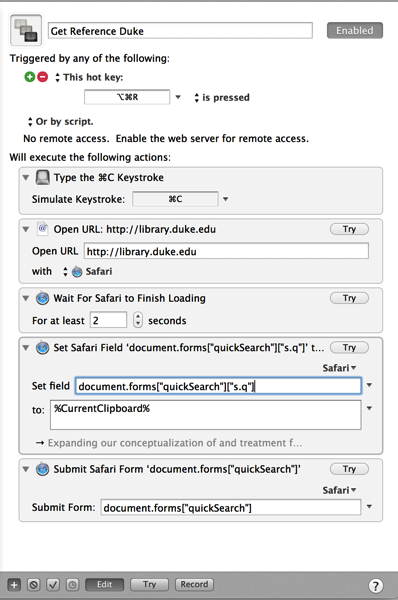
To do this, I use a phenomenal program called KeyBoard Maestro. Keyboard Maestro lets me type a single keyboard command to trigger an entire workflow. One by one, I work through my “Get References” numbers, highlighting the title of each corresponding article. After highlighting each title, Keyboard Maestro does the rest (invoked by Command-Option-R).

Keyboard Maestro automatically  (1) copies my highlighted text, (2) surfs to the Duke Library literature search page, (3) pastes the text string into the appropriate field, and (4) submits the search. Thus, with a single key combination, I am able to download the full text of supporting literature. Once I find the full text I'm interested in (usually a PDF), I save it to my Download Folder, where Hazel takes over and imports the paper into my Papers Library.

If I'm not ready to retrieve the articles, I create an Omnifocus Action for each to be collected at a later time.

My macro is not limited to Skim, it works with any text I’ve highlighted, be it on the web, in a manuscript, or somewhere else. Here is a picture of the programming, but obviously, you’ll have to modify it for your own favorite full-text repository. Enjoy!

Maestro Automate Full Text Retrieval


Addendum (January 14, 2014): If you’re searching at Duke, you’ve probably noticed the library changed its search interface. I’ve updated the Keyboard Maestro Script accordingly. It’s only configured to search for peer-reviewed articles. Download the script and import it into Keyboard Maestro (will only work for Duke Libraries).

Writing Workflows: Processing Annotations (All Roads Lead to Skim)

One of the great things about the internet is its ability to enable collaboration--workflows are never static, each of us builds on the work of others to enhance our own productivity. After my last post, Writing Workflows: Capturing Annotations to Enhance Scientific Writing and Knowledge Retrieval, I received a boat-load of comments, suggestions, and links. Thanks!I suggest you take a look at an entry in Aleh Cherp's excellent Macademic blog. In a recent entry,  a guest author discussed  limitations with the built-in annotation tools of Papers, Sente, and Mendelay. His preference for annotating manuscripts is the open-source Skim. I've been playing with Skim recently (especially some of the post-annotation processing tools). I used Skim in the past, but curtailed my use in order to simplify my workflow (doing everything within Papers2). Despite the rich annotation tools in Skim, I set it aside because of the extra steps needed to make Skim highlights visible in Papers (and visa versa).As pointed out in the comments section of my last entry, the Achilles Heel of my annotation workflow is the need to separate my highlights / notes file by hand (Papers puts out a single aggregate file with all highlights and notes batched together). Although there are scripts available to send Papers2 notes to DevonThink Pro, I could never get them to work properly. I'm experimenting with a modification to my previous workflow--one that will significantly speed up the process:

  • I highlight and make notes in Papers2 on my Mac or iPad as I discussed in my last entry
  • When I've finished annotating, I make sure the most current version of the paper is synchronized back to my Mac. I then "Export PDF File and Media" from the File Menu in Papers2 and save to a convenient location (I use my Desktop). 
  • I then open the document saved to the Desktop in Skim and choose "Convert Notes" from the File Menu in Skim (this results in all the embedded notes being converted to Skim Notes).
  • I open and select the "Inbox" of my Literature Database in Devonthink (this is the location the script will save my comments).
  • With Skim still open, I run the following SKIM PDF Notes to DEVONthink script I downloaded here.
  • I return to my Inbox in Devonthink where I now have individual RTFs for each highlight or note. 
  • I insert my own comments (if I have any) in each RTF file and save each file. I ignore the link the script generates.
  • If I have a comment I plan to cut and paste directly into a future project, I append my comment with the Papers Citation Index.
  • In DevonThink, I highlight then drag and drop all the RTFs (but not the duplicate PDF of the paper) to the "Supplemental" Tab of the manuscript in Papers (this copies each RTF into the Paper folder hierarchy).
  • Finally, in Devonthink, I Index (the first time) or Update the Index (all subsequent times) - NOT IMPORT - the folder. 

The SKIM PDF Notes to DEVONthink script saves me quite a bit of time--I no longer have to parse my comments by hand. Happy writing!