LiquidText PDF Reader

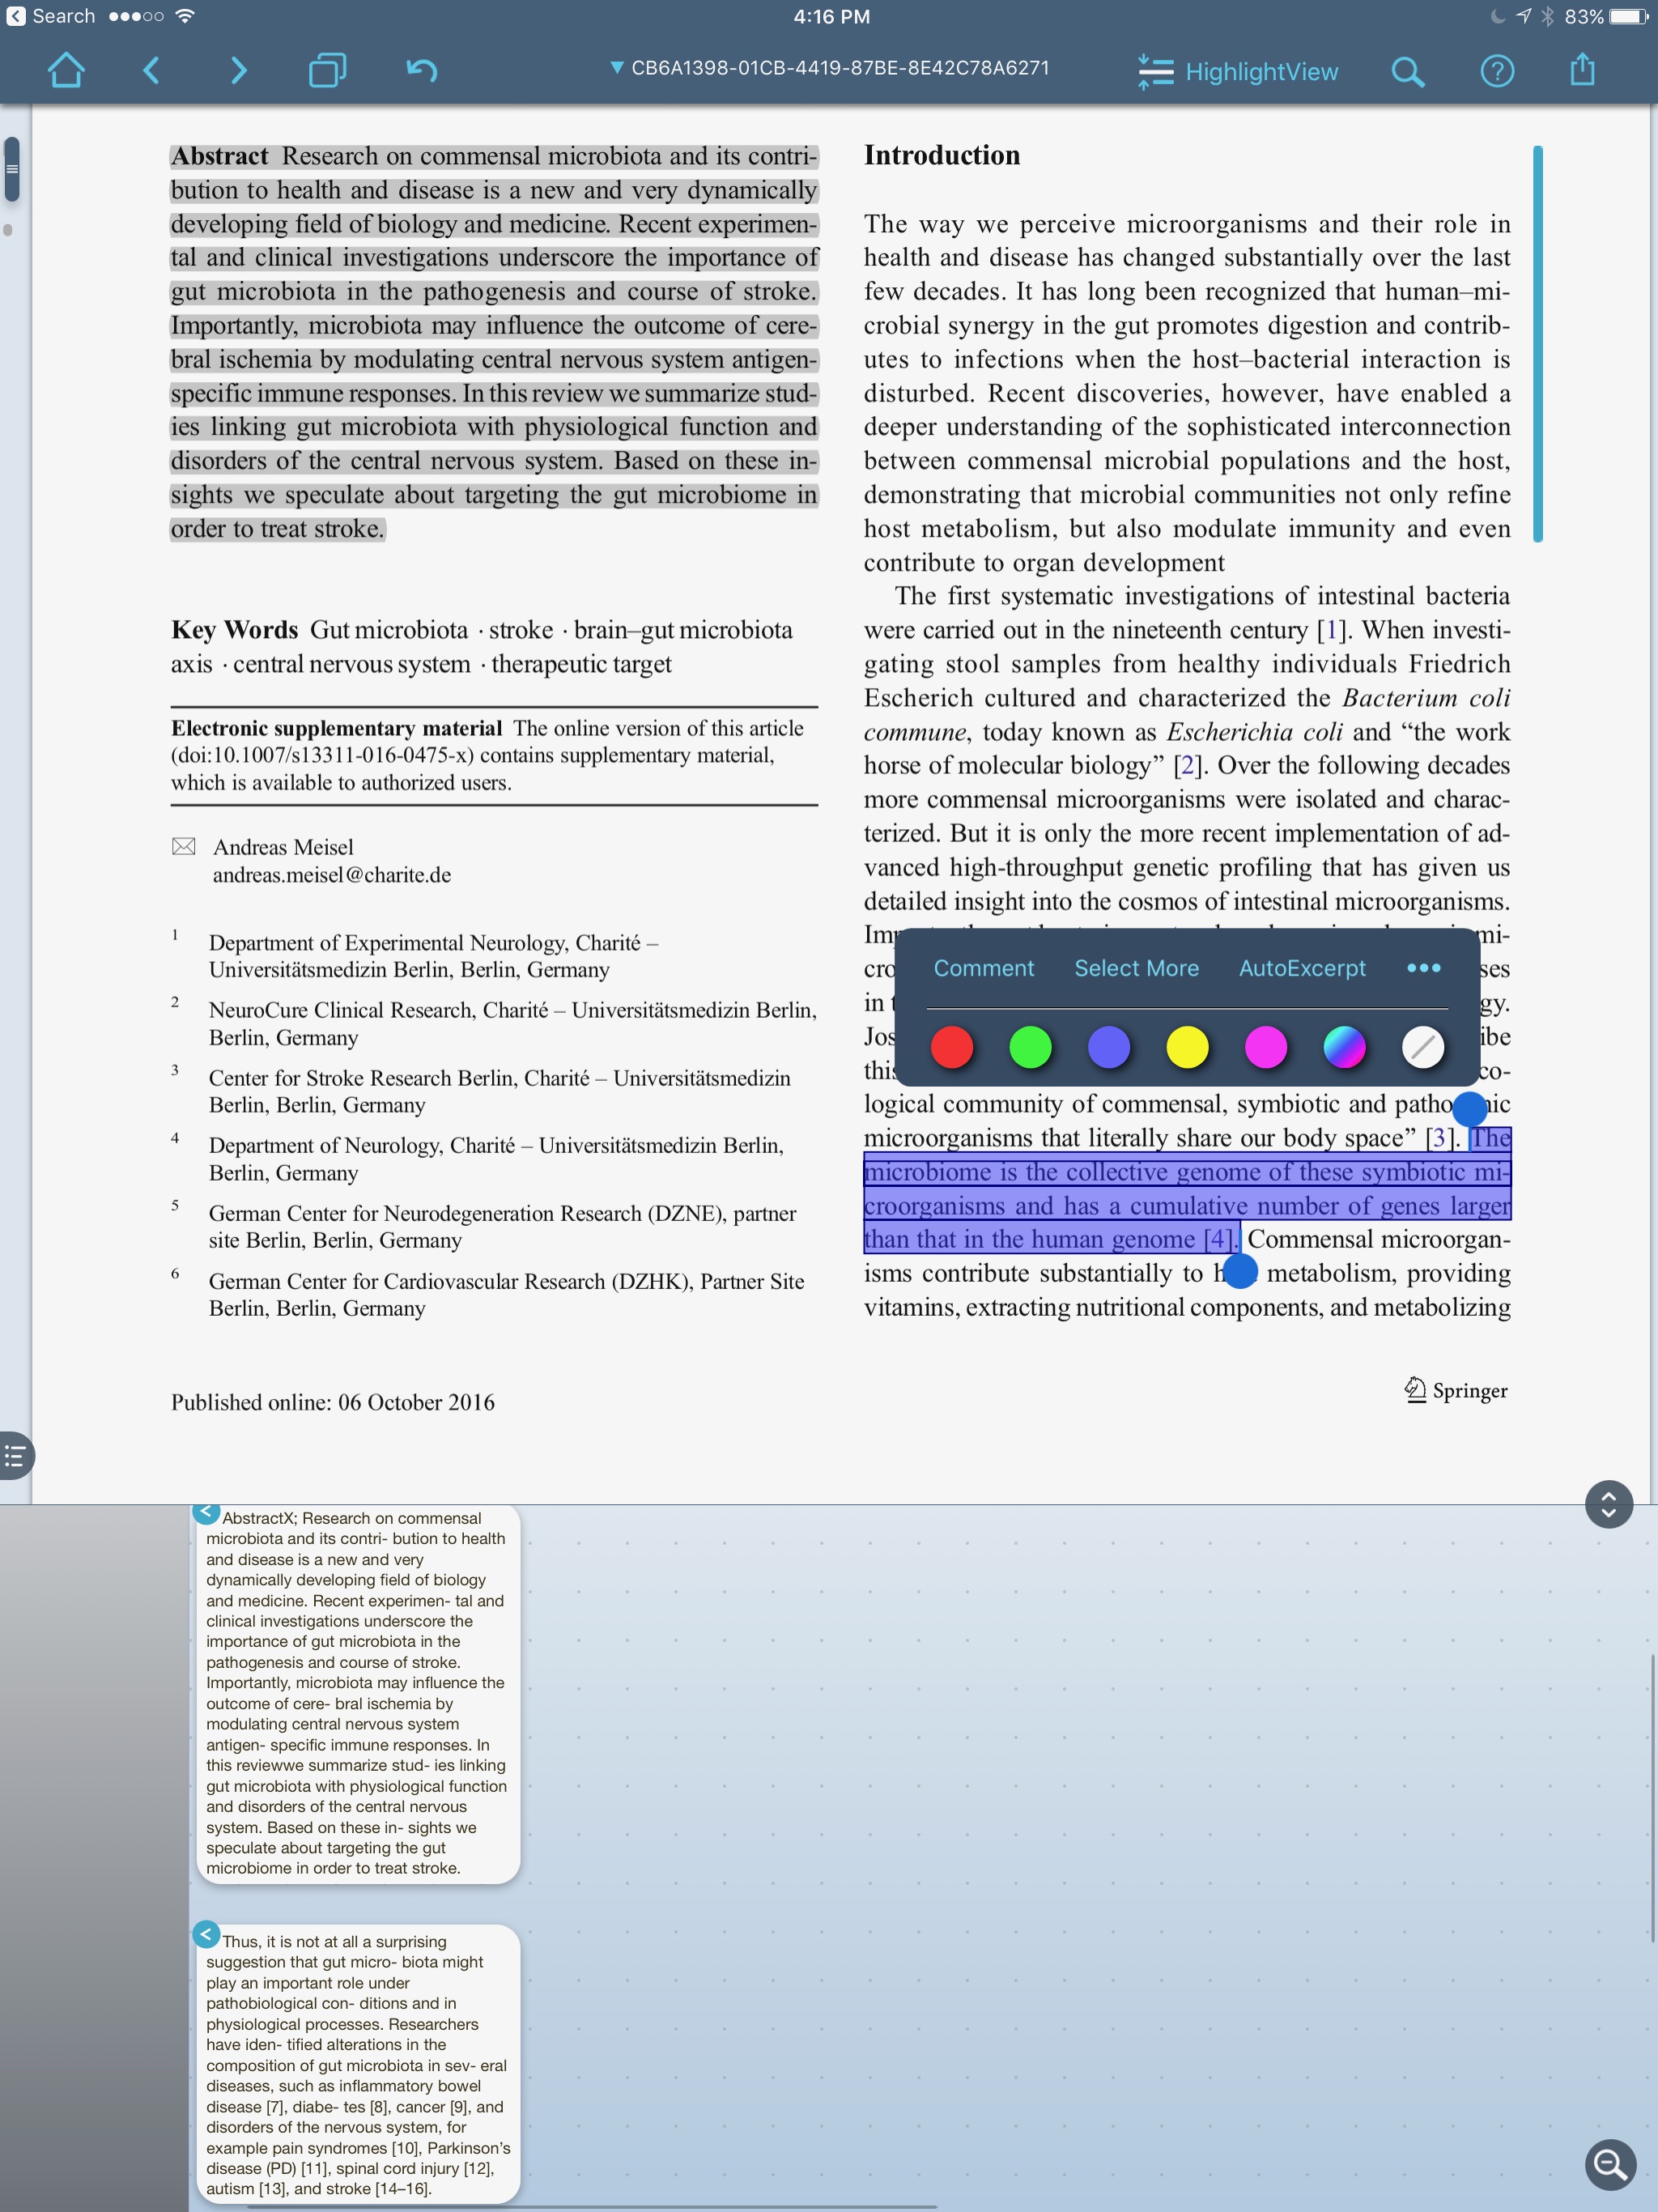
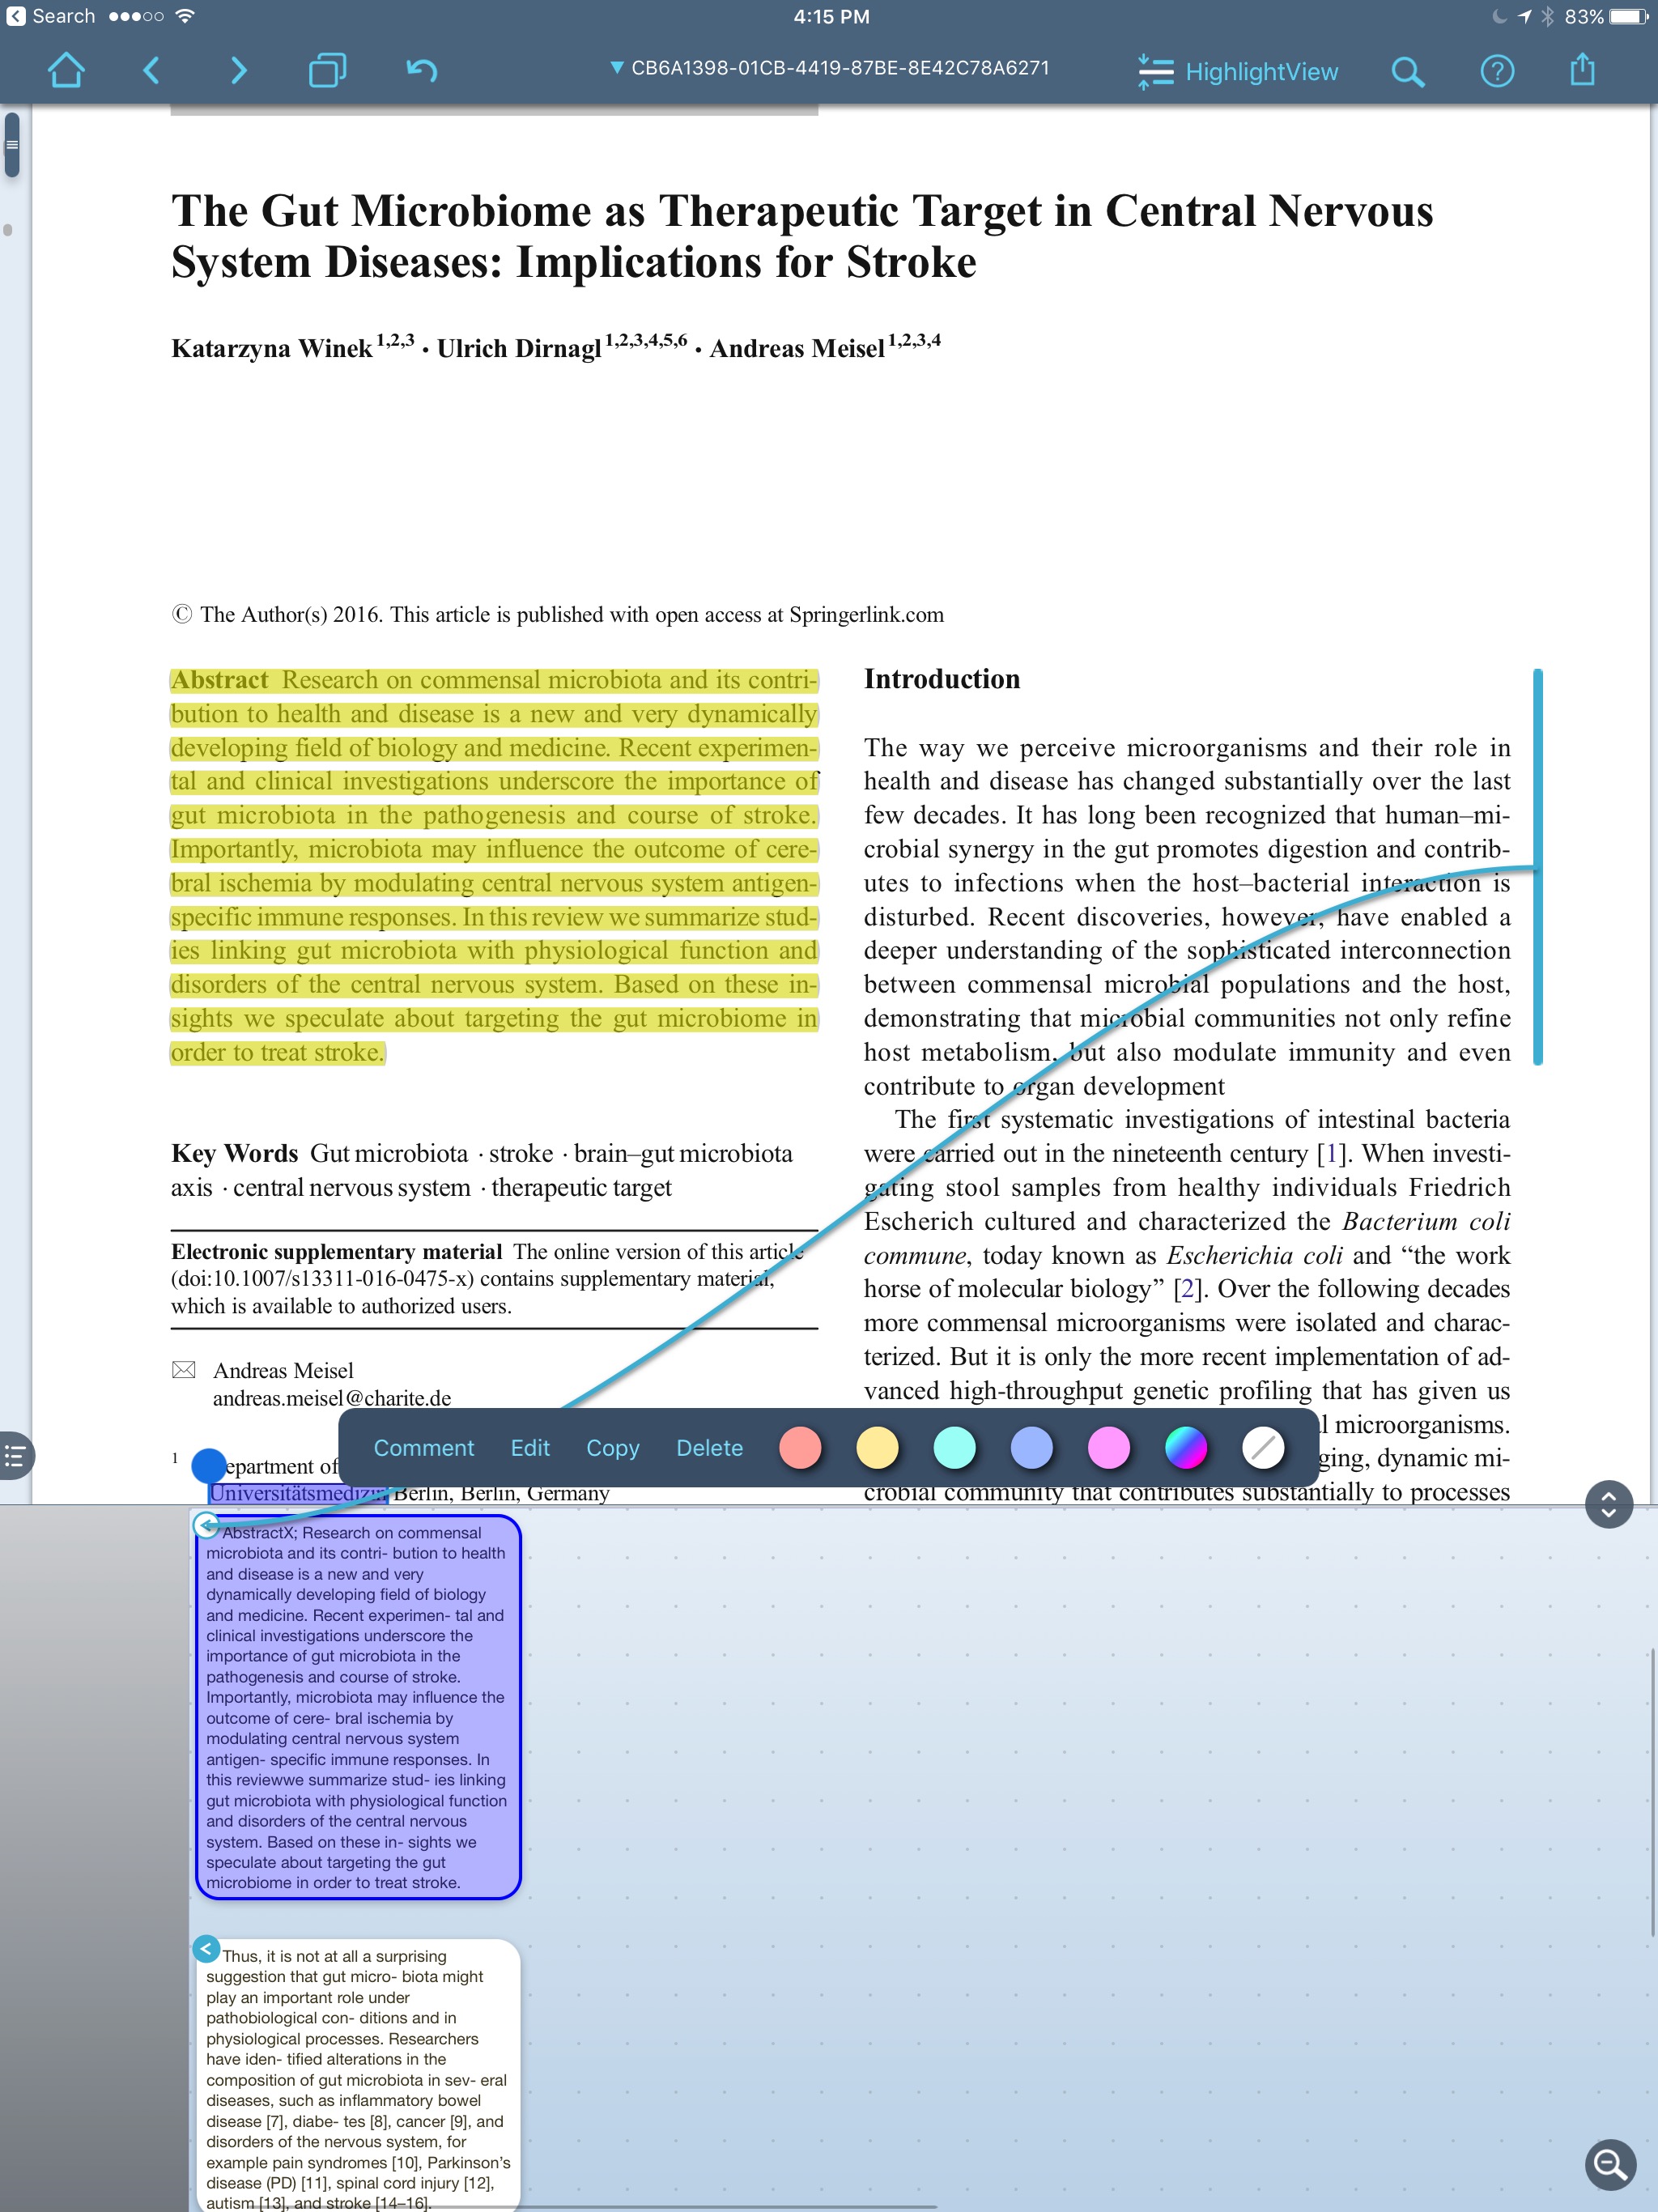
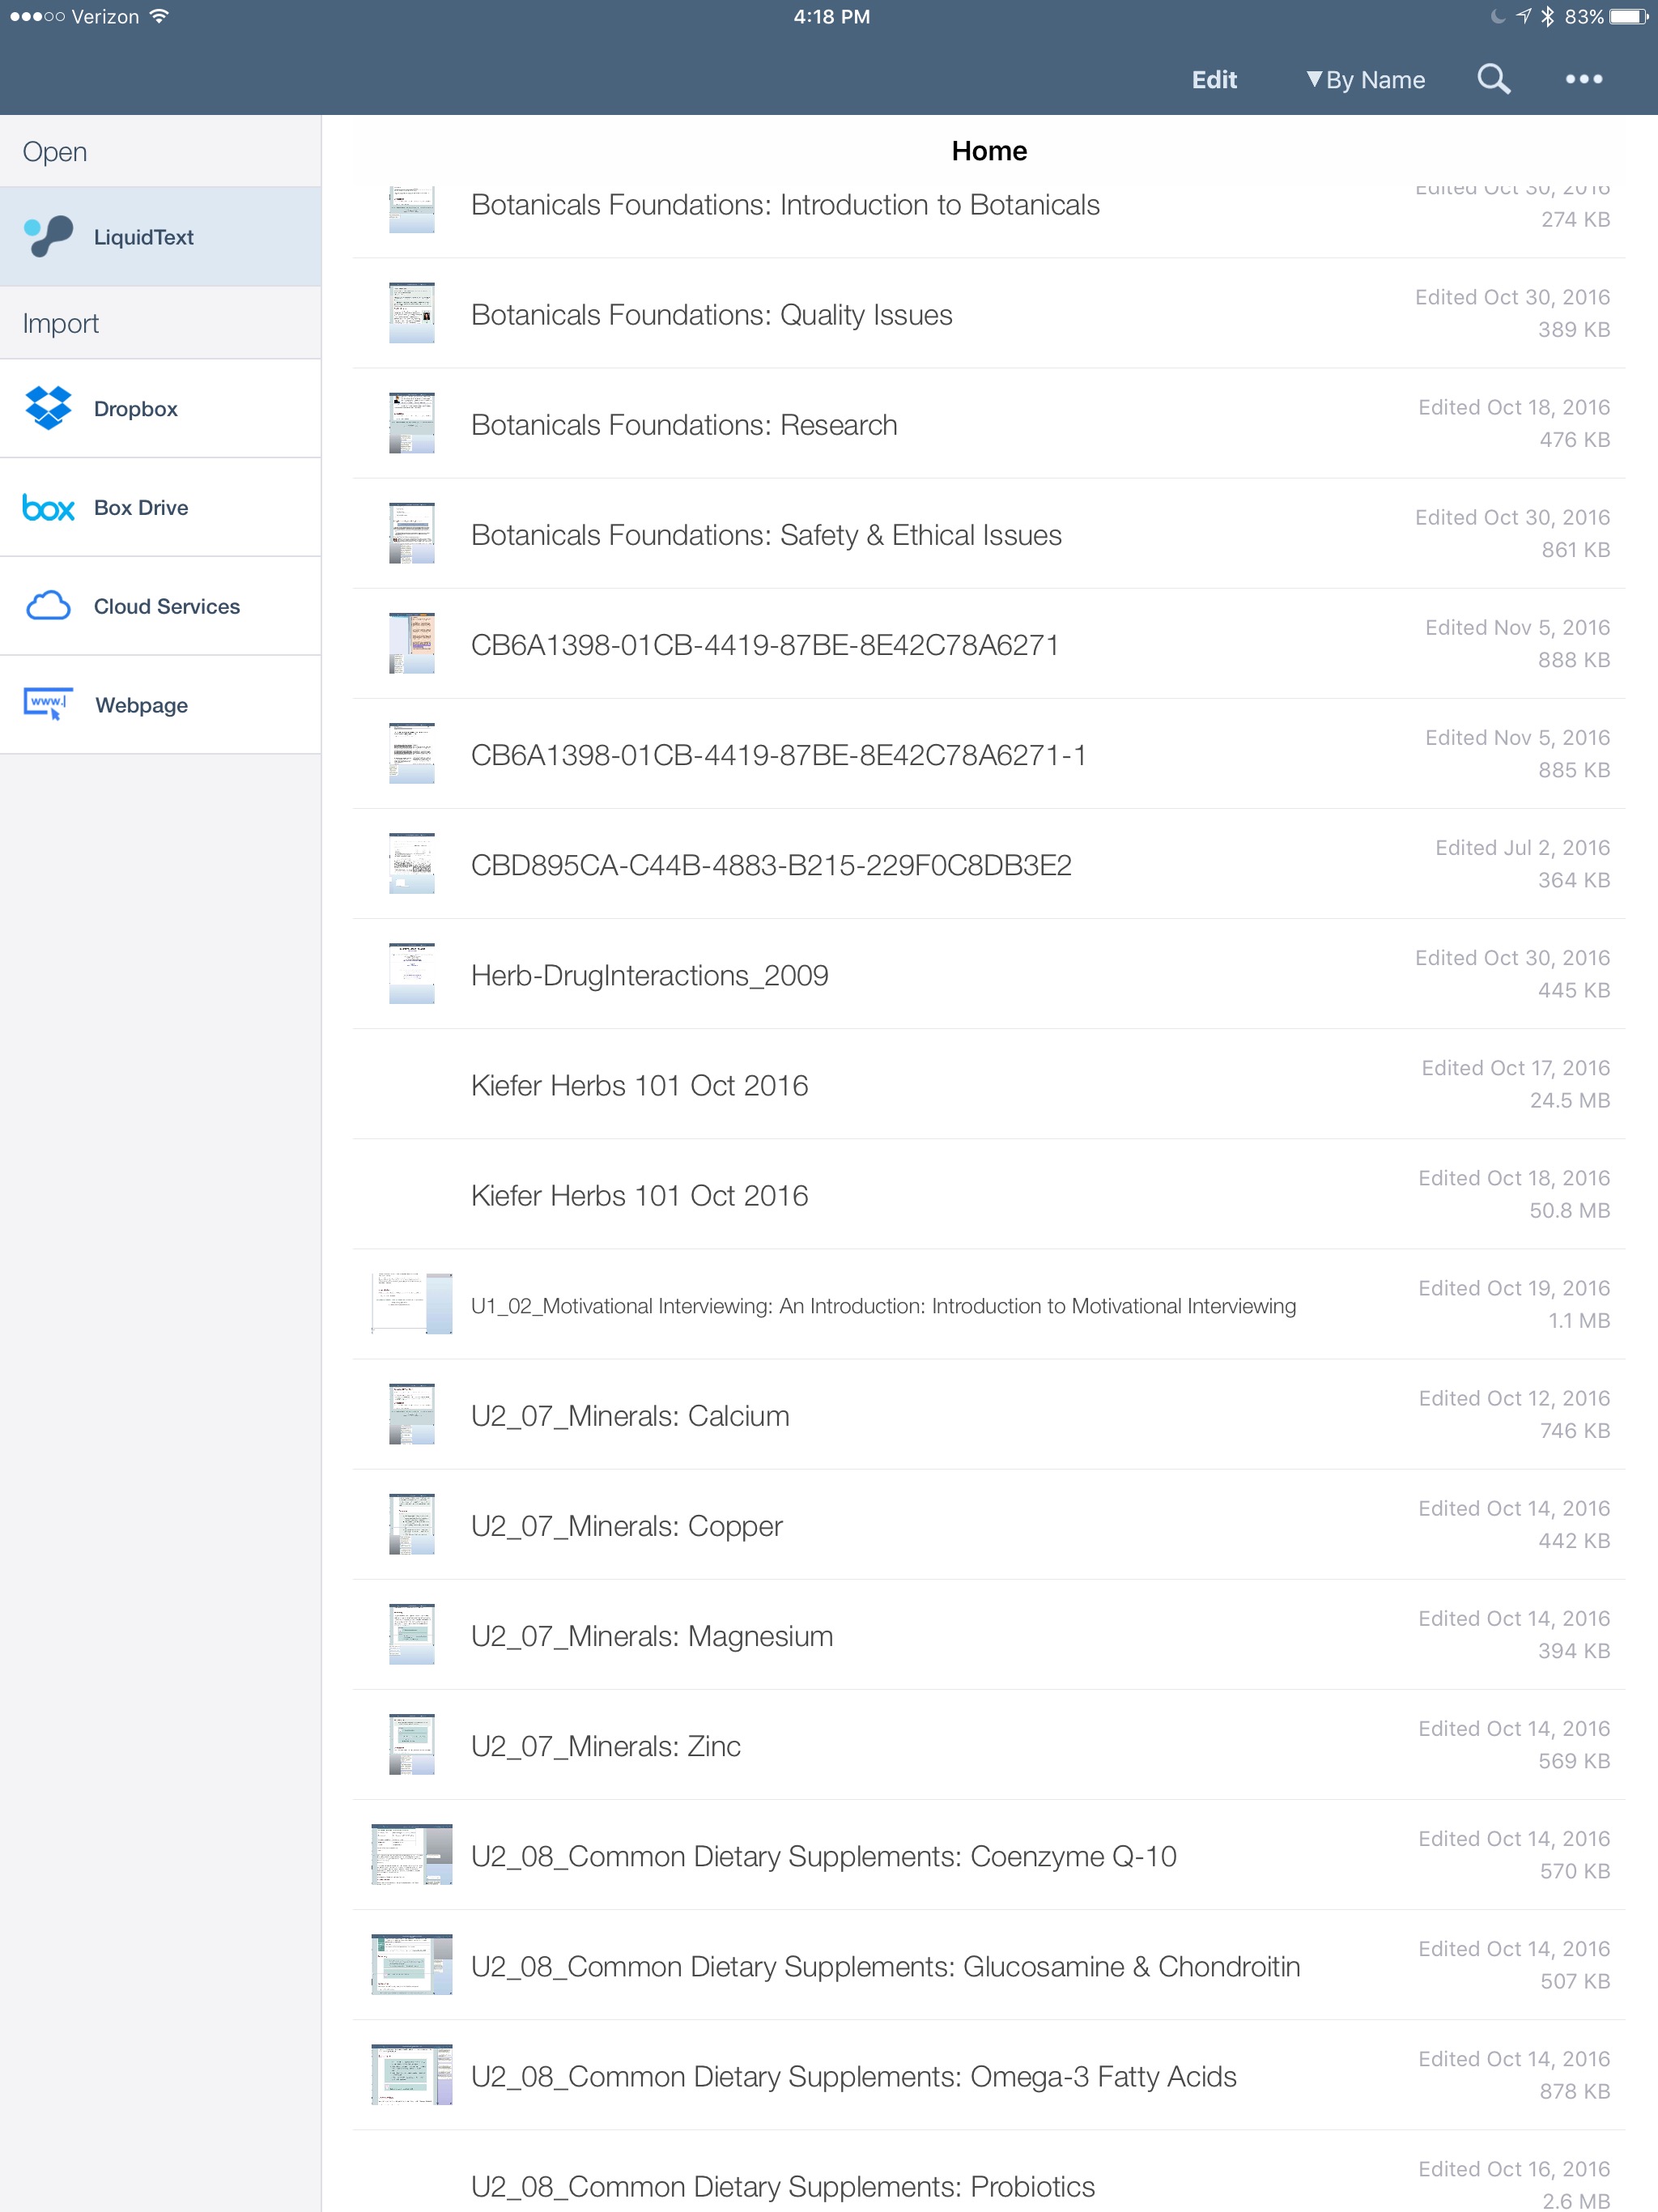
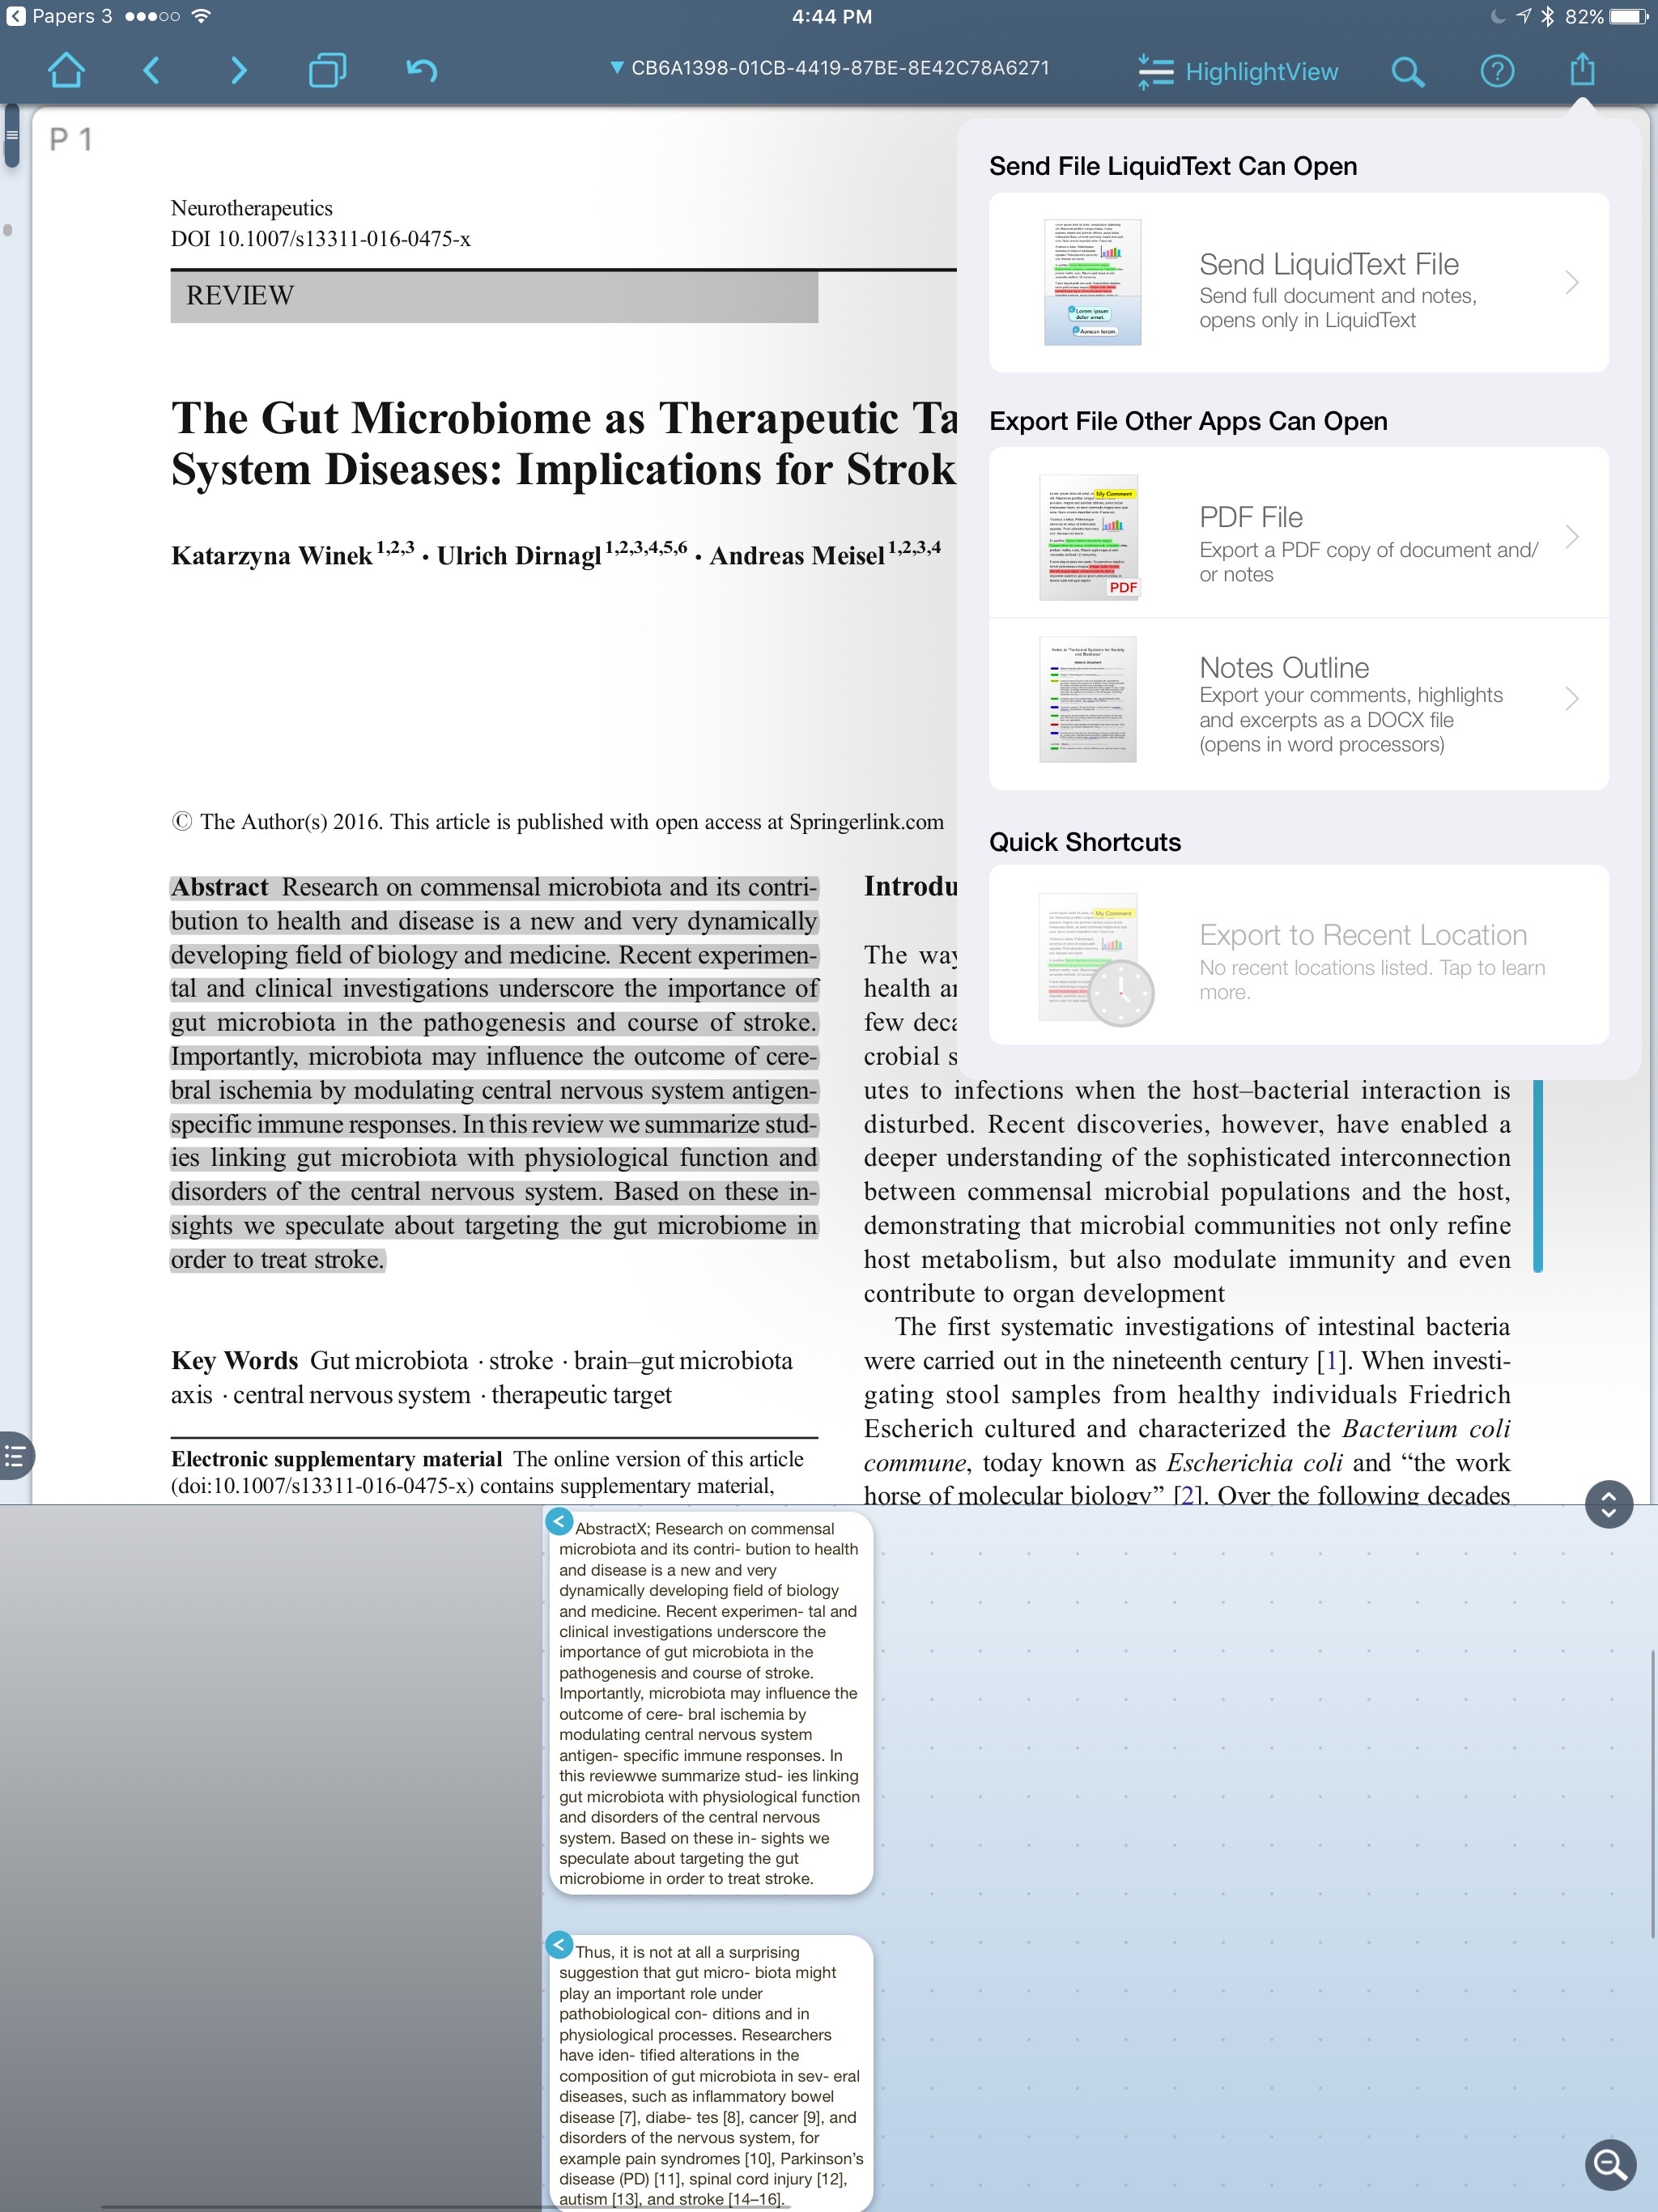
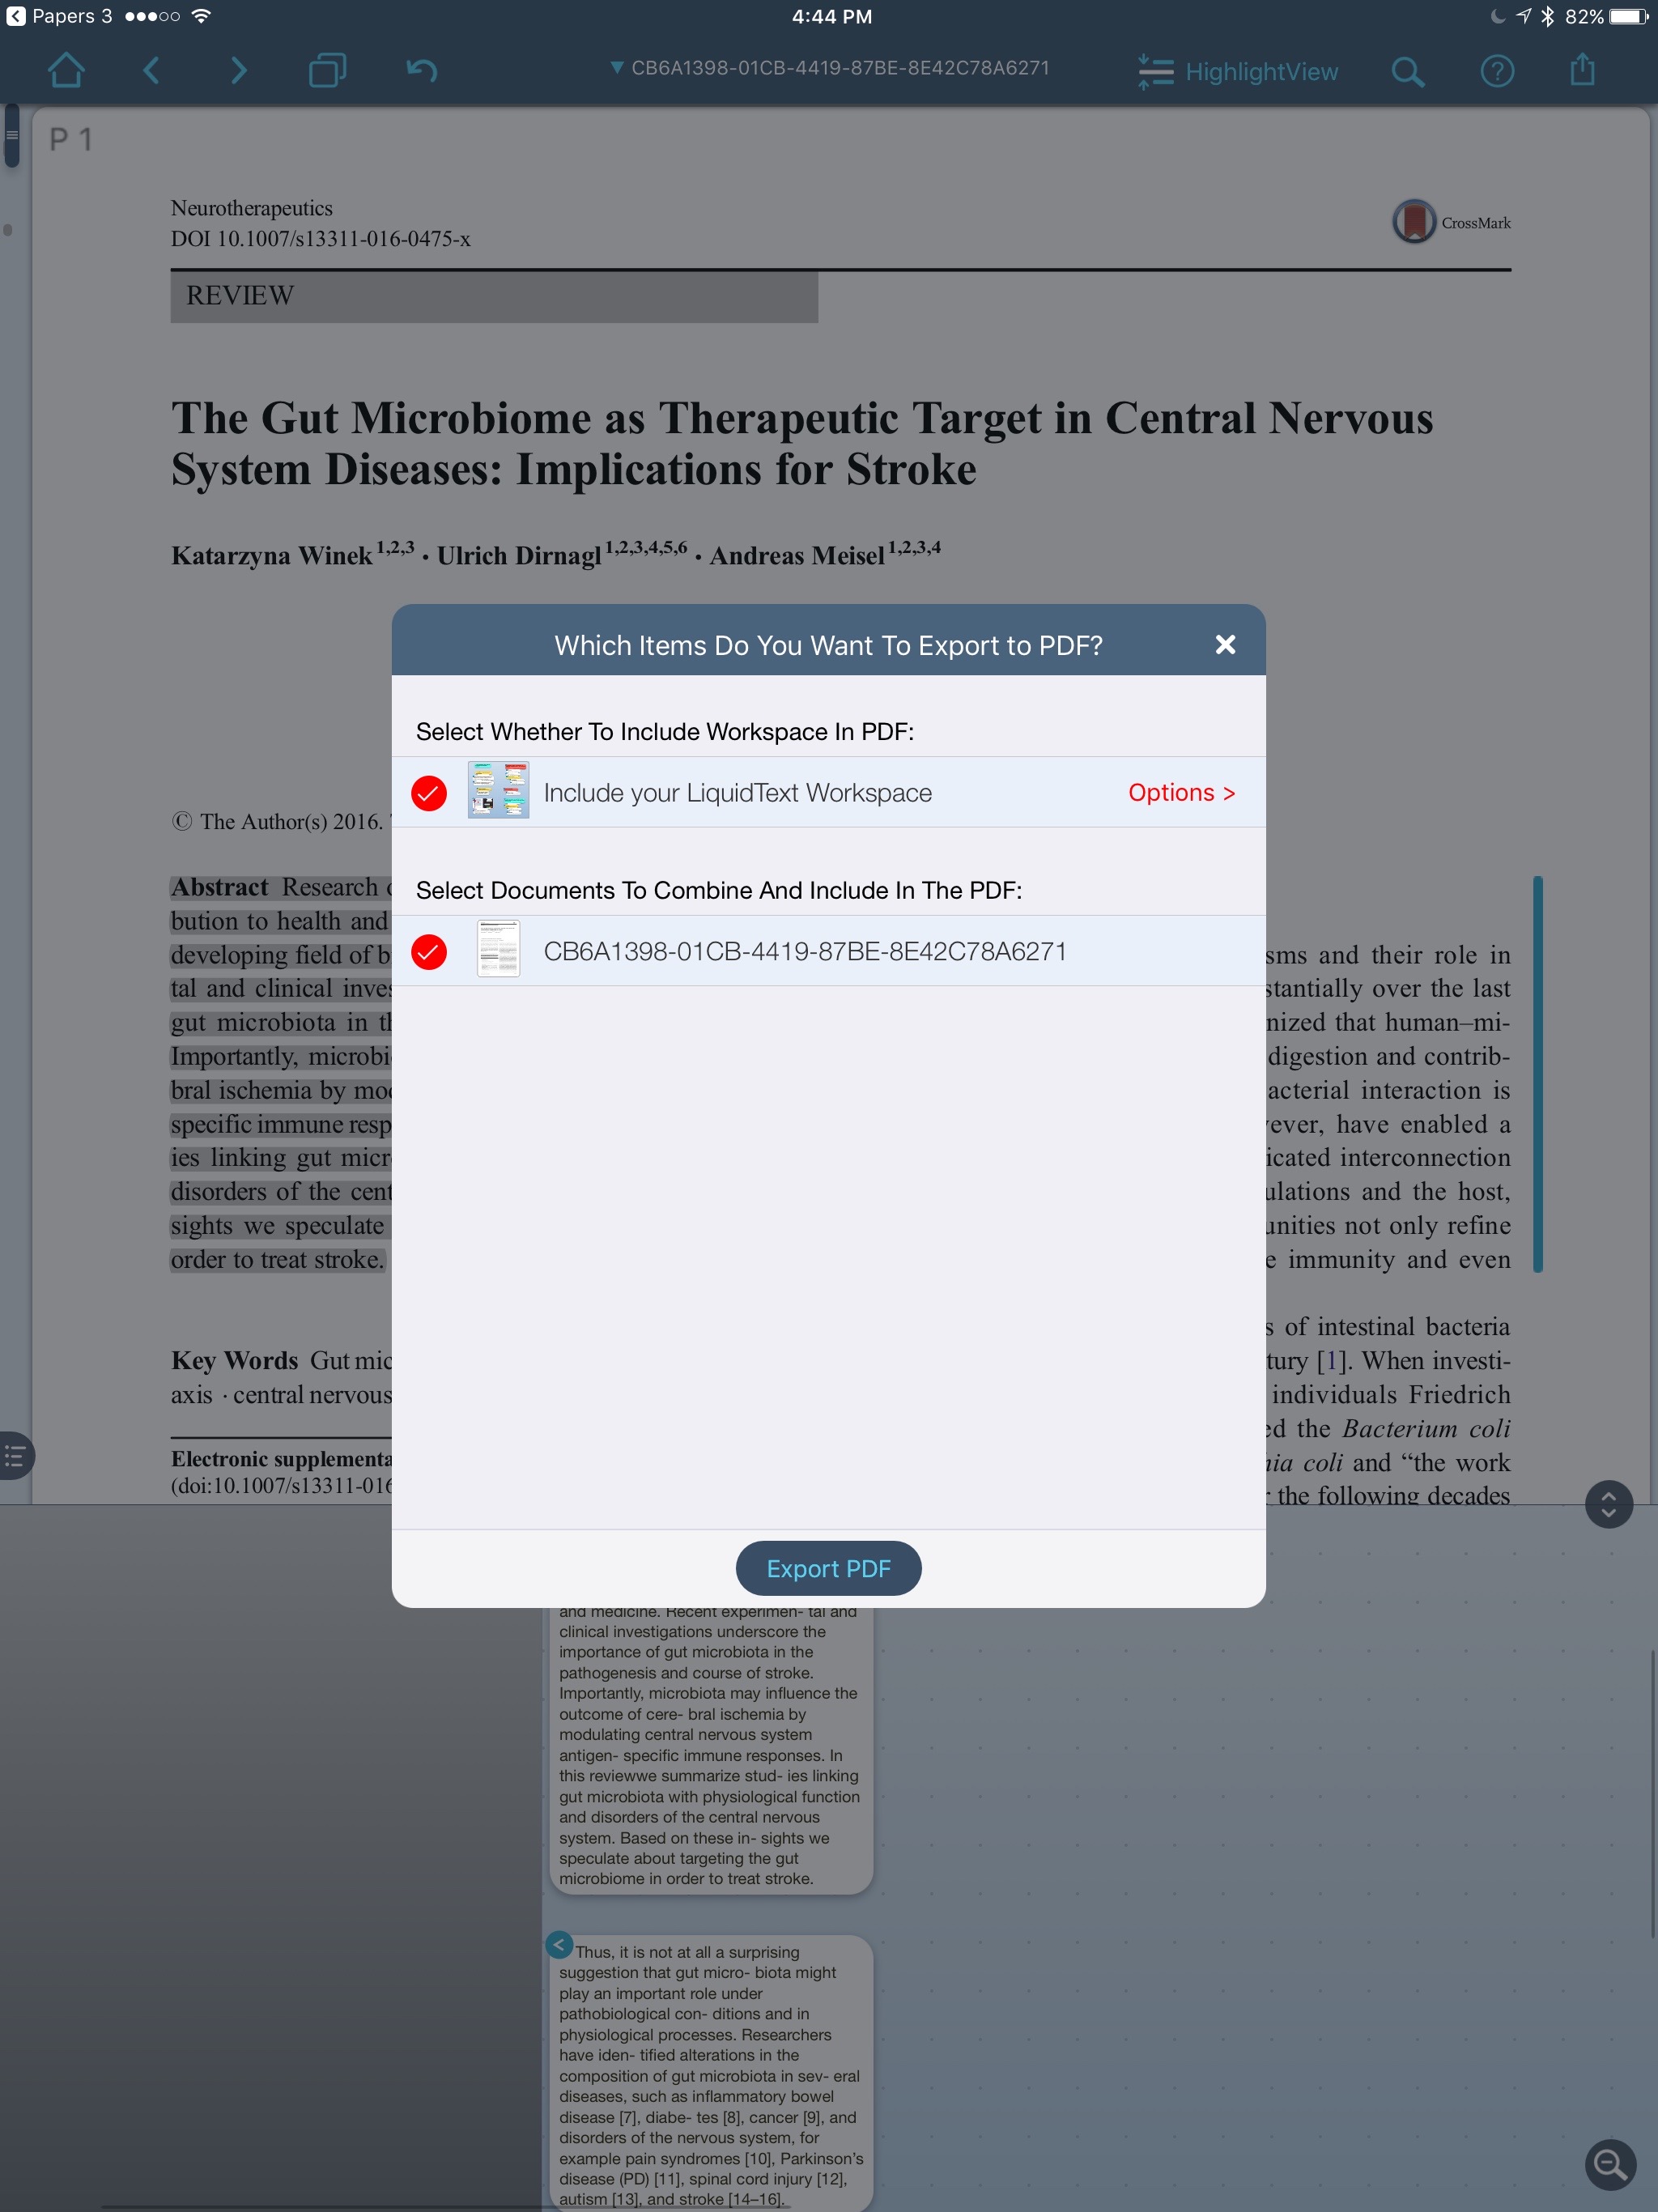
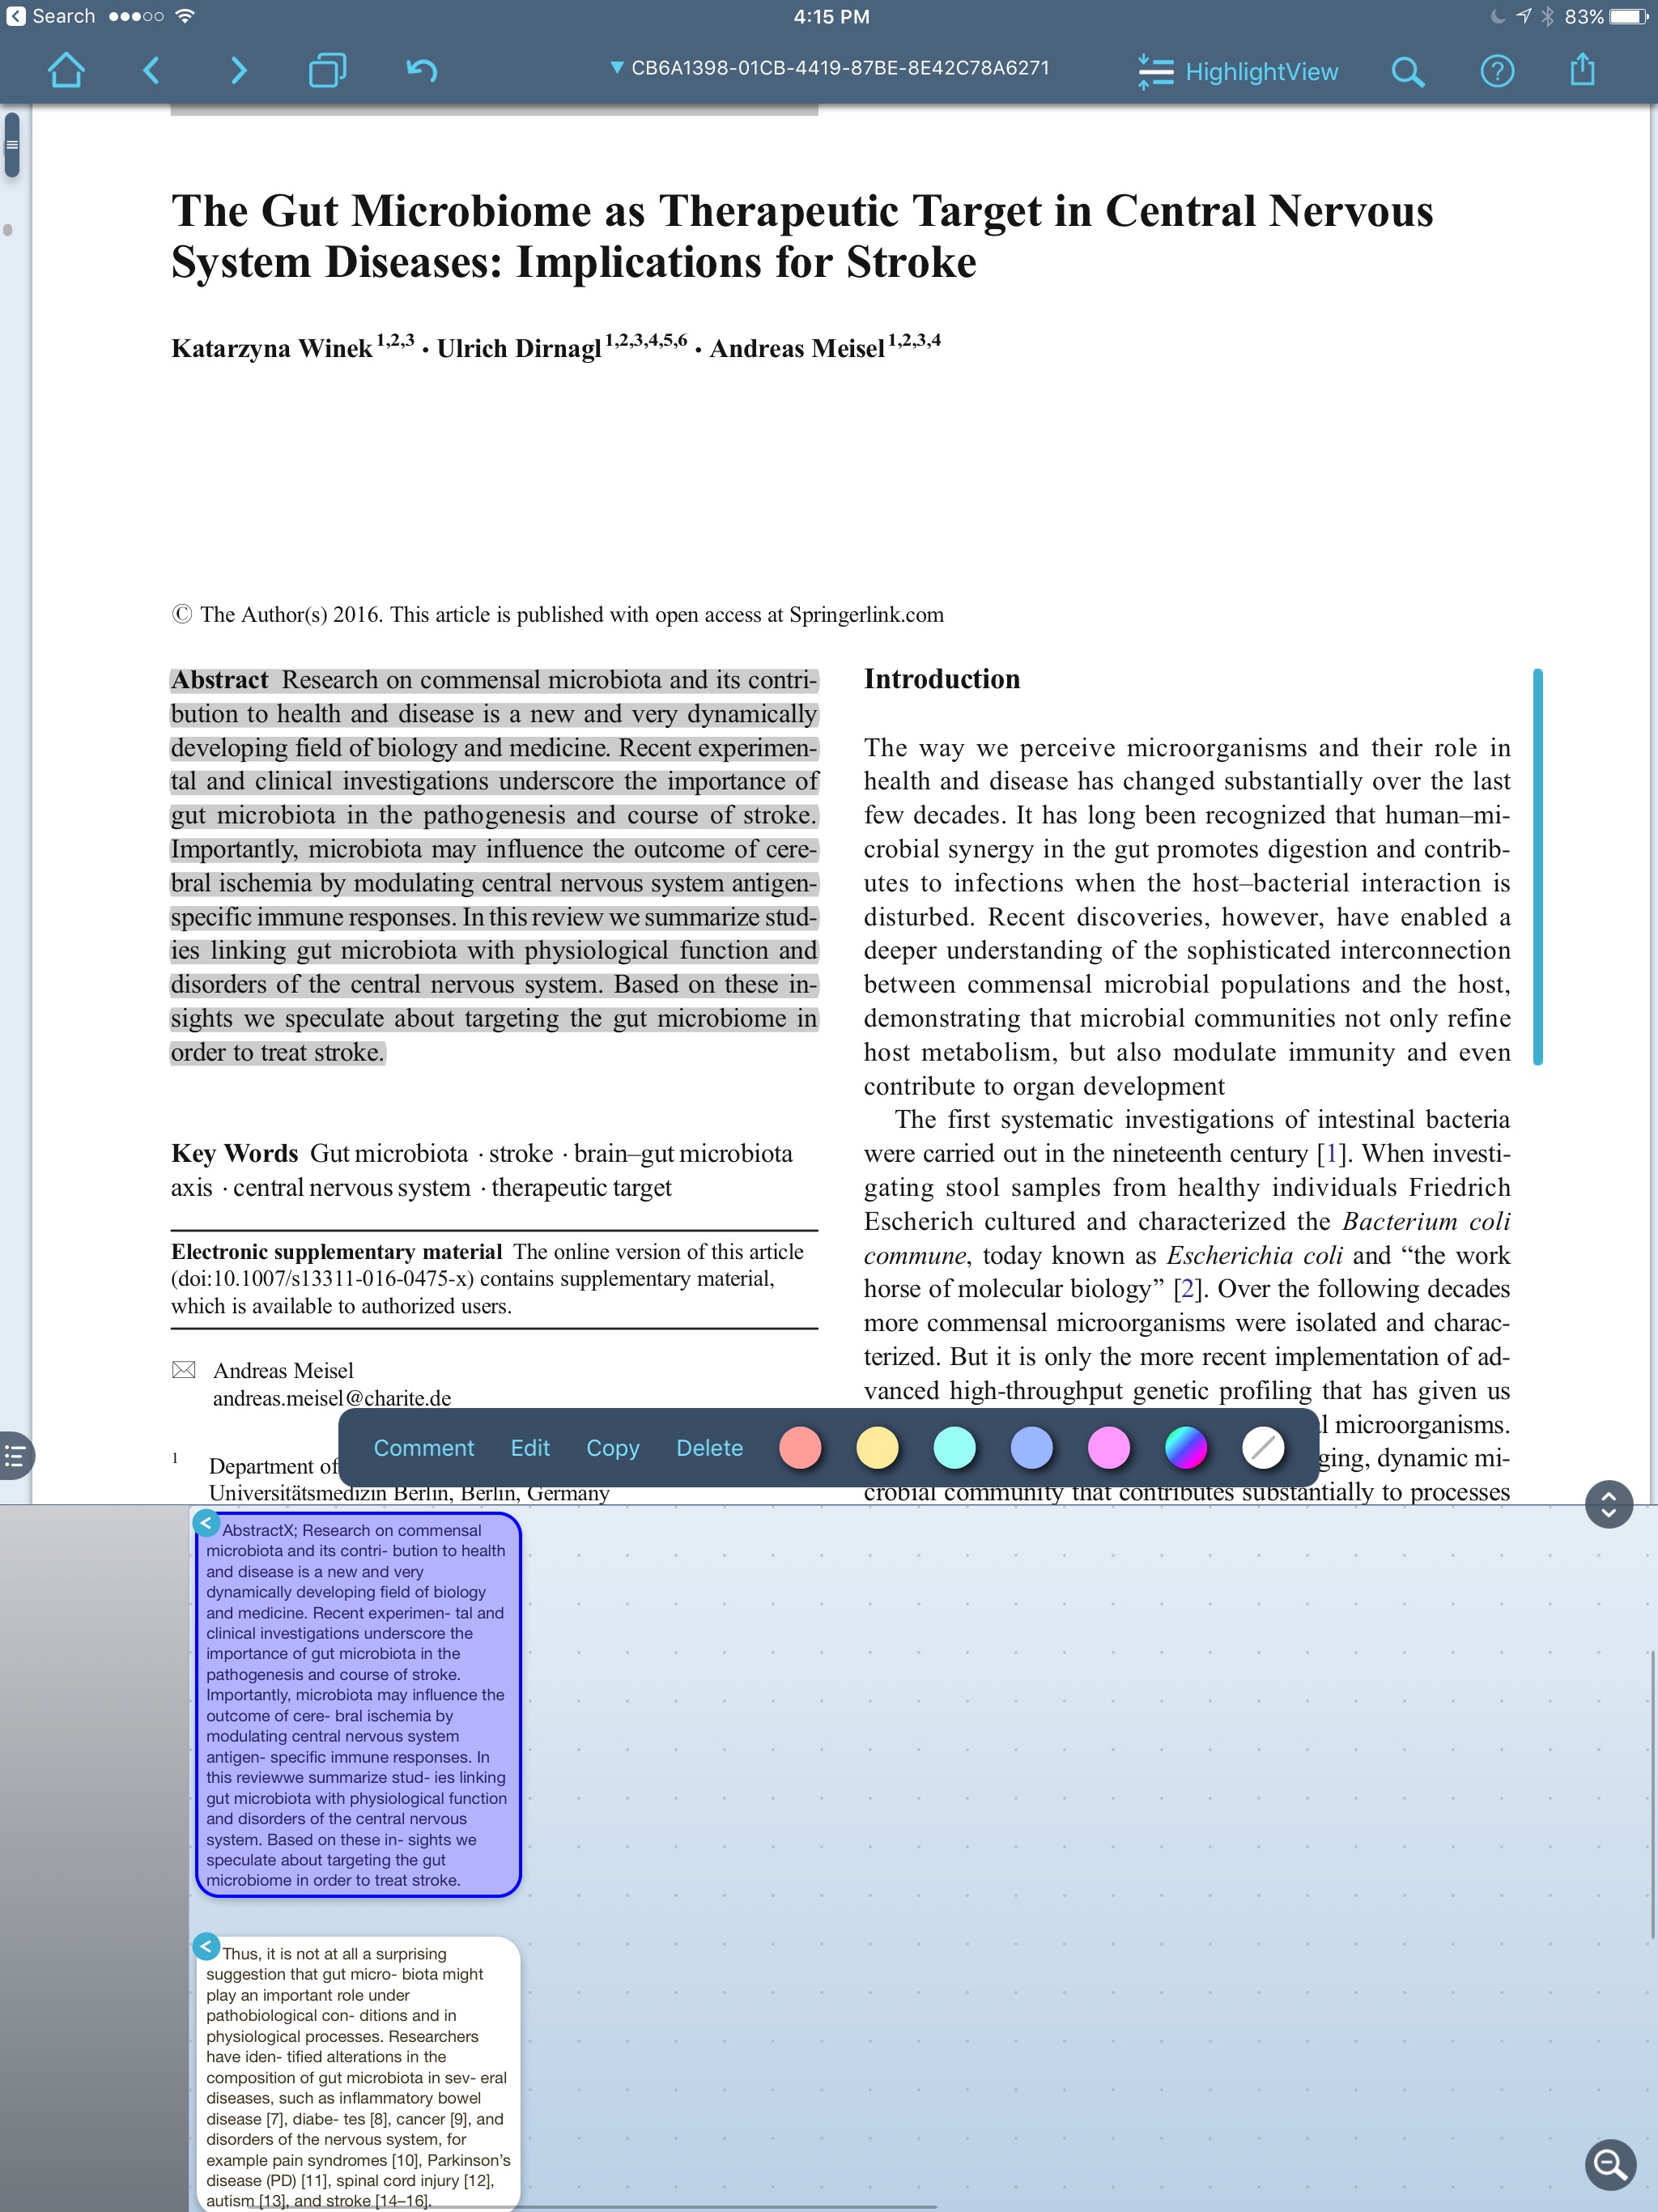
I have experimented with different PDF readers on my iPad. Over the past several months I’ve exclusively used a program called LiquidText.LiquidText has a unique, award-winning, interface that allows me to drag, drop, and manipulate text using my finger. LiquidText was named “Most Innovative iPad App of the Year” by Apple in 2015. LiquidText feels much more natural than any other PDF reader I’ve used on iOS--and I've used many. After highlighting with my finger, the exerpts / highlights / comments are extracted into their own area. The excerpts may be dragged around, linked, and repositioned at will.When reading and highlighting, I either drag text from the PDF into the notes area, or simply hit “AutoExcerpt” and the text is extracted for me. I can comment on the excerpted information.I can also view the place in the paper the highlight came from by merely touching the excerpt in the notes area.LiquidText reads and writes to a whole range of cloud services, but has limited range of export document choices.An Enterprise version is available for $9.99 that adds features like multi-document search and the ability to comment on multiple documents simultaneously. I've been using the app so much, I upgraded primarily to support the developer.There are a few features that are not (yet) available—the most critical for me is the inability to export highlights into a text file—LiquidText only exports highlights to Microsoft Word. This, unfortunately, is not compatible with my workflow for extracting highlights, but I like Liquidtext so much, I figured out a workaround using Skim—here is my entire workflow:

  • I set up a Dropbox LiquidText Folder to serve as a bridge with my desktop.
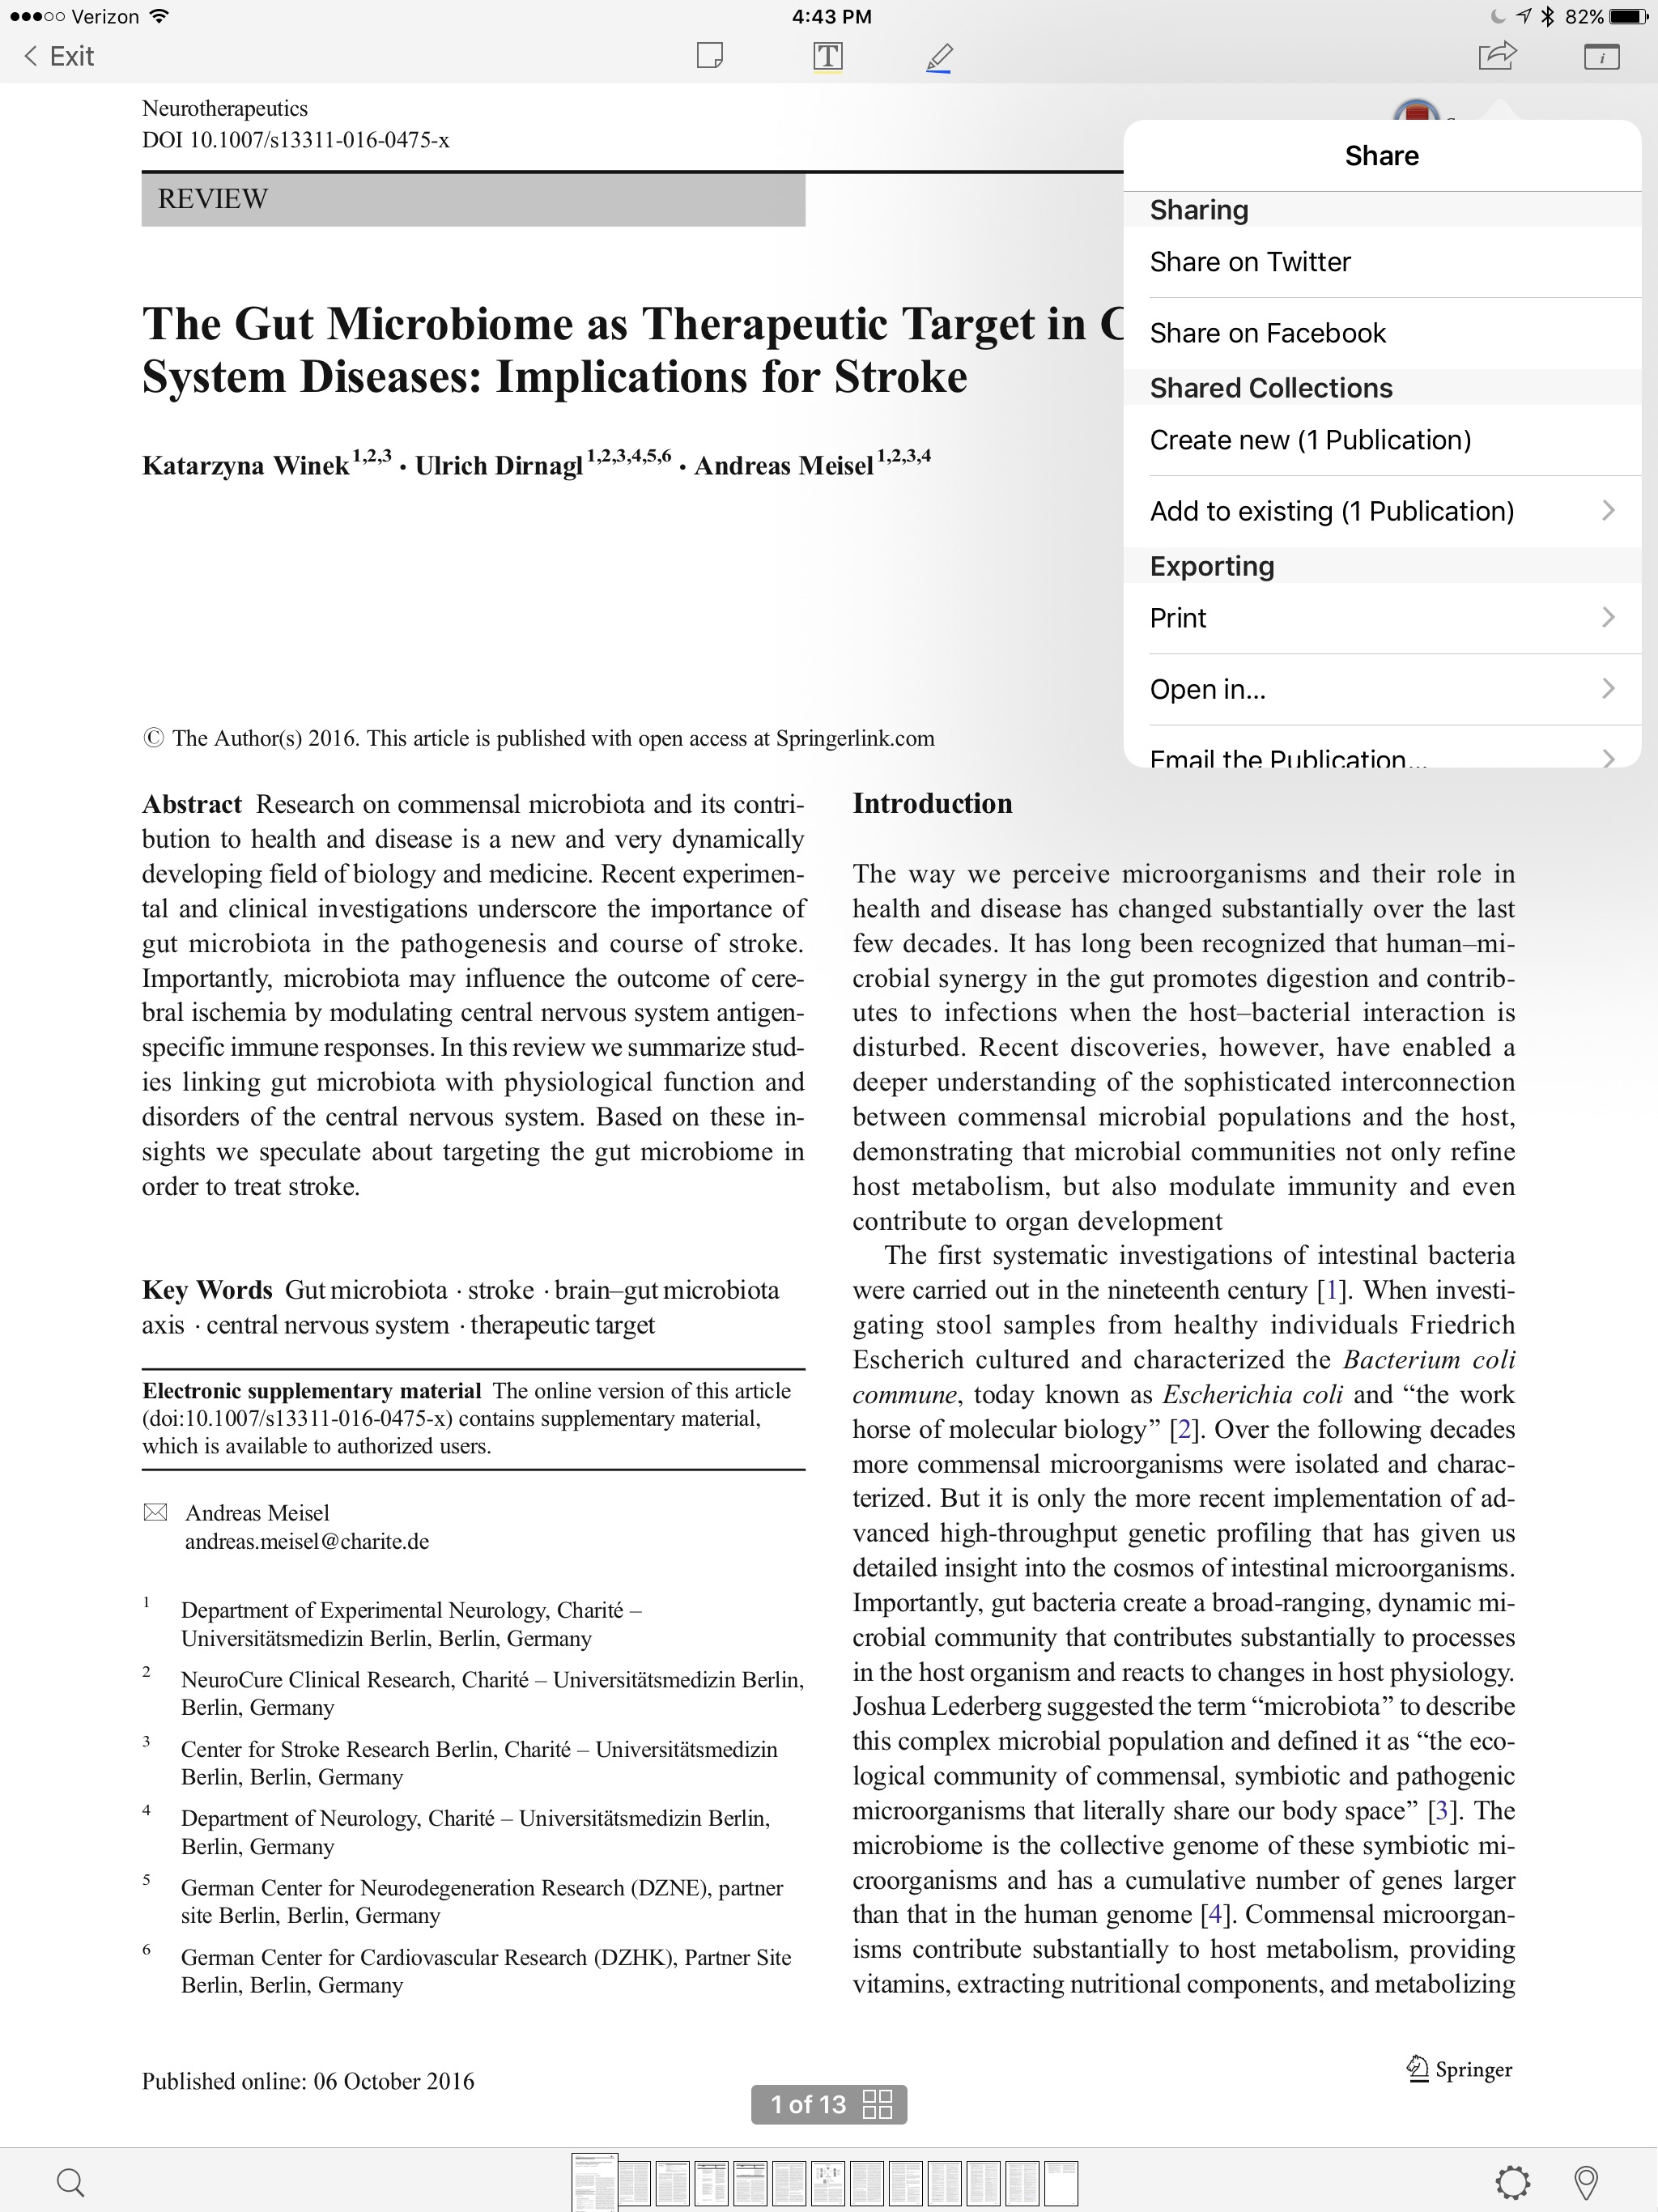
  • I open the entry in Papers on iOS.
  • From within Papers I select "open in". -this brings up action menu.
  • I open, read, and annotate in Liquidtext. This includes linking the full-text of references to each excerpt (as suggested by reader GH).
  • I export the PDF and Notes from Liquidtext to my Dropbox Folder.
  • When I get to my Mac, I open the PDF in Skim.
  • Under the File Menu in Skim, I choose “Convert Notes” making my highlights into Skim Notes.
  • I then process the annotations as discussed in this blog entry.
  • (If you want to take the time on your desktop you can also replace the Papers PDF with the LiquidText highlighted version).

Give Liquidtext a try and please let me know what you think.

Launcher-An End to The Home Screen Real Estate Dilemma

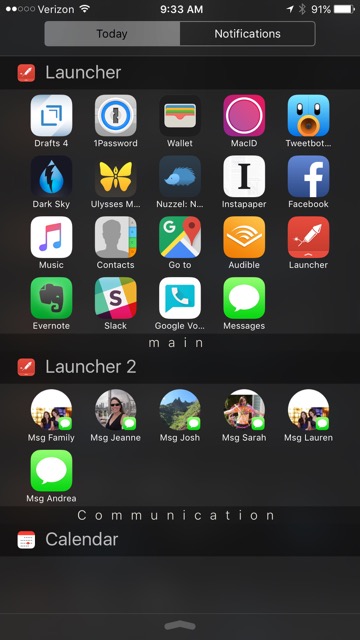
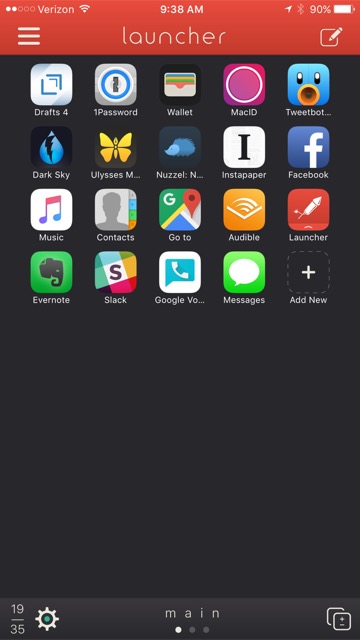
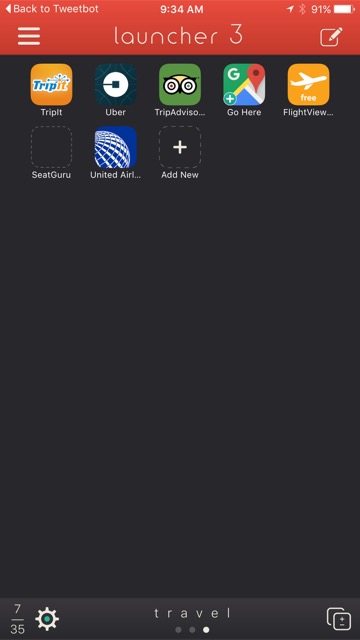
Although I love the real estate of my iPhone 6 Plus, one of my ongoing dilemmas has been deciding what applications to keep on my home screen. I dealt with the dilemma by creating a series of folders. I never liked this solution since it looks cluttered and necessitates several clicks to get to any app.I recently rediscovered Launcher. Launcher gives one-click access to my most commonly used apps. Launcher works by installing widgets on the Notification Page of iOS (accessible by pulling down the menu from the top from any page). Launcher lets me launch apps, build communication shortcuts, access web pages, and much much more.I’ve built widgets for my most commonly used apps, clinical apps and links, texting and calling my family, and travel. I can move these launchers in and out of my access bar depending on the situation. For instance when I'm traveling I move my travel widget higher on the Notifications Page.I found this application incredibly handy. It's changed the way I configure my home screen. Spending the $2.99 to unlock the Pro features is more than worth the price.

Writing Morning Pages with an iPad Pro

A couple of months ago, I was feeling the age of my first generation iPad Air and decided I needed to upgrade to an iPad Pro. I was torn between the larger 12.9 inch model and the smaller 9.2 inch model. Although I was attracted to the portability of the 9.2 inch version, in the end I bought the larger model. I decided to go with the larger model for a variety of reasons: 1. When reflecting on how I used my technology, I found when I had a task to do, I'd often forgo the iPad Air and just use my iPhone 6 Plus, 2. I wanted the best support for my extensive use of the Duet App (the larger screen giving me more portable dual screen real estate), 3. It was becoming increasingly difficult for me to read and annotate PDFs on the smaller screen.I purchased the iPad Pro (along with a Logitech keyboard and Apple Pencil) and have not looked back. One of my favorite unexpected uses of the iPad Pro is the ability to write with the Apple Pencil. In addition to Mindfulness and meditation, I am a true believer in the process of Morning Pages, a journaling technique that espouses the power of long-hand writing in the creative process. Up until the time I bought my iPad Pro, I was using a LiveScribe Pen to do my daily writing. No more!I have been experimenting with various writing apps including: GoodNotes, Penultimate, and Notability. Despite the more feature-rich environment of GoodNotes and the versatility of Notability, I find myself favoring Penultimate, primarily for its ease-of-use and automatic Evernote synchronization. I'd love to hear what your favorite handwriting app might be, and how you're using the handwriting capabilities of the new iPads.If you are not yet writing your own Morning Pages, I hope you'll give it a serious try.

Ulysses iOS, Storyist, and Scrivener

I’ve had the pleasure of working with the Ulysses Beta iOS App for iPhone over the last few weeks. As with the Desktop version, everything is very well thought out. The iCloud synchronization works seamlessly. I’m a fan!In a few short weeks, Ulysses iOS app has changed the way I write. For my shorter writing projects (e.g. blog entries, letters, memos, etc.), I no longer need to sync individual text files to a DropBox Folder (as I discussed in this entry). Instead, I dictate my text directly into Ulysses. I can mark up the text on my phone, or wait to return to my desktop. All my text and markdown is synchronized between all my devices.For longer writing projects (e.g. manuscripts and grants), I will continue to use Scrivener with DropBox sync. I impatiently waiting for the iOS version of the app so I can ditch syncing text files. As I was looking to see if there was a projected timeline for release of iOS Scrivener, I found this article by Ricardo Sanchez discussing the integration between Storyist and Scrivener. Storyist sounds like what I’ve been waiting for in a mobile solution for Scrivener. I’ll check Storyist out and report back.

Writing with my Voice

In my academic roles in the Duke University Human Simulation and Patient Safety Center I write a great deal. I write manuscripts, grants,white papers, and a whole host of other material. I’ve read the most efficient way to write a long document is to spew everything into a draft as quickly as possible, then go back and edit.Typing slows me down. The fastest way for me to “write” something is with my voice. I find it easier to adhere to this ‘draft first’ rule when I dictate using my voice rather than typing out a draft on my keyboard.Why is this? When I type, I tend to correct errors as they occur. Even worse, I try to polish each sentence on the fly (rather than powering through the entire document at one time). The constant editing interrupts my thoughts and makes slogging through an whole first draft extremely tedious.Lately, I've been using a workflow that takes advantage of the native iPhone’s dictation feature to “write.” This workflows has sped up my writing significantly by forcing me to keep moving forward while allowing me to write anywhere/anytime.This workflow is relatively easy to set up. Here is the software you’ll need.OmniOutlinerOmniOutliner is, you guessed it, an outlining program. Before I write anything, I use OmniOutliner on both on my iPad and on my Mac to plan my document. The Omni Group recently added the ability to sync to iCloud (currently a beta feature). Universal access to my outlines allows me to draft and rearrange my outline on the fly, regardless of location.ScrivenerThe next piece of software is Scrivener for Mac. Scrivener is an essential writing programs. That’s right, essential! If you don’t use Scrivener yet, stop reading and download the software right now.One of the advantages of Scrivener on Mac is it allows me to write in chunks. I can start writing in the middle of my project. When I sync the Scrivener project to Dropbox, I end up with a number of text files (each representing one ‘chunk’ of the Scrivener Project). Being able to write non-linearly from anywhere allows me to complete a draft very quickly. I am able to knock out sections of a document while in my car, walking between meetings, or anywhere else the urge to write hits me.Chunks of text in Scrivener may be moved around ad nauseum. I take advantage of the ability to move things around quite frequently. If I don’t like what I’ve changed, Scrivener has built in version control , so I can revert back to past drafts.Scrivener exports pieces of the project as individual files. Scrivener puts all these files in a “Drafts” folder inside the folder of your choice. These files can be txt, rtf, or other formats. I use text since I write in Markdown.DropBoxI set up a folder in my DropBox hierarchy called “Writing Sync.” It is here I synchronize my project between Scrivener and Editorial. Each new project gets its own folder.EditorialEditorial is a phenomenal text editor for iOS with a slew of built in features. Editorial allows me to edit documents written in Markdown and has a wholebunch of other features that makes it my go-to document editing software on iOS. Editorial, unsurprisingly, syncs with DropBox. I have Editorial point to my  “Writing Sync” in Dropbox.Now that I’ve discussed the software I use, let’s set everything up.The WorkflowThe first thing I do is draft my outline in OmniOutliner. I typically do this on my iPad or my Mac then rearrange the outline until I'm happy. Once my outline is complete I export it as an OPML file.I create a blank Scrivener project, then import the OPML file into Scrivener. Importing the OPML populates the Scrivener project, preserving the hierarchy of the outline. Each bullet of the outline receives its own individual chunk in Scrivener.The next step is to set up synchronization of the Scrivener with Dropbox. Under the File Menu, I go to Sync->With External Folder….I make sure the back up before export box is checked and make sure that the project is exported as text. I select the “Writing Sync” Folder as the text file destination. I hit okay and the entire Scrivener project is exported to "Writing Sync" as individual text documents (Scrivener assigns a number to the front of each text file to keep them in order).On my iPad or iPhone, I point Editorial to my “Writing Sync” Folder. Within Editorial I can edit each of the individual text files. I open the file I wish to write/edit and use the dictation (Siri must be enabled) on My iPhone. Editorial immediately synchronizes the new text back  into Dropbox.Once I return to my Mac I re-synchronize the project in Scrivener. All the files in Scrivener now reflect my writing from Editorial. One I've completed my first draft, I use this same back and forth method to edit.Once I'm happy with each of the chunks, I go back to Scrivener on my Mac and compile the whole document as a single Markdown file. I save this file a level above the “Drafts” Folder Scrivener created when syncing.I  can access the full document using Editorial (or any other text editor) on my Mac or iOS device (I use Byword or Ulysses on my Mac) . Finally, when I'm done polishing, I export the document to Microsoft Word (or to the web). Using this workflow, I can write something in about 1/10 the time it used to take me with a keyboard. Although this method works well, it is not without a few annoyances. iPhones limit dictation to 30 second chunks. In addition, Editorial tends to chop off the last few words of a sentence after those 30 seconds expire. Because I’m working on segments of the overall project and can dictate quite a bit in 30 seconds, this is not a huge deal for me. When drafting, the key is to keep pressing forward.This workflow has literally changed to way I write. The workflow allows me great deal of flexibility and saves me a great deal of time.

Duet Display-use your iPad as a second monitor

I have mentioned in the past how much writing I do for work. When I write I prefer having two monitors. Unfortunately, I only have second monitors at home and work. I prefer writing grants, white-papers, and manuscripts in local coffee shops or, my favorite spot, the public library. Previously, when writing in these alternate locations I had to make due with the 13" screen of my Macbook Air. I had tried two-screen solutions that used my iPad Air as a second monitor--but they had too much lag to be functional. Recently, I discovered a product called Duet Display. Instead of using a wireless connection, Duet uses a Thunderbolt cable to connect my computer and iPad. Duet was easy to set up and there is absolutely no lag. I can now, thanks to Duet, take my dual screen set-up to any location. My only complaint, the app's cost ($15.99). Still, for the problem Duet solves, I've found it well worth the money.

/Slash

Last week I came across a story about a new iOS product called /Slash. /Slash is an add-on keyboard for iOS. Over the past week I’ve been using /Slash extensively and in a short time it has earned its rightful place on both my iPhone and iPad.

/Slash allows me to perform functions without leaving the application I’m working in. For instance if I’m typing a text message to a friend I can share my current location, search the web, or search contact information without ever leaving the Messages app.

IMG_0481.jpg

IMG_0481.jpg

This functionality is great! I find myself using /Slash multiple times a day. My only complaint is that I'm unable to dictate using my voice when the /Slash keyboard is activated. In order to dictate I need to switch to the built-in iOS keyboard.

/Slash has quickly has become one of only three keyboards I use on a regular basis—the others being the built in keyboard and Sunrise Meet.

/Slash is a phenomenal addition to my productiviy arsenal. I look forward to seeing how the app continues to evolve. 

Automated Dictation and Task Delegation using Evernote and Workflow App

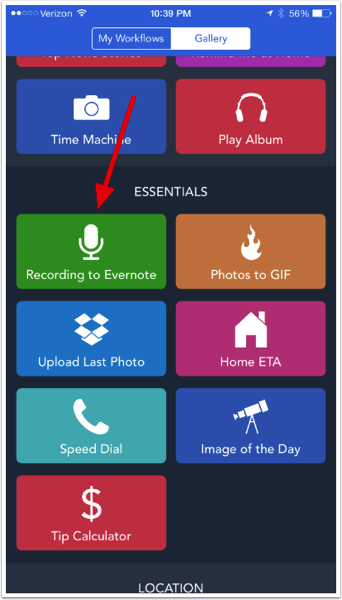
As usual, David Sparks (Macsparky) inspired me. After finishing the MacSparky Workflow Video Field Guide, I decided to try my chops at buidling something new. As I was exploring the Gallery (the pre-baked workflows that come with the app), one of the examples caught my eye; "Recording to Evernote."I have a twenty minute commute between my home and work. When not listening to audio books, I attempt to be productive. While driving, I'm frustrated by my inability to delegate tasks to my administrative assistant. Before Workflow, in order to send a request (or dictation), I'd have to ask Siri to transcribe an email and then hope for the best. As I'm sure you're aware, Siri makes many mistakes. It's both difficult and unsafe to proof while driving. Siri was not a viable option.That's where Workflow comes in. I built a Workflow that records my voice then, at the same time, sends a link to both my admin and to Omnifocus. Here's how I did it.

Add the "Recording to Evernote" from the Gallery

First, download Workflow. Once you've installed the app, click on the "Recording to Evernote" workflow in the Gallery. Select "Get Workflow." Your workflow will be added to your "My Workflows" Area. Now it’s time to edit.add-the-recording-to-evernote-from-the-gallery.png

Programming the workflow

I didn't change any of the programming at the beginning of the script, but you can.programming-the-workflow.png

Programming the workflow - screen 2

Here is where I altering and appended the built in script:

  • (1) I customized the name of the note and included the current date variable
  • (2) After the audio note is recorded, the file is saved to Evernote. "Get Note Link" retrieves the unique URL for this brand new note.
  • (3) "Copy to Clipboard" passes the URL of the audio to the clipboard.
  • (4) "Send email" command takes the clipboard and pastes it into my email
  • (5) I put my admin's email address is in the "To:" field
  • (6) I included my OmniFocus MailDrop email address in the "Bcc" field (so I can track what I've delegated in Omnifocus).
  • (7) I customized the Subject Field (and appended the current date)

programming-the-workflow-screen-2.png

Add to my Home Screen

Finally, when I was finished programming (and after I customized the color and icon of the button), I added the button to my HomeScreen. Now, when I touch the button a screen comes up that reminds me to "tap to record." I tap, record my message, and then tap again. Workflow automatically saves the recording to Evernote then sends two emails: one to my admin (with a link to the audio recording) and one to my Omnifocus Inbox (where I can keep track of the delegated task).As you can see, Workflow makes automation ridiculously easy. I hope you find this simple application useful.

TripIt: Travel Plans Made Easy

Although I don’t consider myself a road warrior, I do a fair amount of travel for my work. For years, my trusted travel partner has been TripIt.

TripIt is a web site (with apps for your iPhone, iPad, or Android) that aggregates all my travel information. Whenever I receive travel related information, I forward the email to the generic address: plans@tripit.com. TripIt processes the information from airlines, hotels, car rentals, etc., and combines them all into a single, easy-to-read itinerary (with confirmation numbers, phone numbers, times, etc.). The base site is free, but the Pro version is well worth the $49 per year. I’ve been a Pro subscriber for years.

Check out this video for more on TripIt.

MyPhoneDesktop: Seamlessly Transfer information Between Mac and iOS Devices

I’ve written about the interplay between my Mac and iOS devices in several entries. The interplay between my iPhone, iPad, and computer are critical to my productivity. Recently, I discovered a program called MyPhoneDesktop that I use so often, it has made its way to the home screen of my iDevices.

Although I love my iPhone, I have trouble with the soft keys—they slow me down when I have to type things like URLs or text strings. If I wanted to transfer files, I would typically use Dropbox (or email) to get files from my Mac to my iPhone or iPad. But no more. After installing and configuring MyPhoneDesktop on both my iPhone and Mac, I can rapidly share information between my devices.

As an example, I can search for a contact on my Mac, then have my computer dial the number on my iPhone. I can send URLs, text snippets, or complete files from my Mac to my iPhone or iPad merely by dragging and dropping onto the app. Similarly, I can transfer pictures to my phone by dragging and dropping onto a pop-up receptacle that emerges from the right side of my screen. Perhaps best of all is the app's bookmarklet that passes a web page from the Mac to my iOS device through the push of a single button. 

What’s the downside? I can’t transfer information from my iPad or your iPhone back to my Mac. 

I use MyPhoneDesktop numerous times every day and you will too. Pick up a copy for $4.99.

Meeting Workflows: Processing Meeting Notes and Discovering Linkages

It was a great deal of fun to join my friends, David Sparks - MacSparky, Katie Floyd, and Brett Terpstra (hosted by Dan Miller) on stage at MacWorld Live to discuss my Meeting Workflow. The session was webcast live from the MacWorld site. Following the session, I received many questions as to how I process my notes once they’ve been collected. Here is what I do…..

As I mentioned, I write and capture all my notes in Plaintext (using Drafts on my iPad and iPhone and nvALT on my Mac). I covered the way I capture ideas (IdeaX) using TextExpander. I use a similar method for capturing meeting notes (MeetX), chunks of writing (ScribbleX), quotations (QuoteX), and random thoughts (ThoughtX). Using Simplenote Notesy, I’m able to keep my notes on my iPad and iPhone in sync with my Mac. A single folder indexed by nvALT serves as the repository for everything, regardless of their content. In a pinch, I can search my notes on my iPad or iPhone using SimpleNote Notesy, but the true power of this workflow is realized when I return to my Mac.

I have alluded to my love of Devonthink Pro Office. I’m especially fond of DT's ability to find related notes using its artificial intelligence. For the purpose of this workflow, I have a single database that indexes three things: (1) my collection of manuscripts (from Papers2), (2) my web clippings, and (3) my nvALT notes. My web clippings are added directly to my DT database, but my Papers folder and nvALT folder are INDEXED, not imported into the same database. Indexing in DT is done by choosing File:Index… and navigating to the folder of interest on your computer (this is only during the initial set-up). You will have to manually update the index your folders each time you add new information. This is quick and simple– done by choosing the appropriate folder in DT and choosing File:Update Indexed Items.

When I’m writing (or searching for information), I can select a particular note and find all related information in my library-whether it’s a scholarly article, a newspaper clipping, a web site, or a note I’ve taken. Often times, DT finds linkages for me that weren’t readily apparent. This speeds my writing process immensely and makes me look like a magician to my peers. I hope it works for you too.

Appended March 2, 2013: Read this entry on why I switched from SimpleNote to Notesy.

Soulver for iPad

I've written about Soulver for my Mac–a notepad calculator that allows you to mix words and numbers. And now Soulver is available on the iPad. Soulver is my favorite app for budget and grant planning. I can jot down my ideas line-by-line. If I make a mistake, I erase a single line (rather than starting over). Because I can mix numbers, calculations, and words, I am able to reconstruct my thoughts days, months, or even years later. And since Soulver syncs through Dropbox, I can share my work between my Mac and my iPad. The iPad version is currently selling for $2.99.

Drafts for iPad

I was talking to a colleague today about how I quickly capture notes on my iPhone and iPad. My goto app on the iPhone is Drafts (by Agile Tortoise). Drafts lets you get stuff out of your head and on to your device quickly. Once you've captured the information, you can decide what to do with it (e.g. send to Facebook, Twitter, save as a text file, Omnifocus, or a whole host of other possibilities). 

While Drafts was great on my iPhone, it wasn't available on the iPad--until now ($2.99 on the App Store). 
Drafts is now on the first screen of both of my iOS devices. Thanks Agile Tortoise!

OmniFocus Continued: Capturing Information in OmniFocus

In my last entry, I spoke about the power of Omnifocus. To get the most from the program, you must have easy ways to capture data. As I mentioned in my last entry, there are versions of Omnifocus available for the Mac OS as well as the IOS–I own them all. In this blog entry (and accompanying screencast) I’ll discuss the main ways I get information into Omnifocus.

Direct Entry

The least complicated way of entering a task is by manually entering it into the program itself. There are two ways to do this: (1) launch Omnifocus: Select Inbox: and type in the new Action (remember to frame the new item with a verb) or (2) Launch Omnifocus: select File: select “Quick Entry”: and enter the action.

Using the Quick Entry Box, you can capture a task and process it later, or if you expand the columns of the Quick Entry box (using the gear icon) you can type in the context, start date, etc at the time of entry. I try to estimate the amount of time it will take to complete the item at the time of entry.

If this is the first item in a new project, type in the name of the project in the Project column and then hit Command-Return. This will create a new project in the Omnifocus database. If you designate a Project while entering your item, it will be filed directly into that project. If you don’t, it will end up in your Inbox for later processing. Of all the ways to get information into Omnifocus, I find direct entry the most cumbersome.

Clippings

Clippings are incredibly handy and convenient. You highlight what you want, hit a key combination and, boom, Omnifocus launches and creates your Action item (with a link back to original item you highlighted). I use this method of capture Actions dozens of times each day. In order to get this to work you must set up your preferences in a specific way.

To set up Clippings go to the menu bar, and choose Omnifocus, then choose Preferences. In the Preferences menu click on the Clippings Tab. Define a Clippings Shortcut that works for you (I use the Command-Space-Period). Next you have to choose whether the clipped item shows up in Quick Entry (which allows you to do some additional quick editing) or whether you want the item dumped directly into your Inbox (I use Quick Entry).

Underneath the Copy Clipping to radio buttons are the different programs that work with Clipping. You can learn more about how Omnifocus will handle the clipping by highlighting each individual item next to the check box. I have all the programs checked. The most important selection is the final item: Any Application- make sure this is checked. You can then make and Action item out of information anywhere on your computer.

There is a special add-on for Apple’s Mail.app called the Clip-o-Tron 3000. Make sure this is installed (the installer is in the bottom right hand corner of the Clippings preference panel). The Clip-o-Tron let’s you highlight an email message and then use the key combination you designated above to automagically make a new Omnifocus Action. This new action contains the text of the email as a note AND a link back to the original email in your email database. This is my most common method of capturing Action items into Omnifocus.

If you’ve set up Omnifocus to synchronize (more on that in another entry)–the new Action will show up on all of your devices. Both Direct Entry and Clipping describe how I capture information from my MacBook Pro. Direct Entry also works on the iPad and iPhone. But I find myself usually using a third method to capture information from my iOS devices.

Capturing Information by Sending email

I’ve found I use my iPad more than my laptop these days. Unfortunately, capturing information is less convenient on my iPad. How do I get around this shortcoming yet maintain my productivity? By using email!

Open Preferences under Omnifocus menu bar and click on the Mail Tab. Make sure that the Mail Rule to create Omnifocus actions is checked. Next, look at the options under “Process messages having: radio buttons. I use the ”+omnifocus" before the @ sign option ( found it’s easier to have mail autocomplete a mail address than navigating to the subject line and typing). Next, you can choose the processed messages to be filed in a dedicated folder (I have a specific folder called at @Archive). If you leave this unchecked, the item will just remain in your email Inbox. Finally, (and critically) you must specify which e-mail addresses Omnifocus will accept mail from (I use all of my current e-mail addresses).

Now open Mail.app and select Preferences. Select the Rules Tab. Omnifocus should have placed a rule for you to edit. Here is how I’ve configured my “Send to OmniFocus” Rule.


Once configured, all I have to do is send an email to myself inserting +omnifocus just before the @ sign in the email address. When Mail.app is launched on my MacBook Pro, the item is automatically processed by Omnifocus and filed into the appropriate folder.

This is a handy method to use when you are reading email or a web page on your iPhone or iPad. I forward the email (or send a link to the web page) using my +omnifocus email address. This method  of capture is powerful, but what if I'm unable to safely send an email to myself yet want to capture something to OmniFocus (say, perhaps, while  commuting in my car or walking from one location to another)? It turns out that’s possible too, using Siri!

Using Siri to Capture to OmniFocus

This final method works only if you have an iPhone 4S with SIRI. As with the other methods, it takes a bit of configuration.

You must have Omnifocus installed on your iPhone. Launch Omnifocus on your phone and on the main Omnifocus Home Screen choose the Settings button (looks like a gear). Under Capture select the iCloud Reminders menu.

Make sure iCloud Reminders is turned ON. You also must enter your Apple ID and Password. Once this is configured, then hit the “Connect” button.

Siri understands two commands for OmniFocus. If I ask Siri to "Remember to..." the entry will be placed in my Inbox without an associated time. If I ask Siri to “Remind me to…..” do anything, for instance: “Remind me at 10am to call Dr. Smith about Patient Y’s operative plan,” a timed entry is placed in the OmniFocus Inbox and an alarm will go off at the requested time. What really happens is the entry is entered into Apple’s native Reminders App but when OmniFocus is launched, the reminder is transferred to your Inbox and the Apple Reminder is erased. The Omnifocus Inbox synchronizes with all your other devices.

The SIRI "Remind me to..." entry is context sensitive–if it’s before the time I specified, an alarm will go off to remind me to call today. If it’s after the time I specified, the alarm will be set for tomorrow.

I find this method of entry especially useful to capture items during my commute to and from work or when I’m walking between one location and another. In my opinion, this is one of the best applications of the SIRI technology–and has improved my productivity immensely.

Conclusion

I’m a heavy user of OmniFocus. In fact, Omnifocus is the hub of almost all of my workflows. During a typical day I’m inputting information constantly from many different sources. In this entry, I’ve covered the four most common ways I capture information into OmniFocus.

In my next Omnifocus entry, I’ll discuss how I organize and use Omnifocus in my daily work (and in the process discuss some of its strengths and limitations).

Until next time! Jeff Taekman
 

iPad Keyboard Conundrum

I've been astounded by folks who still insist the iPad isn't a great productivity tool. The early iPad was primarily for content consumption, but over the last 2 years, there has been a concerted effort by Apple and software developers to make it a phenomenal tool for creation as well. For me, a keyboard is the key to iPad productivity. With a keyboard and particular software (to be covered in future entries), my iPad 3 (err, iPad) serves as a replacement for my MacBook Pro 90% of the time.There are an expanding number of available Bluetooth keyboards out there. My personal journey started with Apple's wireless keyboard . Although this set up worked well, it was not that portable. I needed a separate bag to carry the iPad and keyboard-and found myself rarely going through the hassle of taking / pulling out my keyboard. As a busy academic physician that works both clinically and administratively, I am in need of a portable solution that would work in the operating room and the board room–thus I started looking at folios (case and keyboard contained in one).

A short time later, I settled on the Sena Leather Folio. Through reviews I summized the Sena had two disadvantages, 1. it was expensive and 2. it lacked a right-sided shift key. I decided to pony up and thought I could easily overcome the non-traditional keyboard. Boy, was I ever wrong. The lack of the shift key was my major complaint, but not the only one. I would never, ever buy one again. Besides the outrageous price, what were the problems?

Strike One-The lack of a right shift key-although I believed I could overcome this limitation, I have to admit it drove me absolutely crazy (and greatly inhibited my productivity). Having to consciously override years of (automated) typing behavior slowed my writing down considerably. I tried work-arounds such as writing while skipping the caps with the right hand-none worked. The cognitive effort needed to override my automated behavior greatly impacted the speed and quality of my work. Worse yet, when in the flow of writing, I would often fail to overide the urge to hit the right shift and would accidently type an apostrophe (the key on the Sena keyboard where the right shift SHOULD be).

Strike Two-The stand-I like to type while sitting in a chair or relaxing in my hammock (one of my favorite writing places). The Sena case has a single thin leg to help the iPad stand up in landscape mode. The design makes it impossible to type with the Sena in your lap; the iPad screen falls down.

Strike Three-the case enclosure-the iPad is bound to the Sena by a simple tab that tucks into the opposite side of the case. In less than a month, the tab became overly flexible, and the ipad constantly slipped about in the case (especially when propped up). This was not only annoying, but the case then tended to block part of the screen.

I can't emphasize enough the non-traditional layout of the Sena Keyboard will greatly inhibit your productivity! You've been warned.

When I purchased my new iPad earlier this year, I decided it was time to also upgrade my keyboard. Which brings me to the ZAGG Folio 3. I've owned the black leather folio 3 and keyboard for more than a month, and I can't say enough positive things about it. It is extremely thin, portable, easy to use and set-up. The case is designed to use the iPad primarily in the landscape mode, but the iPad can be removed from its holder and flipped to portrait mode if you so desire. The design of the case is such that it can be used in your lap, on a table, or even in a hammock. If you want to just read, the keyboard is thin enough to flip behind the screen, conveniently out of the way. A charge of the keyboard lasts several months I've charged a single time since my purchase- even with heavy daily use). Best of all, the Zagg Folio 3 has a standard keyboard (yes, with a right-shift key)-this alone has doubled my productivity in writing. The only complaint I have is the slickness of the leather case. I have not dropped it yet, but I fear it's only a matter of time.

The Zagg has become a critical piece of hardware in my productivity workflow. I suggest you order yours today.

Omnifocus 1: OmniFocus-The Center of The WIPPP

I thought I’d kick off my blog with a discussion of one of my most critical pieces of software, Omnifocus by the Omni Group. Although I have modified and tweaked David Allen’s system to work for me (more on this in another entry), the software is based on David Allen’s Getting Things Done (GTD). There are versions for my Mac, my iPad, and my iPhone.

In a nutshell, Omnifocus serves as the central hub of organization for my personal and professional life. David Allen’s method depends on getting stuff out of your head and into a holding place called your Inbox. Each time you are confronted with something to do you have three choices: Do it, Delegate it, or Defer it. If you can to do it immediately (in 2 minutes or less), you should do it right away, otherwise, if not delegated,  the task should be sent to your Inbox for processing.

Core concepts to understand about OmniFocus:

  • Inbox is where you dump (capture) everything for further processing. The Inbox is a temporary holding area to be processed daily. 
  • Actions are single events. Actions should always start with a verb. An example of a good actionable event would be: “Download my CME certificate from the American Society of Anesthesiologist Meeting.” 
  • Projects are collections of two or more Actions. Projects can be defined as sequential (each task must be completed in order) or parallel (each task can be completed at any time). 
  • Contexts are where (or what) you need to complete the Action. My contexts include email, call, errands, Mac:Anywhere, Mac:Online, work, home, etc.

Omnifocus Basics-Items, Projects, Contexts, and the Inbox

Once a day (I typically do it in the evening), I sort through my inbox and assign each item a project (see below) and a context (where the item will be completed). In addition, I typically add a start date and projected time to each item. I only use a due date if the item is important AND has a hard stop.

Sample Project-Renewing my Medical License

I know each year on my birthday I have to renew my medical license and submit it to the Credentialing Office.There are numerous tasks I have to complete to make this happen. I have to submit documentation on my professional education, log the hours into the Medical Board’s web site, pay my annual license fee, download my updated license, and send the license to Credentialing.

Let’s assume I wasn’t vigilant in collecting all my CME certificates, and thus have to contact the organizing body of each meeting to obtain my credit hours.

The items in this hypothetical sequential Project called Annual License Renewal (with context in parenthesis) would be: (1) download CME certificates (Mac: Online) , (2) enter hours and dates into personal spreadsheet (Mac:Anywhere), (3) log on to Medical Board Web site, enter information and pay fee (Mac:Online), (4) Download renewed license (Mac:Online), (5) email license to hospital credentialing (email). The project has a hard stop (my birthday) past which I would not be able to practice.

You’ll notice I used only a few contexts in this example. All in all, I have about fifteen. My personal contexts include: Home, Work, email, phone call, Mac Anywhere, Mac Online, iPad, iPhone, or Tech–for any device.

Why Take the Time?

Once you have your tasks in OmniFocus, the fun begins. Omnifocus lets you sort your lists in really useful ways–called Perspectives. Instead of looking at my projects, I can sort my to-do’s by contexts–having it show me the emails I must send across all my projects, or, in another example, what I need to do on my Mac while online. If I have only a few minutes, I can ask OmniFocus to display items tagged as t 5 minutes or less.

Perspectives are very customizable–the customizbility is where the power of Omnifocus outshines other GTD managers such as Things. I personally have about a dozen different perspectives I use to slice and dice my Omnifocus data. During the day, I refer to my lists dozens of times, usually in a Context mode. At the end of the day, as I’m processing new to-dos, I work primarily in a Project view.

My data backs up to my Dropbox, and syncs to the cloud (there are several different sync methods available). My database is accessible with an iPad and/or iPhone client-always current and always with me. As I add new information in iOS, the item turns up in my Mac-based Omnifocus client. Synchronized, powerful, and simple-very Mac like.

In a single day I’ll usually add information to my Inbox in one of four ways: clipping, direct entry, email, or through Siri. Getting information into OmniFocus will be the topic of my next entry.

In conclusion–OmniFocus is an indispensable tool for personal and productivity. If you aren’t familiar with it you should run, (not walk) to your computer and download it immediately.