
I'm a big fan of goal setting. I believe in subconscious mind and its role in achieving goals.Years ago I read PsychoCybernetics and strongly believe in its message. If you have not read the book, it essentially promotes the idea that our subconcious has a servo-mechanism that zeros in on wants and desires. The servo mechanism works both positively and negatively—our subconcious thoughts determining our ultimate target.The book convinced me many years ago I should maintain both short and long term goals and I should favor positive imagery and goals over negative thoughts and beliefs.Each year during the last week of December or the first week of January, I do a two-year sweep. I review the things I've accomplished over the previous year and the things I plan to accomplish in the new year. I review my short, medium, and long term goals and begin to build out what the current year will look like. I put my written goals into Evernote. I visually map out my year in MindNode.In addition to my goals, I also scheduled 30 day “sprints.” These are short term goals delving into new areas that interest me. Much of what I do is based on the Agile programming paradigm. An excellent reference on applying Agile to time management is the book: Getting Results the Agile Way.Here is a picture of my template for yearly planning: Now I'm off to do my review. I wish you a happy and healthy 2018.Sincerely, Jeff Taekman.
Travel Receipt Workflow
Here is a handy workflow to keep track of your reimbursable / billable expenses on the road.Set-up:
I have an Evernote Notebook that is used solely for professional receipts. This notebook is named “Receipts_Work”. I’ve set up an If This Then That (IFTTT) Applet to send an email when the notebook receives a new note.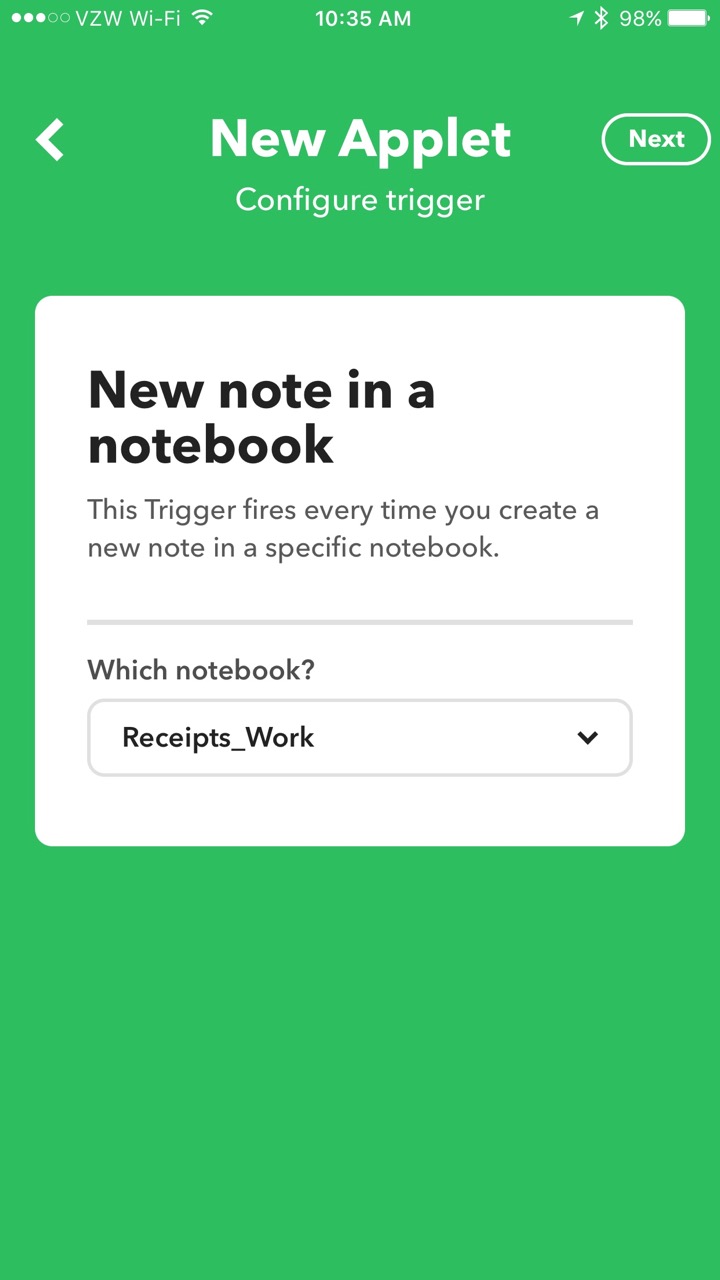
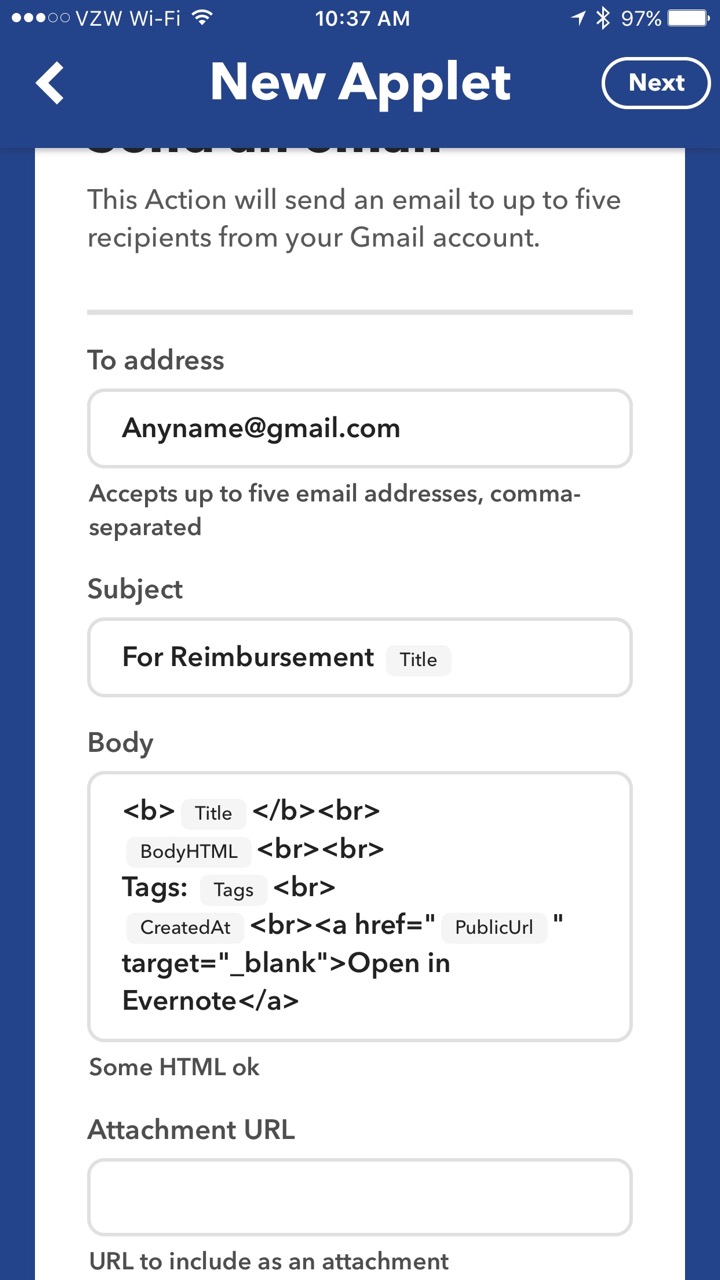 When I receive a receipt on the road, I immediately scan it with Scannable then save it to my Receipts_Work Notebook. IFTTT monitors the Receipts_Work Notebook. When the new note is detected, it automatically sends an email to both my assistant and my Omnifocus Maildrop address (so the item is added to my Omnifocus Inbox).After my trip, I can go back to my Evernote, select all the receipts/notes from my trip and make a “Table of Contents” using a single button push in Evernote.
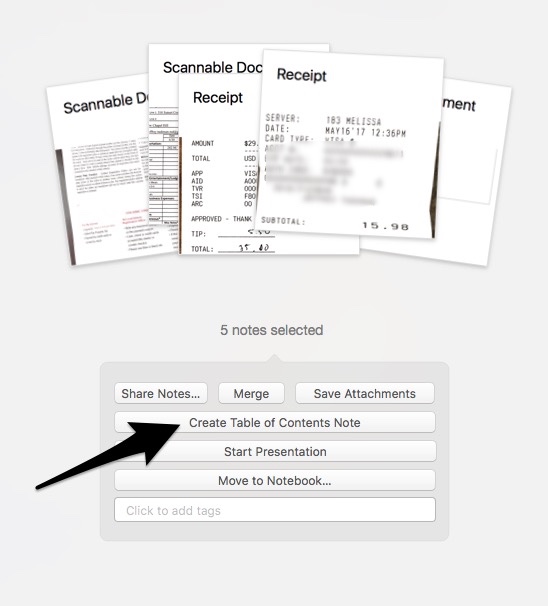 This workflow simplifies management of reimbursement receipts. Hope it works as well for you as it does for me.
Import Evernote into Ulysses
As you can tell from my past posts, I love the app Ulysses. As of this week, Ulysses became even more powerful with the ability to import Evernote files (although not in bulk). Check it out!
Airmail 3 - A Unified email Experience to Rule Them All
Several months ago I wrote about my discovery of Spark email. I wrote about what I like and disliked in the app. Although Spark wasn’t perfect, I preferred it to the built-in iOS Mail app. I used Spark exclusively on iOS for a month.But then, a reader wrote and told me I should check out Airmail by Bloop. I had tried an earlier version of Airmail, but was less than impressed. Regardless, I decided to check out what had changed in the latest version.When I read the updated features of Airmail along with the promise of a simplified unified experience across all devices, I decided to give it a try. I’m glad I did—I’ve used Airmail exclusively as my email client since mid-July.From the Airmail website:
Airmail 3 is a new mail client designed for El Capitan with fast performance and intuitive interaction. Support for iCloud™, MS Exchange, Gmail™, Google™ Apps, IMAP, POP3, Yahoo!™, AOL™, Outlook.com™, Live.com™Airmail was designed from the ground to retain the same experience with a single or multiple accounts and provide a quick, modern and easy-to-use user experience. Airmail is clean and allows you to get to your emails without interruption - it’s the mail client for the 21st century.
Beside the unified experience, I particularly appreciate the ability to customize every aspect of the email experience.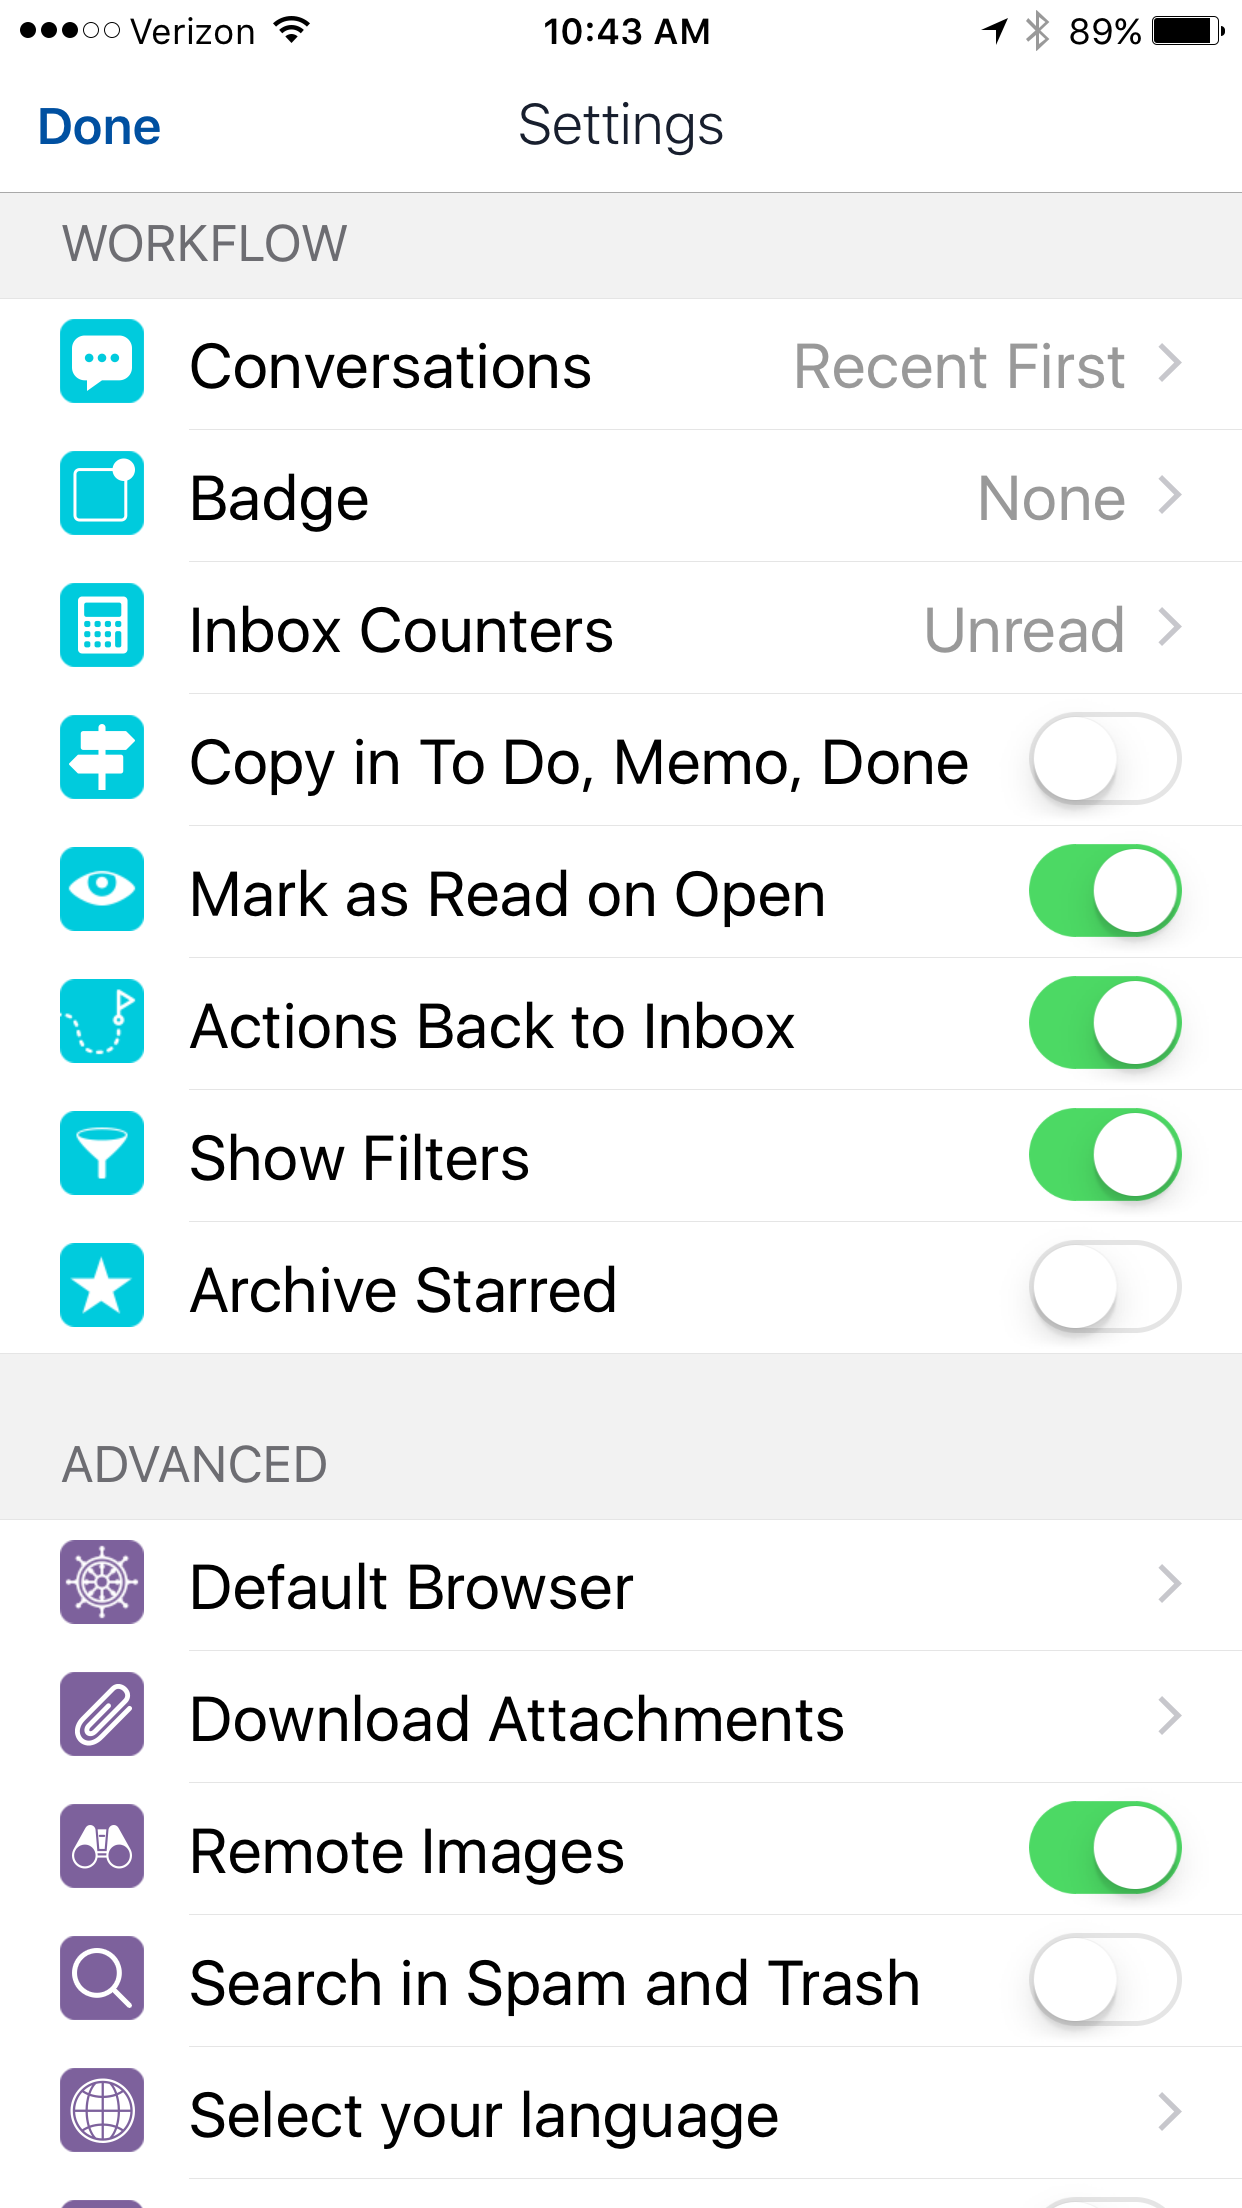 In addition, Airmail supports services (the actions I use most commonly include saving attachments to Evernote or moving an email to an Omnifocus task).
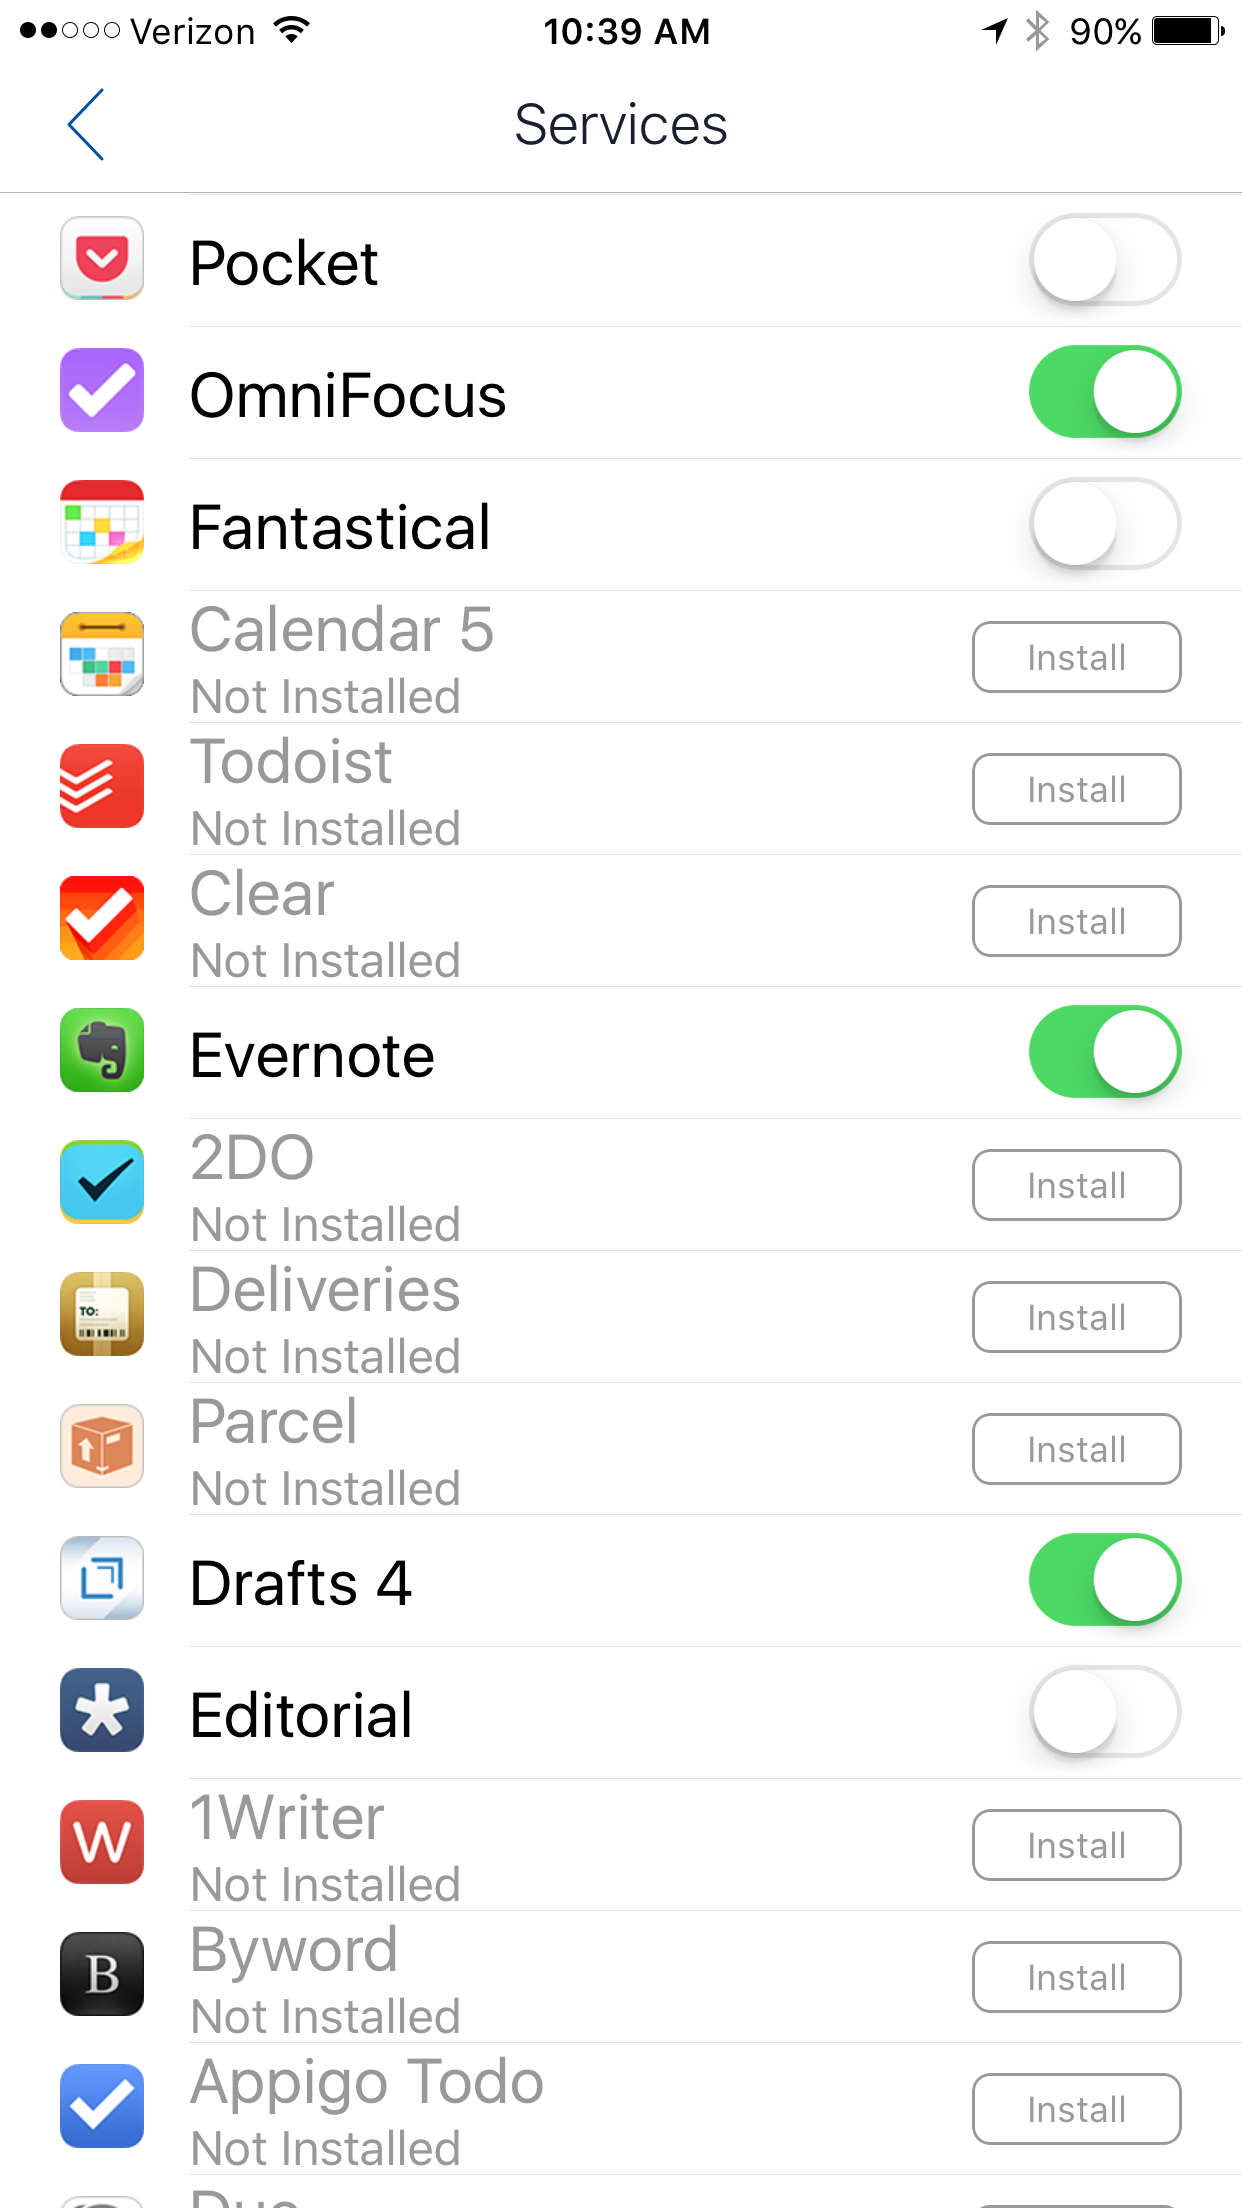 There are 4 customizable swipes. I chose to customize this feature in the following manner:
- short left swipe-DELETE email
- long left swipe-bring up action menu
- short right swipe-Archive
- long right swipe-Snooze (message disappears to re-appear at a future time).
Another nice perk is the ability to synchronize accounts and settings using iCloud. This feature alone saved me tons of time when setting the app up on my Mac, iPhone, and iPad.I’ve been incredibly happy with Airmail over the past several months and don’t anticipate this changing. I hope you’ll give Airmail a try.
Capturing Clinical Questions Using Drafts and Evernote
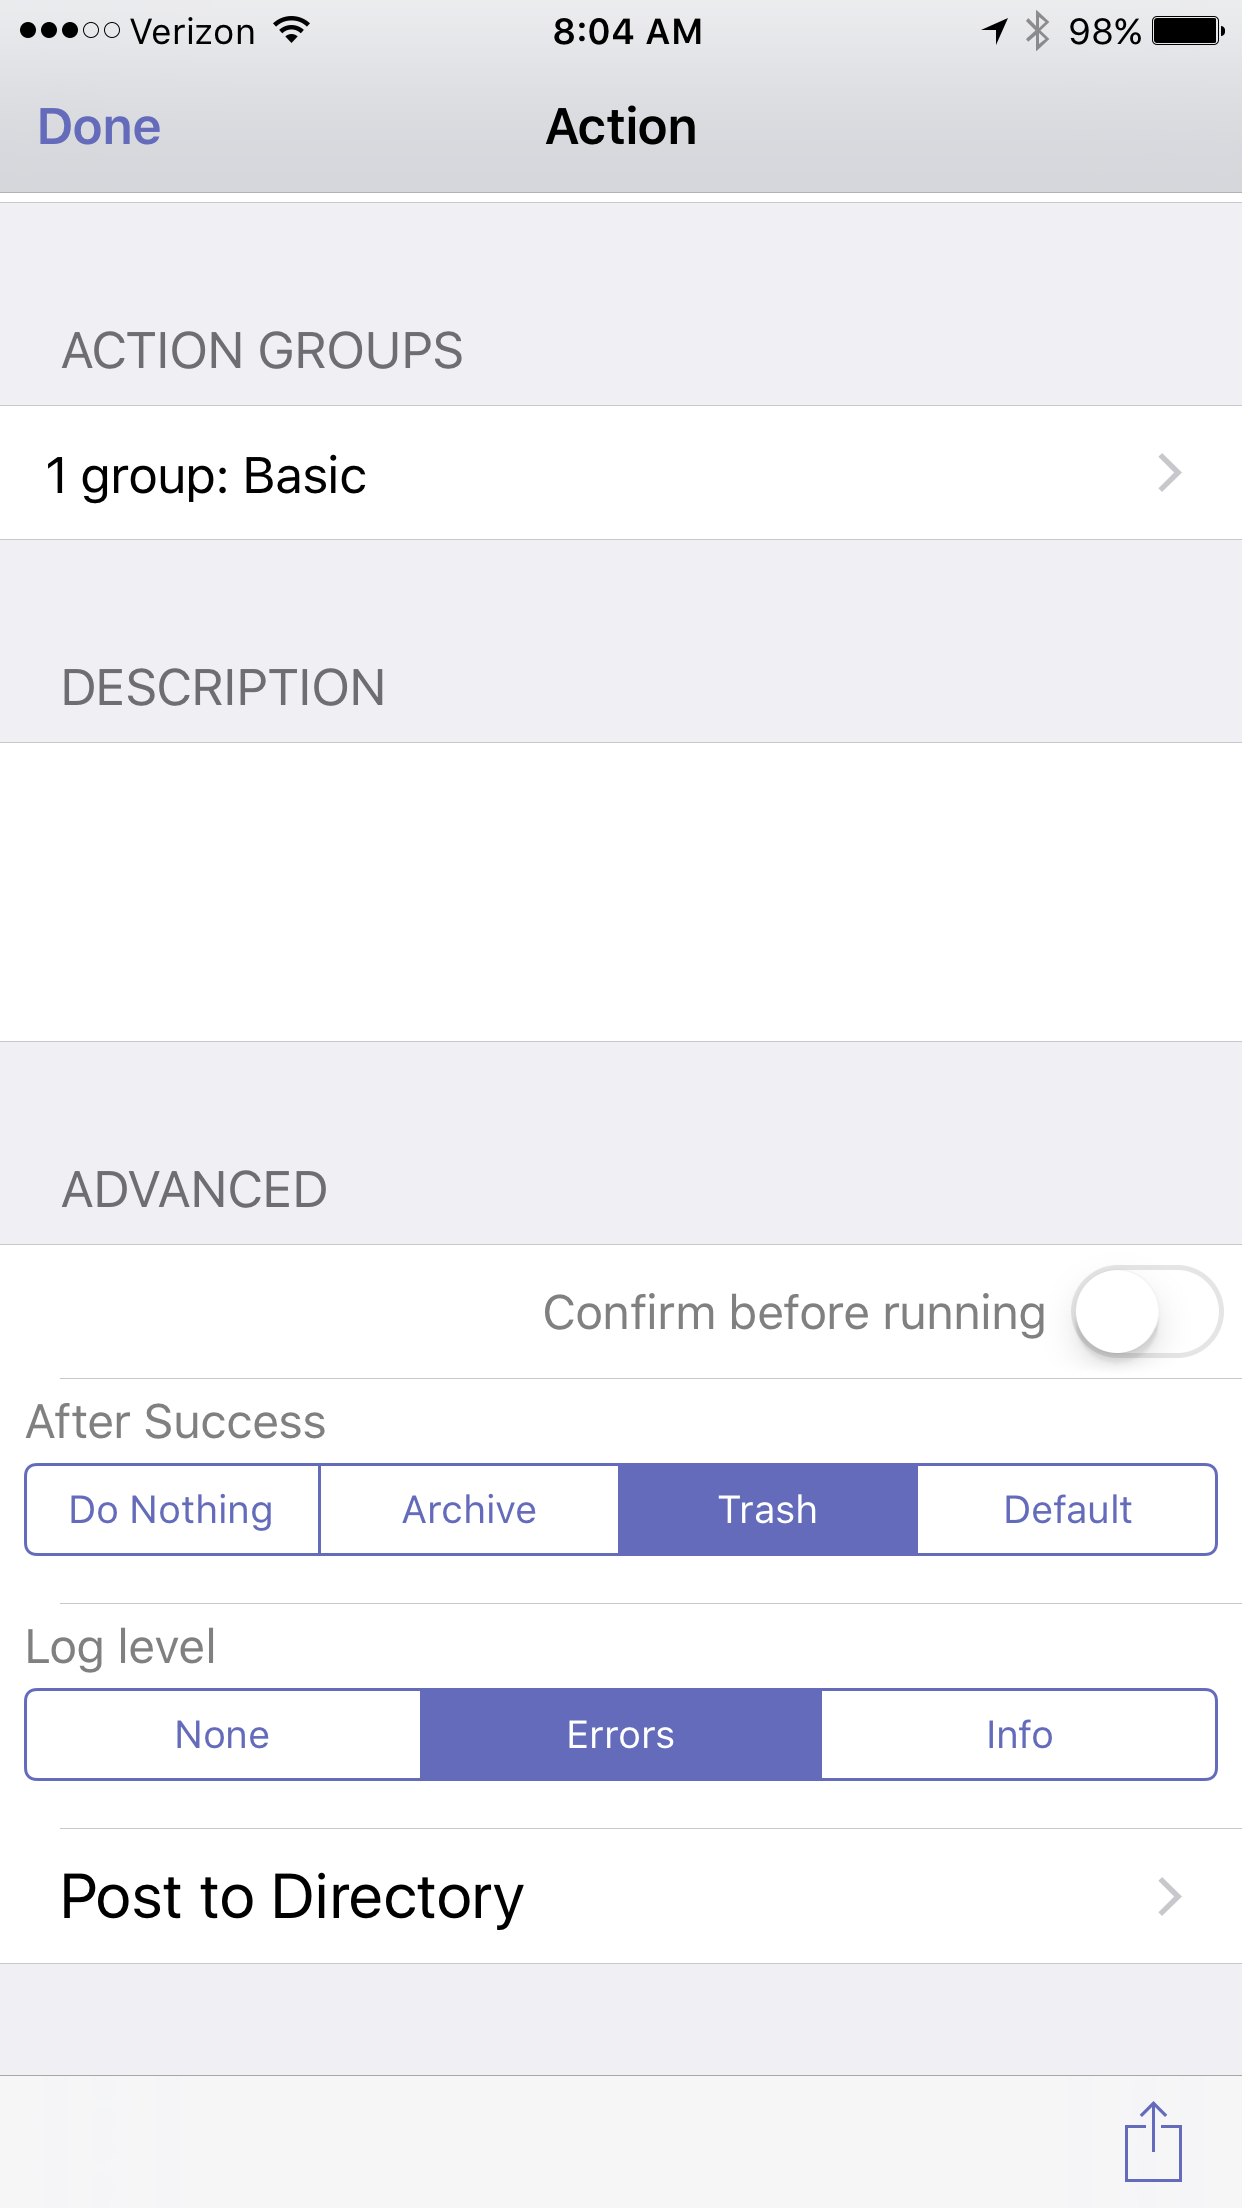
Being a physician means a commitment to lifelong learning. In a busy clinical practice, two-thirds of clinical encounters generate at least one clinical question. In an average day the typical physician has at least 11 unanswered clinical questions. Only 40% of those questions ever get answered. Most of the questions are forgotten in the hustle and bustle of clinical care.In an attempt to improve my ability to capture (and answer) these questions, I've developed a new script for Drafts. This script uses the same concept as the technique I've mentioned to capture ideas, quotes, etc. This particular script saves information to Evernote but you could use Ulysses, DayOne, Wunderlist, or any other app you can program with an action. I chose Evernote since Evernote has the ability to find related notes anywhere in my collection. When researcing answers my question I capture those to Evernote as well-linking the question and answers in my Evernote database in perpetuity. Since Evernote is ubiquitous, the answer is available on my computer iPhone, and iPad.Here is how I approached this. First, I set up a new notebook in Evernote. I called this notebook "Clinical Questions." I then developed the following script in Drafts. Using this script it is now possible for me to quickly capture questions investigate later. I merely open Drafts and type or dictate my question, then hit the script. The question is logged to my Clinical Questions Notebook (along with date and prepended with tag ClinicalQuestionX).I’ve found myself using this script many times each day. I hope it helps you as well.Stats found on UptoDate: http://goo.gl/BDBqmH
Drafts Script to Capture Ideas to Ulysses
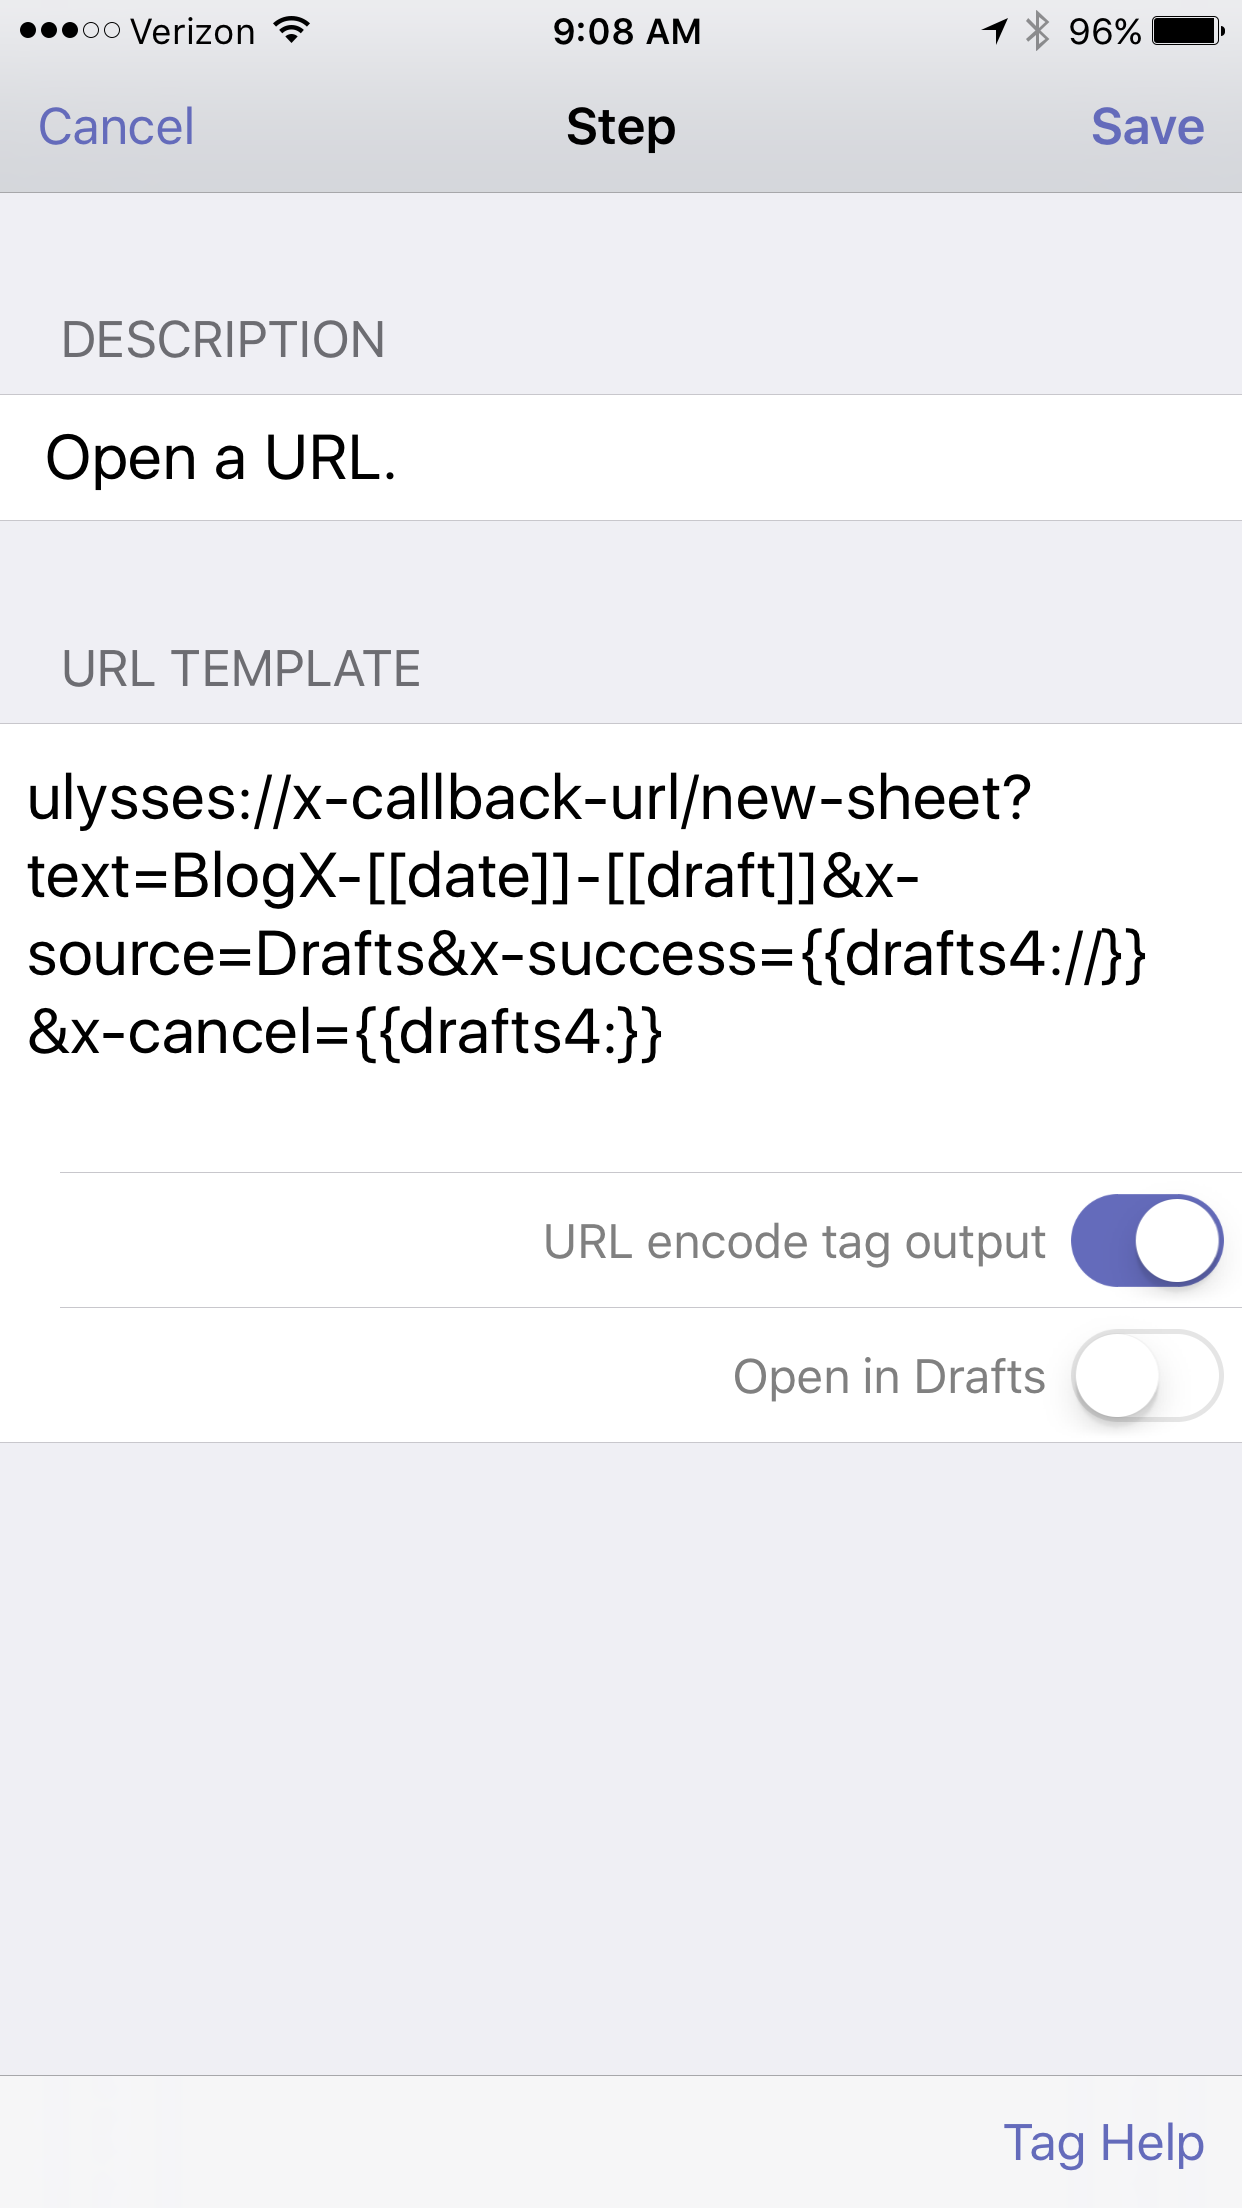
As I've mentioned in previous writing, I am a big fan of Ulysses. I now do all of my short writing in Ulysses, so I decided to transition my blog idea script from Drafts->Evernote to Drafts->Ulysses.The script prepends "BlogX" and the current date, erases the Drafts file, then places my new idea in my Ulysses Inbox.In Ulysses, I keep three blog related groups: Ideas, In Process, and Published. I no longer have to take time to move my ideas from Evernote to Ulysses. Instead, each idea is submitted to Ulysses, eliminating entirely the need for Evernote. If you use lUlysses, you can adopt this script for capturing other ideas as well. I hope you find it useful.
Using Skitch and Papers to Capture Figures and Tables
Few would argue that the most important point of a scholarly manuscript is made in its figures and tables. I am going to share with you how I capture figures while reading scholarly information on my Mac. This workflow uses:SkitchPapersInstall Skitch and make sure, in Skitch Preferences, to enable the “keep Skitch Helper running in background when I quit,” and “Start Skitch Helper when I log in to my computer.” As I’m reading scholarly literature and come across a table or figure I want to save I do the following. I make the figure as big as possible on my screen. Then, from the Skitch menu in my menubar, I select the Crosshair Snapshot. I then select the figure (and sometimes the caption) trying to balance the white space surrounding the figure.Next, I go to Papers, select the reference in my Papers Library, and then from the Edit Menu:Copy As:Reference.I return to Skitch and double-click at the bottom of the figure then paste the reference text. I then balance the text. The height of the Skitch figure will expand to accomodate the new text.
 When I want to refer to or use the table or figure I view it directly in Skitch or find it in Evernote. Using this method, I can also search for words in the reference (e.g. the author’s name or the title of the manuscript) and sometimes even the words in the figure itself.If I want to use the figure in a presentation or to send it to a colleague or trainee I can export the figure from the Skitch File Menu.Using this method I’ve captured hundreds of figures. I hope this workflow helps you too.
Quick Idea Capture Using Drafts and Evernote
Although I’ve already written about the way I capture ideas using Drafts and Evernote, I thought it was worth repeating since these techniques were buried in another entry. I literally use this method multiple times a day. Using Drafts, I’ve efficiently captured hundreds of ideas, blog thoughts,and lyrics. As you’ll see below, I also use Drafts to start entries in Day One., ------------------------------------------Capturing Ideas in Evernote using DraftsEvernote extends its great power by linking to many other applications. I’ve found capturing snippets of text into Evernote is even easier than the method I described a few years ago using plaintext.I use Drafts on my iphone and iPad to capture / brain dump just about everything. Drafts is an essential program on my iPhone. Drafts allows me to capture without thinking about what app I need to open. Once the text is captured, Drafts routes the information wherever I choose. I wrote about one way I use Drafts to capture and process meeting notes. When I want to capture an idea, I merely open Drafts and type or dictate my idea into the app. When I’m done, I route the information to Evernote using the following custom action:
The action automatically derives a title from the first line of the text and appends the date and time. Furthermore, it files the note in my “Ideas” Notebook in Evernote and tags the note with the keyword “Ideas."The note ends up in Evernote looking like this:

When I get to Evernote, I append further information in the note as needed. I use IdeaX in the header so when I search for a list of my ideas, they are not mixed together with information I’ve gathered from other sources. If I search for a keyword(s), I not only see my ideas, but all the information I’ve gathered in Evernote—very useful.Capturing Blog Ideas, Lyric Ideas, Quotes, and other Snippets in Evernote using DraftsI use a similar scripts in Drafts to capture a whole host of other information on the go. Each class of information is filed into it’s own Notebook in Evernote. For example, here is the action I use to capture information for my blog:
 Using Drafts for entries in Day One.Although I love Day One, I was not entering information often enough. Action URLs are a powerful feature of Drafts. Action URLs-open other applications, then perform functions. In order to increase my capture rate, I decided to make an Action URL that transfers text from Drafts to Day One.Here is how simple it is…..
 I have configured Day One on my Mac and iOS devices to sync. I also enabled the #hashtag feature in Day One. Hashtags are translated into keywords in Day One.Since enabling this script, I find myself capturing both personal and professional snippets each day. Give it a try!By incorporating Evernote, I’ve greatly simplified many of my capture processes. I highly recommend giving Evernote Premium a whirl and trying out a few of these workflows on your own. You won’t be disapointed.
Using Instapaper and IFTTT to automate capture of highlights

IMG_0693
IMG_0695
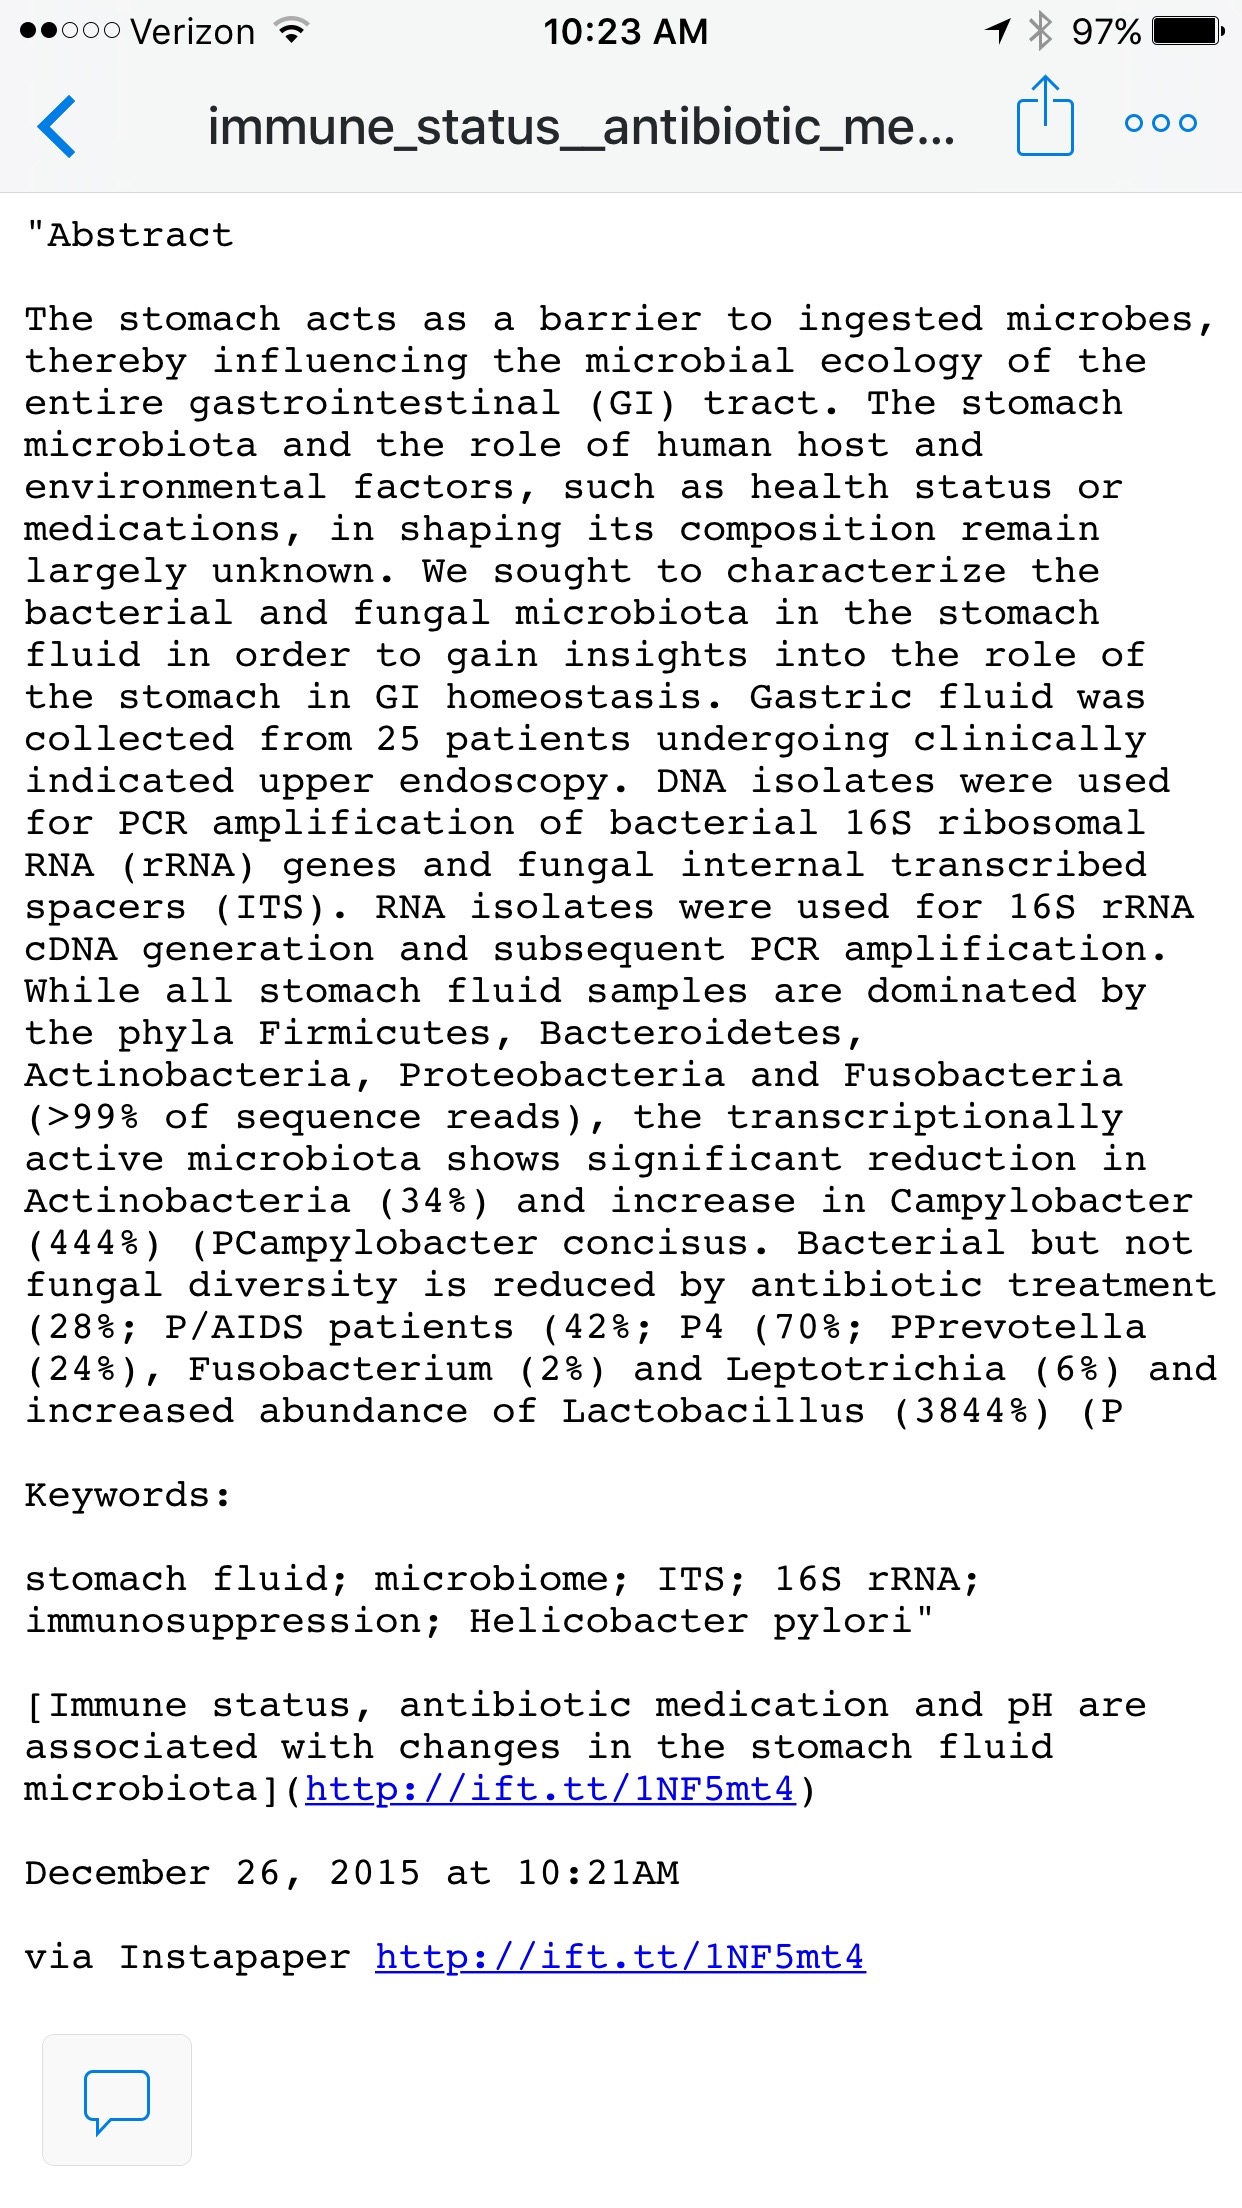
I'm a big fan of the read it later service, Instapaper. Instapaper stores article to be read at your convenience on any device. If you subscribe to the premium service you get a bunch of perks.Two of the great premium features of Instapaper are 1.highlighting and annotation of articles and 2. The ability to save entire articles and annotations directly to [Evernote]. By hitting ‘like’ in Instapaper, the app automatically saves the full text article to Evernote.For my purposes I save liked articles to Evernote , but rely on IFTTT to handle my Instapaper notes. Each time I highlight or annotate within Instapaper, a text file with the annotated text is saved to Dropbox by this script. The saved note looks like this....Once the text note is in Dropbox, using the same Literature Devonthink Database I use for writing (as I wrote about in this entry), I index the folder that contains all the extracted highlight text files. Thus when I search in Devonthink, I find literature from saved web articles, scholarly manuscripts, and extracted highlights all in a single pass. Using the “See Also" magic hat in Devonthink I can find other relevant information very quickly.A few things I need to work on:1. Automating save to Dropbox of Instapaper comments.2. Automating full text transfer to DropBox from Evernote (for notes with highlights)I hope you find this useful.
Papers Links
In previous entries I've written about my love of Papers and how I use it for all my grants and scholarly writing.One of the features I use constantly is called Papers Links. This is a brief code (looks like a URL) that links back to a particular manuscript in your personal library. Here is an example:papers3://publication/doi/10.1097/AIA.0b013e3181eace73Papers Links are available in Papers by highlighting the manuscript, then using "Copy As" under the Edit Menu, right clicking on the paper of interest, or using the keys: Shift- Command-L.
Combining Papers Links with Launchbar is nothing short of awesome. I annotate everything I extract from a manuscript with a Papers Link and a Papers Citation. When writing, I can highlight any Papers Link, hit my Shift Key twice to invoke Launchbar Actions (as I discussed in this entry). The double shift copies the highlighted text to Launchbar--the orange tab shows that Launchbar is awaiting an Action Command. I hit Tab Key to bring up the context sensitive menu.
 I select Papers and hit return. Papers launches directly to the paper of interest.
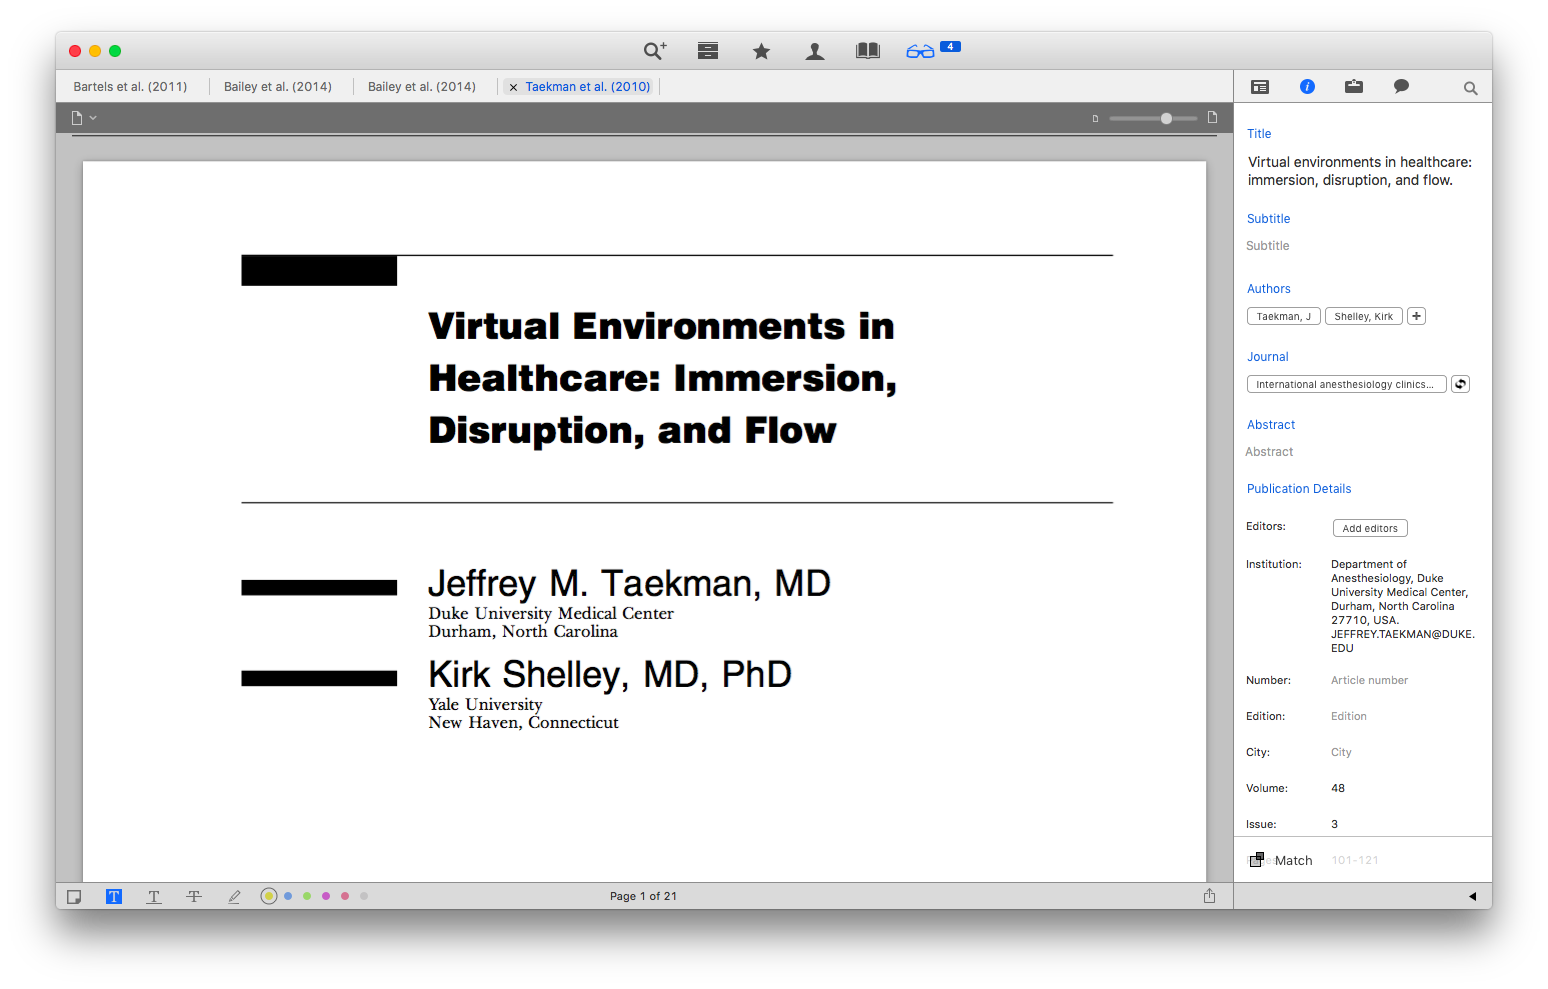 I use Paper Links in all my extracted annotations—it makes it lightning-fast to use a reference when writing, and to be able to dig deeper into the original reference as needed.
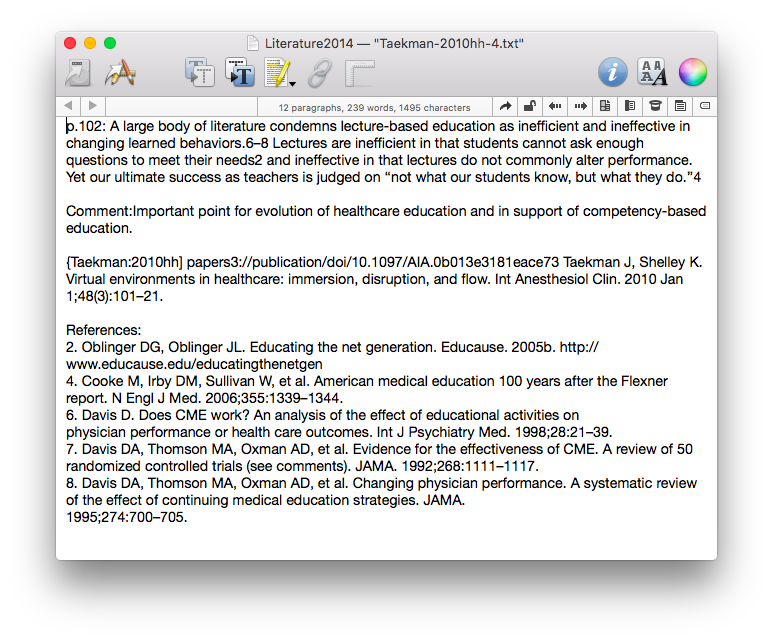 I also use Papers Links when I copy figures or tables from a manuscript using Skitch / Evernote. The Papers Link allows me to quickly find the manuscript with the embedded media element when writing or preparing presentations.I use Papers Links constantly when writing. I hope you find them helpful too.
If This Then That
I am a big fan of the If This Then That (IFTTT) website and app. If you're not familiar with the site, it is a service that performs an action in response to a trigger. There are dozens of "Channels" that follow you unobtrusively, automating your work.One of the many ways I use IFTTT is to track the time of my commute to and from Duke. The script, using Location Services on my phone, triggers when I enter or leave my driveway. Another script fires when I enter or leave the parking garage at work. When the "If" is triggered, the service appends the date and time to an Evernote file. A separate trigger writes the same information to the Google Calendar I use for time tracking.In the future I will write about how I use IFTTT to help me keep on top of my reading, both for pleasure and for work.
Embracing Evernote
Workflows evolve. A few years ago I was hesitant to use Evernote because of its proprietary nature. I was using plaintext to capture everything, but had to work out a complex syncing system to be efficient. Over the last year, I’ve overcome my fear and have increasingly built Evernote into my life. I started using it in so many ways, I finally subscribed to thePremium service. I’ve found Evernote to be a flexible and reliable tool readily available on all my devices — both for capture and to find information when I need it.
Here are a few ways I’m using Evernote:
Clipping Service
The first thing I installed when I started using Evernote was the Mac Clipping Tool. Using the clipping tool I easily capture, attach keywords, and annotate pages from the web. Using the “Share” menu in the web clipper, I copy a link to the note directly as a reference in OmniFocus or Calendar entries. When I’m on my iPhone or iPad I use the Action Button (the square with the arrow emerging from the top) to get items into Evernote.
Emailing notes directly into an Evernote NoteBook (premium feature)
I have transitioned my personal email client to Postbox. Postbox, unlike Mail.app, has an Evernote clipping tool embedded into the interface. Sometimes, I’m unable to use either of these methods and will choose to email a note into Evernote. To learn more about this premium feature, read the excellent overview of Evernote email features (including naming the file, placing the file directly into a specific notebook, or tagging the file with a keyword or reminder time).
I most commonly use this method when I’m answering an email, placing my unique Evernote email address and Omnifocus MailDrop Address in the bcc field of my email. Using this method, I can kill 3 birds with one stone (responding to the email, keeping the reference material, making an Omnifocus entry to keep up with the item).
Linking to reference material for Omnifocus or Calendar
Once information is captured Evernote, each note has its own unique URL. I use this feature extensively to link reference material to OmniFocus and my Calendar. I have different ways of linking depending on the situation.
By control-clicking on a note in Evernote and then selecting “More Sharing” I copy the web-based URL to my clipboard. I then paste the URL into the note field of Omnifocus or into the appropriate field of my Calendar. Then, even when I change devices, I have access to my reference material.
Another method of grabbing URLs is with Launchbar. As I mentioned, I now use Launchbar extensively. I can select a note in Evernote and then invoke Launchbar, then I select “Evernote – Copy Link of Selected Note.” This copies the URL of the slected note to my clipboard to be pasted into any other app.
Capturing Ideas in Evernote using Drafts
Evernote extends its great power by linking to many other applications. I’ve found capturing snippets of text into Evernote is even easier than the method I described a few years ago using plaintext.
I use Drafts on my iphone and iPad to capture / brain dump just about everything. Drafts is an essential program on my iPhone. Drafts allows me to capture without thinking about what app I need to open. Once the text is captured, Drafts routes the information wherever I choose. I wrote about one way I use Drafts to capture and process meeting notes.
When I want to capture an idea, I merely open Drafts and type or dictate my idea into the app. When I’m done, I route the information to Evernote using the following custom action:
The action automatically derives a title from the first line of the text and appends the date and time. Furthermore, it files the note in my “Ideas” Notebook in Evernote and tags the note with the keyword “Ideas."
The note ends up in Evernote looking like this:
When I get to Evernote, I append further information in the note as needed. I use IdeaX in the header so when I search for a list of my ideas, they are not mixed together with information I’ve gathered from other sources. If I search for a keyword(s), I not only see my ideas, but all the information I’ve gathered in Evernote—very useful.
Capturing Blog Ideas, Lyric Ideas, Quotes, and other Snippets in Evernote using Drafts
I use a similar scripts in Drafts to capture a whole host of other information on the go. Each class of information is filed into it’s own Notebook in Evernote. For example, here is the action I use to capture information for my blog:
By incorporating Evernote, I’ve greatly simplified many of my capture processes. I highly recommend giving Evernote Premium a whirl and trying out a few of these workflows on your own. You won’t be disapointed.
Automated Dictation and Task Delegation using Evernote and Workflow App
As usual, David Sparks (Macsparky) inspired me. After finishing the MacSparky Workflow Video Field Guide, I decided to try my chops at buidling something new. As I was exploring the Gallery (the pre-baked workflows that come with the app), one of the examples caught my eye; "Recording to Evernote."I have a twenty minute commute between my home and work. When not listening to audio books, I attempt to be productive. While driving, I'm frustrated by my inability to delegate tasks to my administrative assistant. Before Workflow, in order to send a request (or dictation), I'd have to ask Siri to transcribe an email and then hope for the best. As I'm sure you're aware, Siri makes many mistakes. It's both difficult and unsafe to proof while driving. Siri was not a viable option.That's where Workflow comes in. I built a Workflow that records my voice then, at the same time, sends a link to both my admin and to Omnifocus. Here's how I did it.
Add the "Recording to Evernote" from the Gallery
First, download Workflow. Once you've installed the app, click on the "Recording to Evernote" workflow in the Gallery. Select "Get Workflow." Your workflow will be added to your "My Workflows" Area. Now it’s time to edit.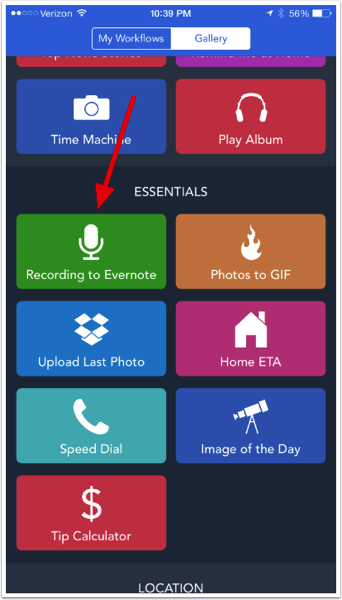
Programming the workflow
I didn't change any of the programming at the beginning of the script, but you can.
Programming the workflow - screen 2
Here is where I altering and appended the built in script:
- (1) I customized the name of the note and included the current date variable
- (2) After the audio note is recorded, the file is saved to Evernote. "Get Note Link" retrieves the unique URL for this brand new note.
- (3) "Copy to Clipboard" passes the URL of the audio to the clipboard.
- (4) "Send email" command takes the clipboard and pastes it into my email
- (5) I put my admin's email address is in the "To:" field
- (6) I included my OmniFocus MailDrop email address in the "Bcc" field (so I can track what I've delegated in Omnifocus).
- (7) I customized the Subject Field (and appended the current date)

Add to my Home Screen
Finally, when I was finished programming (and after I customized the color and icon of the button), I added the button to my HomeScreen. Now, when I touch the button a screen comes up that reminds me to "tap to record." I tap, record my message, and then tap again. Workflow automatically saves the recording to Evernote then sends two emails: one to my admin (with a link to the audio recording) and one to my Omnifocus Inbox (where I can keep track of the delegated task).As you can see, Workflow makes automation ridiculously easy. I hope you find this simple application useful.
(Mynd + Fantastical2) = Calendar Control

I continue the search for the perfect calendaring app on my iPhone. I wrote a few months ago about Tempo, from the makers of Siri. Although I used Tempo for several months, another contender, Mynd reached my radar screen.
I don’t find the Mynd interface (or colors) aesthetically pleasing, but the app has so many cool features it’s worth a look. Mynd connects to your calendars locally and then mines data for each appointment.
When I first opened the app, I noticed the Mynd View. This view includes the time of my next appointment, the current weather conditions, the people I’ll meet with that day, the locations of my meetings, and the total number of events for the day. I can click on any of these boxes to drill down further. I can connect Mynd to Evernote (appending relevant notes to each meeting) and to LinkedIn (appending further information to each meeting attendee).
Mynd is also location aware. It estimates how long it will take to drive to my next meeting and tells me when to leave my current location. If I’m running late, I can text, email, or call any one (or all) of the meeting attendees from within the app.
In addition, Mynd has a new feature called the Scheduler, that facilitates scheduling of meetings. The Scheduler scans my calendar and suggests free times that might work for a proposed meeting. Mynd aggregates all the potential times I choose and formats an email to my prospective meeting attendees.
Although I’m a big fan of Mynd, I still find making calendar entries clunky. For this, I often turn to Fantastical2. Fantastical is able to make appointments from english sentences (e.g. Meet with Sir Ken Robinson at Weaver Street Market in Durham, NC for lunch tomorrow at noon). I’ll often type (or dictate) my appointment details into Fantastical2. The dictated appointment is instantly translated into a calendar entry that quickly becomes available in Mynd.
Oh…and Mynd is free. Get Mynd in the App Store
Addendum: a reader asked if I was truly meeting with Sir Ken Robinson. Sadly, the answer is no. I admire the hell out of the man and do hope that someday.....
Addendum 2: Although I was very high on Mynd at one point, I’ve gone back to Tempo. Many of the features that were free in the original version of Mynd, are now premium (paid) add-ons. In the end, the change in feature set and the ugly interface scared me off. Life is too short to live with an ugly interface (especially on a frequently used calendaring app)!